Create wallets inside a vault, find and view them, enable outgoing transactions, and configure wallet-level settings and tags in the Ripple Custody (Wallet) console. For background on wallets and keystore types, see Wallets overview. To create the vault that holds a wallet, see Manage vaults. To manage wallets programmatically, see Manage wallets via the API.
| Action | Console role | Console procedure | API procedure |
|---|---|---|---|
| Create a wallet | Owner, Administrator, Proposer | Create a wallet | Create a wallet |
| View wallet details | All roles | General settings | Get a wallet |
| List wallets | All roles | List wallets | List wallets |
| Update wallet details | Owner, Administrator, Proposer | Details settings | Update a wallet |
| Enable outgoing transactions | Owner, Administrator, Proposer | Enable outgoing transactions from a wallet | Update wallet settings |
| Turn on raw signing | Owner, Administrator, Proposer | Raw signing | Update wallet settings |
| Freeze deposits by default | Owner, Administrator, Proposer | Freeze transactions by default | Update wallet settings |
| Enable sweeping | Owner, Administrator, Proposer | Sweeping settings | Update wallet settings |
| Get a wallet's sequence | - | - | Get a wallet's sequence |
| Tag a wallet | Owner, Administrator, Proposer | Tag a wallet | Tag a wallet |
| Check organization balances | All roles | List vaults | Get organization balances |
| Check vault balances | All roles | Viewing balances | Get vault balances |
| Check wallet balances | All roles | Viewing balances | Get wallet balances |
| Refresh wallet balances | Owner, Administrator, Proposer | Refreshing balances | Refresh wallet balances |
| Delete a failed wallet | Owner, Administrator | Delete a wallet | Delete a wallet |
Permissions: In the console, owners, administrators, and proposers can create wallets and update wallet settings, and every role can view wallets. See User roles and permissions. The API procedures need an API credential of type WALLETS. See Prerequisites.
Required role: Owner, Administrator, or Proposer.
The Create wallet form has four steps: Details, Settings, Advanced, and Confirm.
Open the vault where you want the wallet, and select Create wallet.
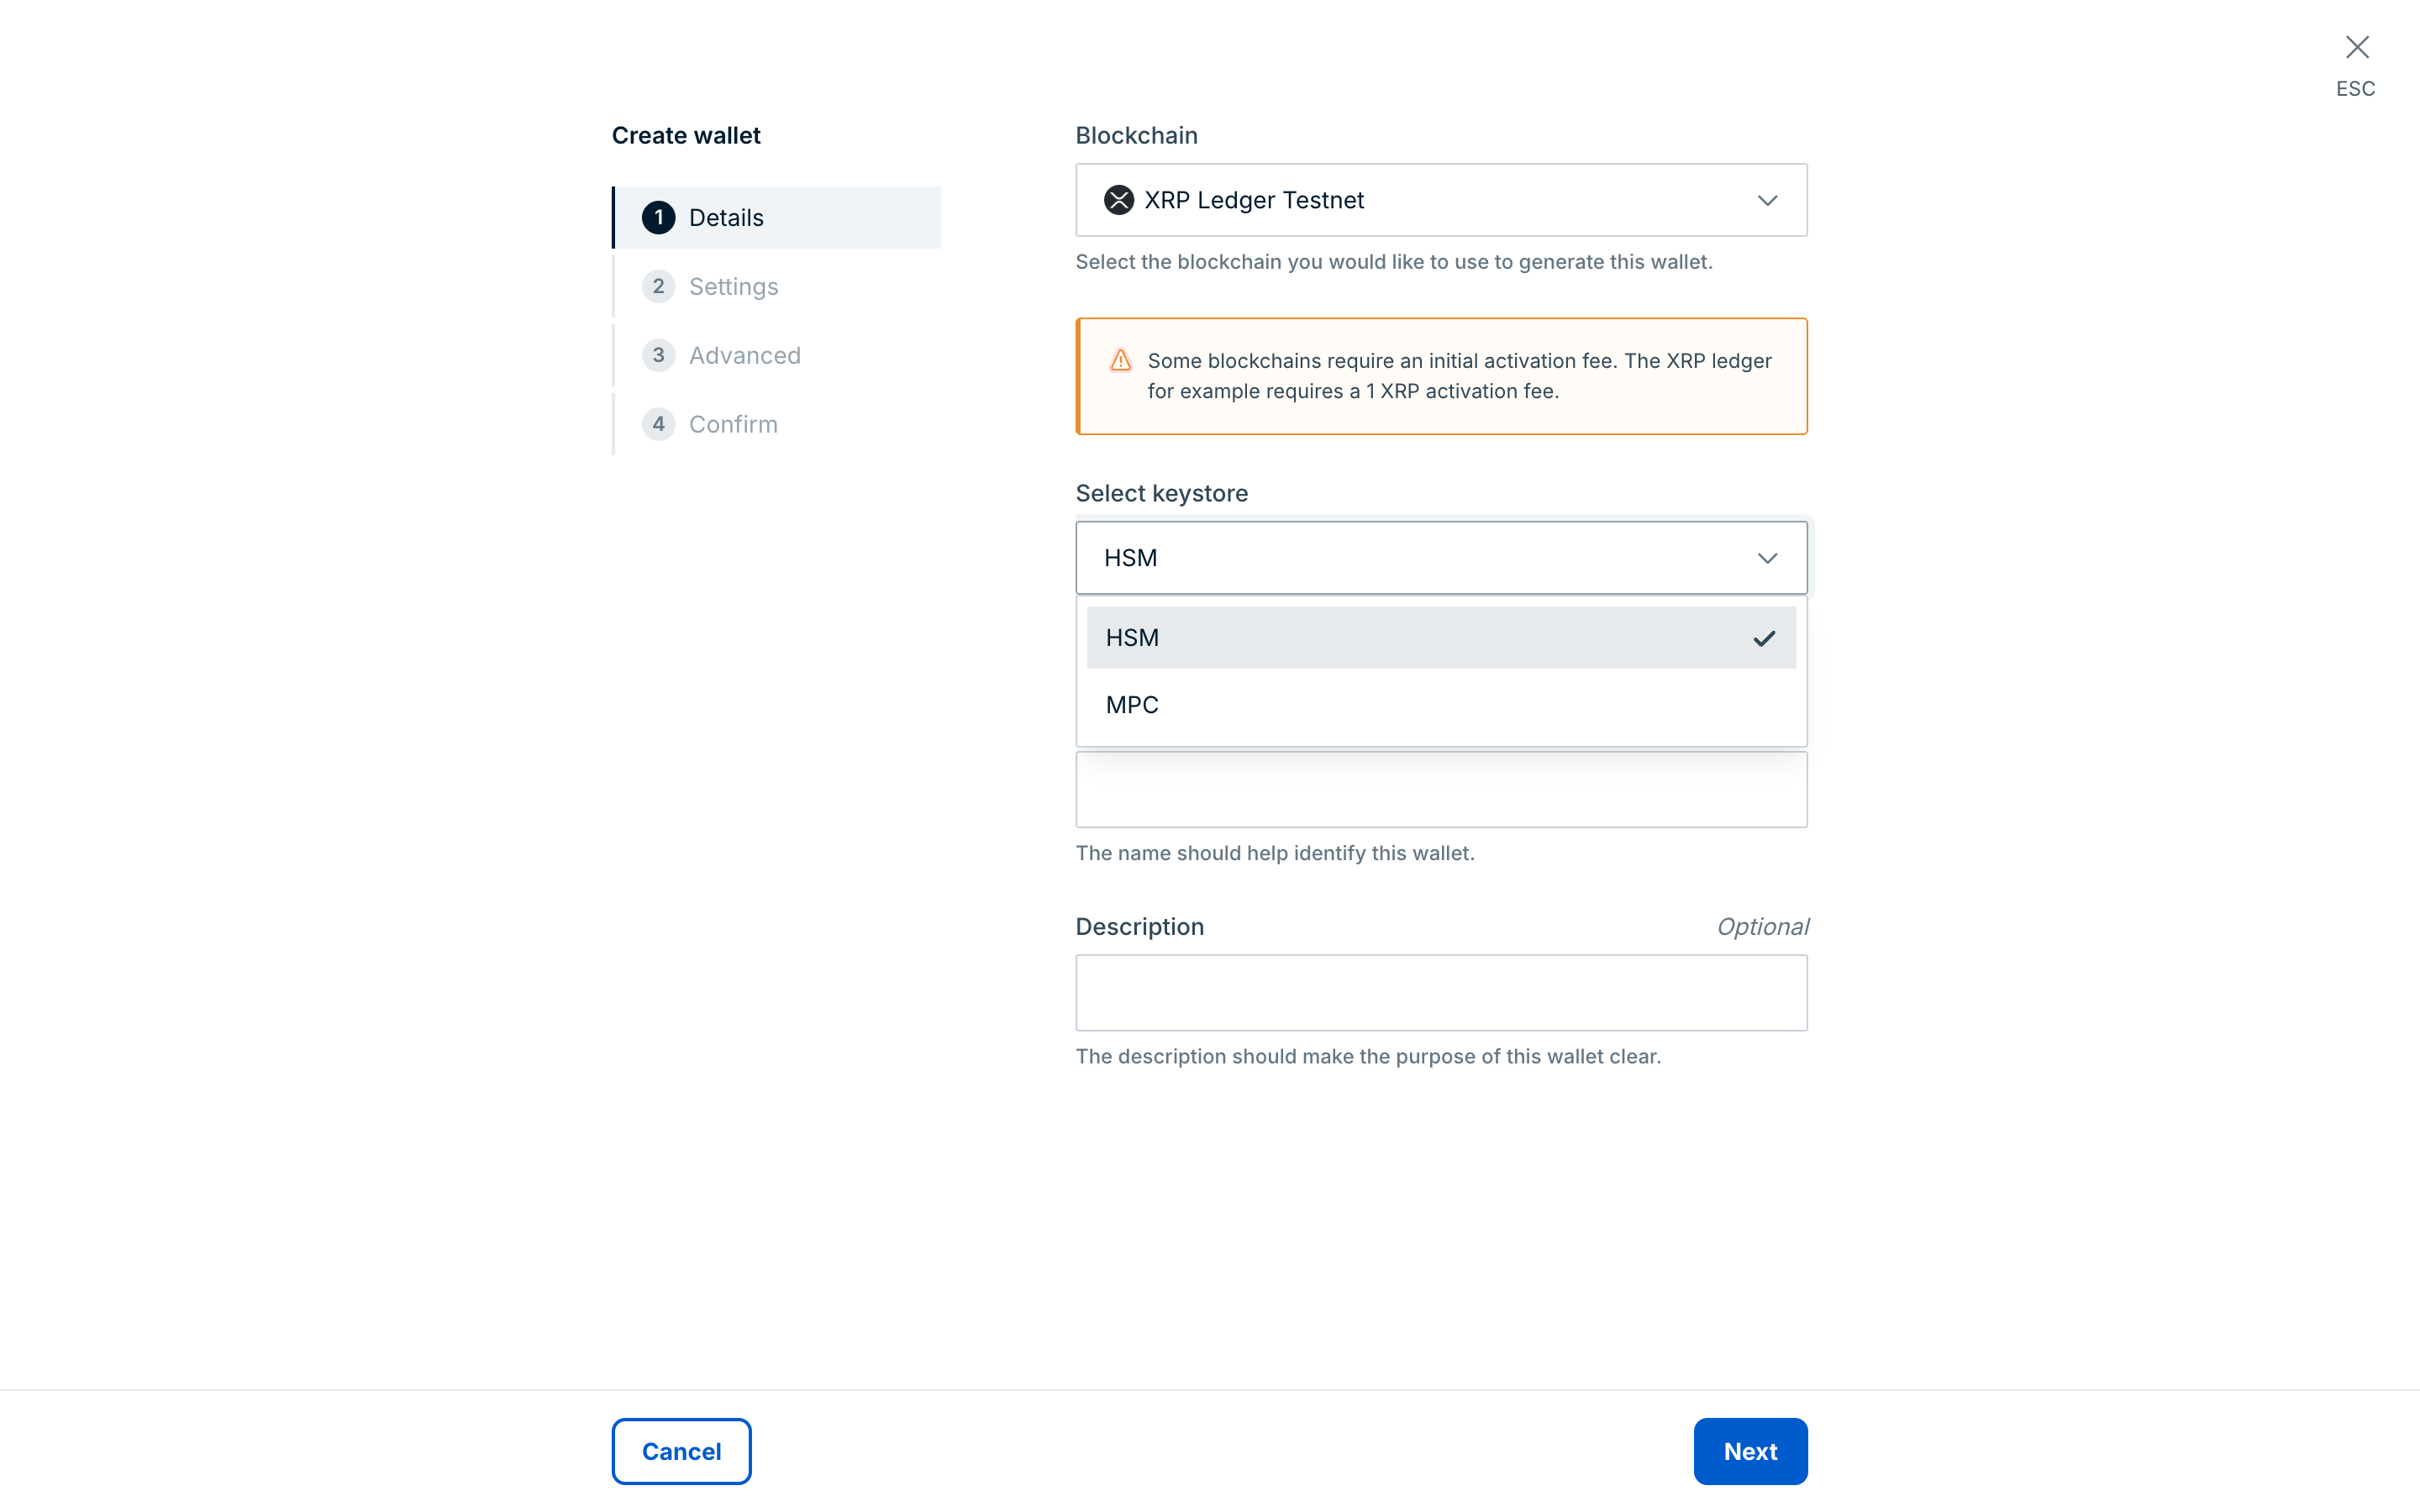
On the Details step, select the Blockchain that you want to provision the wallet on. Ripple Custody (Wallet) currently supports wallet creation on the following blockchains:
- Arbitrum
- Avalanche
- Base
- BNB Chain
- Bitcoin
- Ethereum
- Polygon
- Solana
- Tron
- XRP Ledger
- 1money
For feature availability on each chain, see Blockchains and tokens. To request a chain that isn't listed, contact Ripple Support.
Activation feesSome blockchains such as the XRP ledger require you to pay an activation fee before sending or receiving transactions.
Under Select keystore, select the keystore type. You can't change it after you create the wallet.
- HSM — available in sandbox only, and not for Solana wallets. The console selects HSM by default when it's available.
- MPC — select the Quorum that signs for the wallet.
MPC prerequisiteTo create an MPC wallet, you first need an MPC quorum, which you create in the Controls section of the Ripple Custody (Wallet) console. See MPC quorums.
Enter the wallet Name (5 to 50 characters). The name should help identify the wallet.
Optionally, enter the wallet Description (5 to 100 characters). The description should make the purpose of the wallet clear. Then select Next.
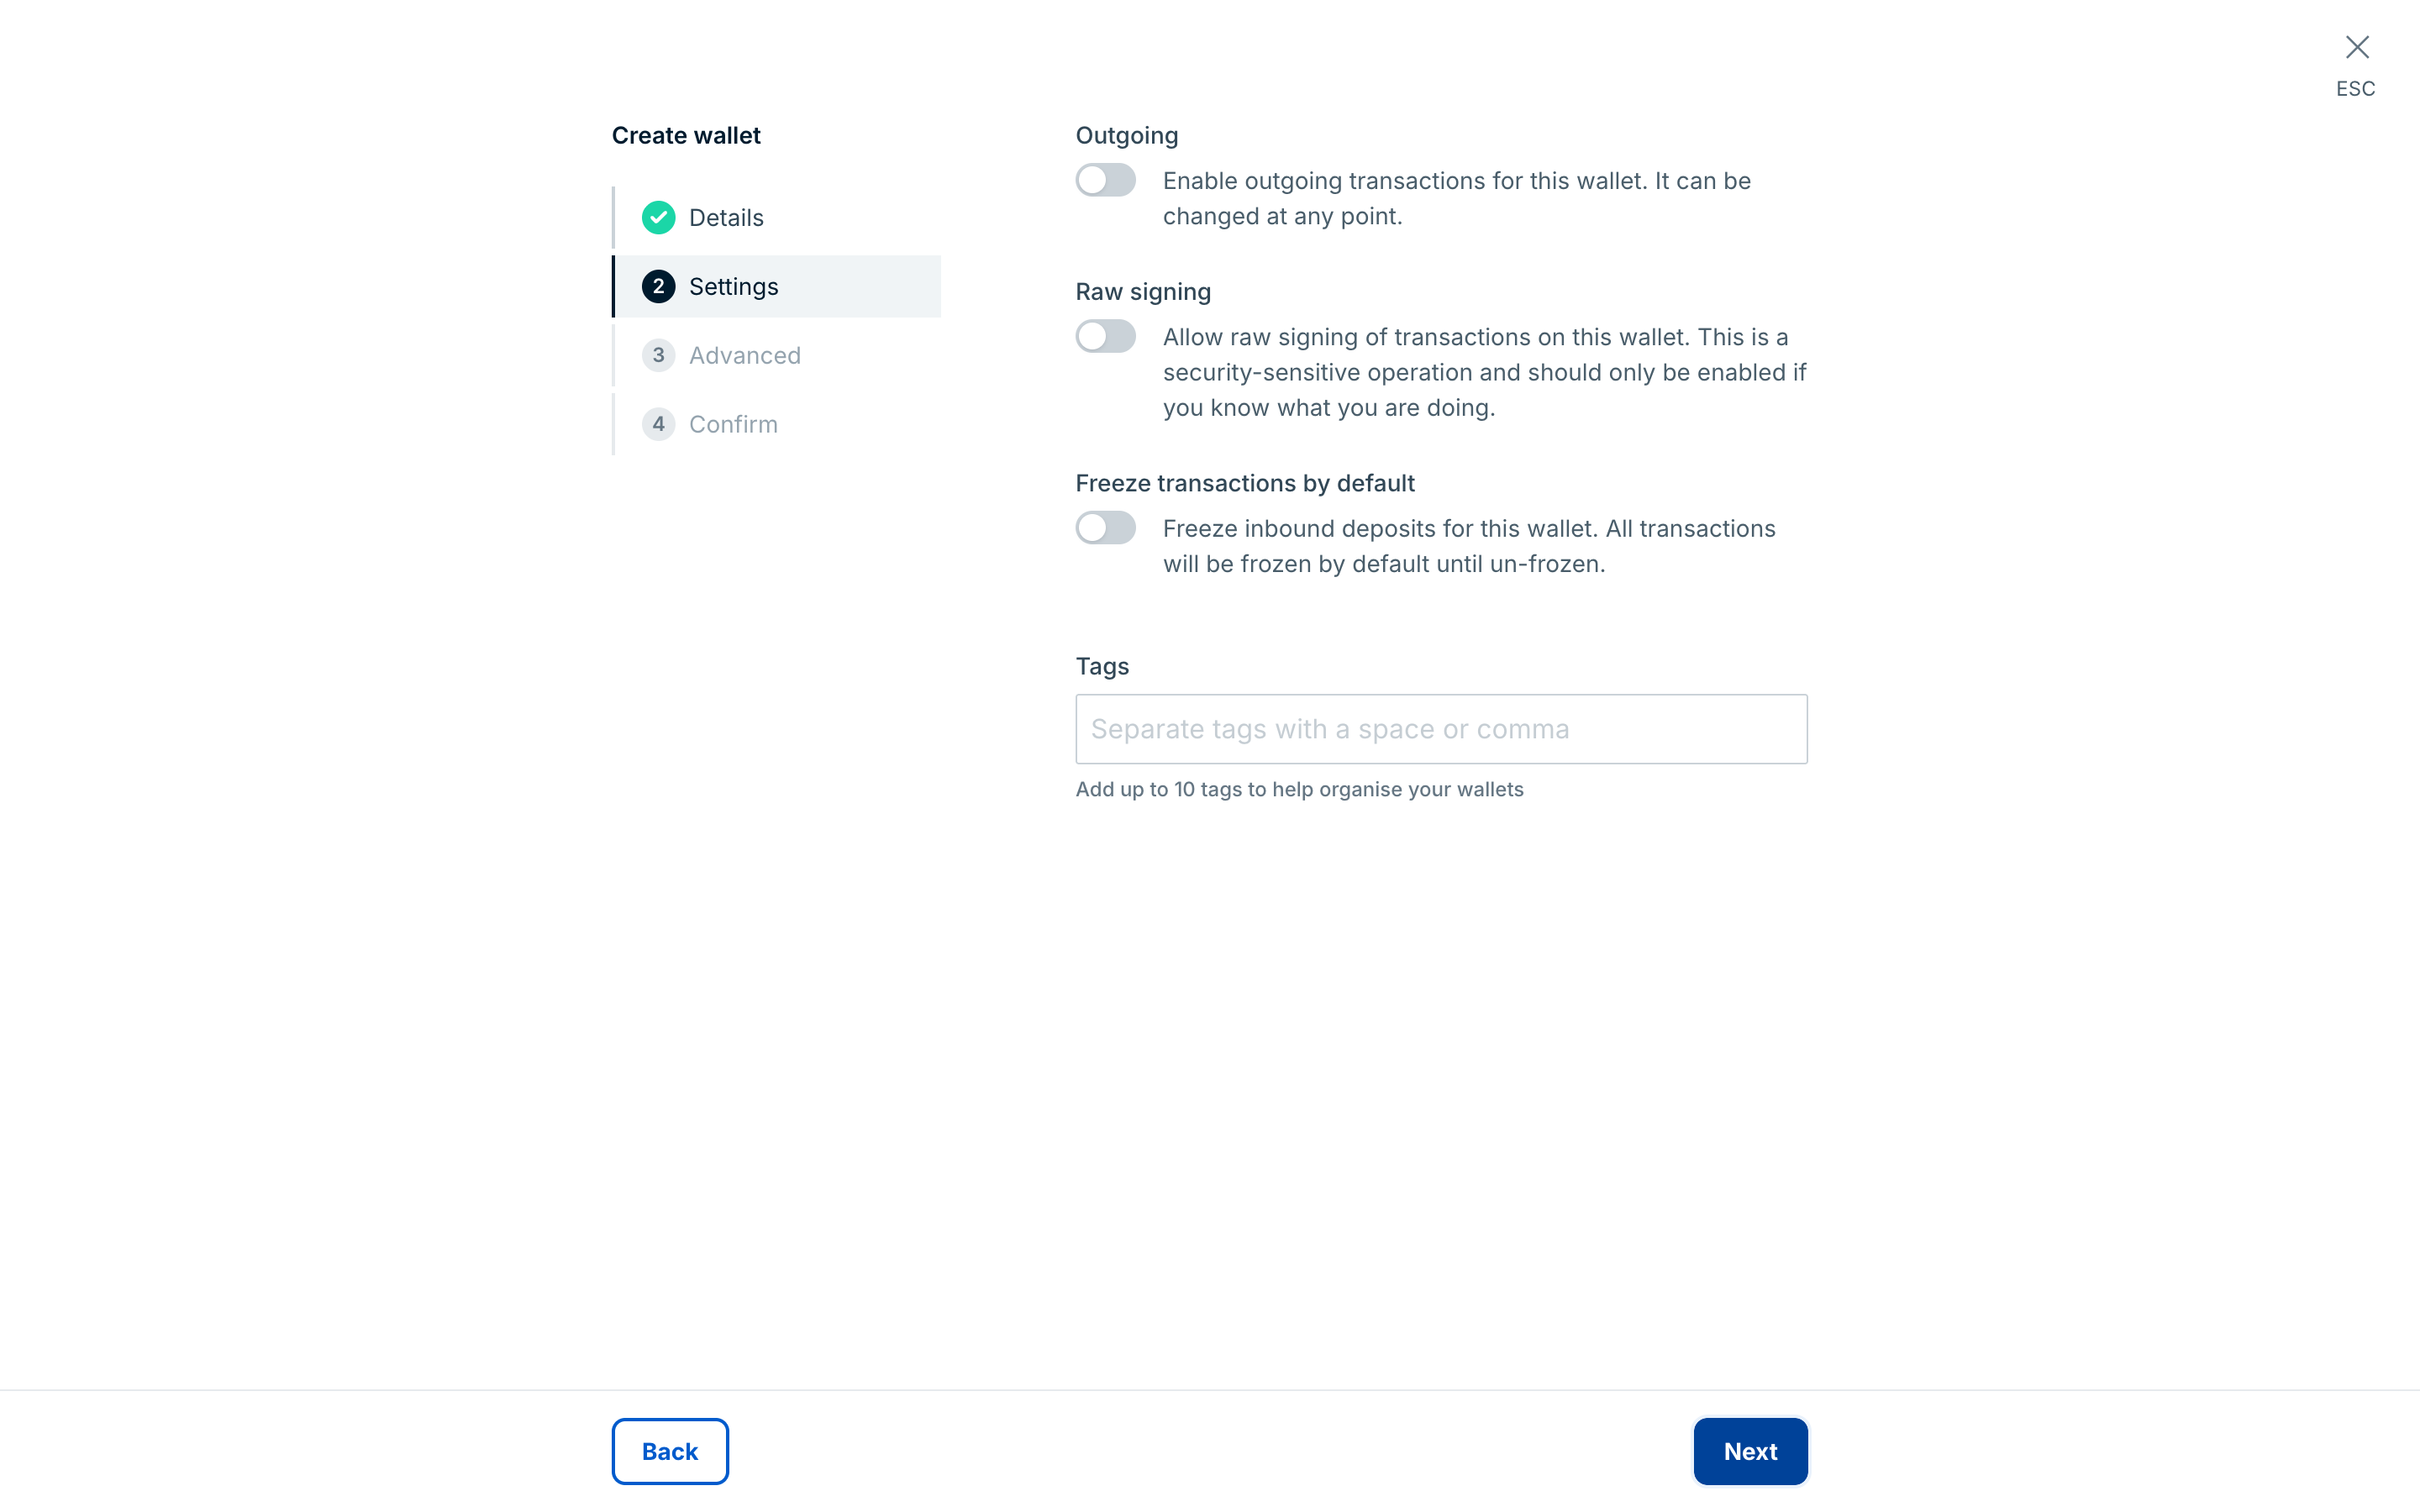
On the Settings step, optionally turn on Outgoing, Raw signing, or Freeze transactions by default, and add up to 10 Tags. All three settings are off by default, and you can change them later. Select Next.
On the Advanced step, optionally enter a Correlation ID and an External ID. Select Next.
On the Confirm step, review the summary and select Create wallet.
Transfer funds into your wallet (for example, from an exchange).
Ripple Custody (Wallet) places the wallet in a CREATED state and moves it to PROVISIONED after generating the wallet address. For MPC wallets, quorum members must approve the key generation before the wallet becomes provisioned.
For a guided first run, see Create your first wallet.
Ripple Custody (Wallet) operates a zero-trust security model. Every new wallet blocks outgoing transactions by default. Before a wallet can send, you must create a transaction policy, register destination addresses, and enable outgoing transactions. See Enable outgoing transactions from a wallet.
The console lists wallets per vault. To list every wallet in your organization at once, use the API. See List wallets.
Go to Vaults in the console sidebar, and select the vault's name.
The vault page shows cards for up to three of the vault's wallets, followed by a table of all its wallets with each wallet's Name, Balance, Address, ID, Storage (keystore), and Status.
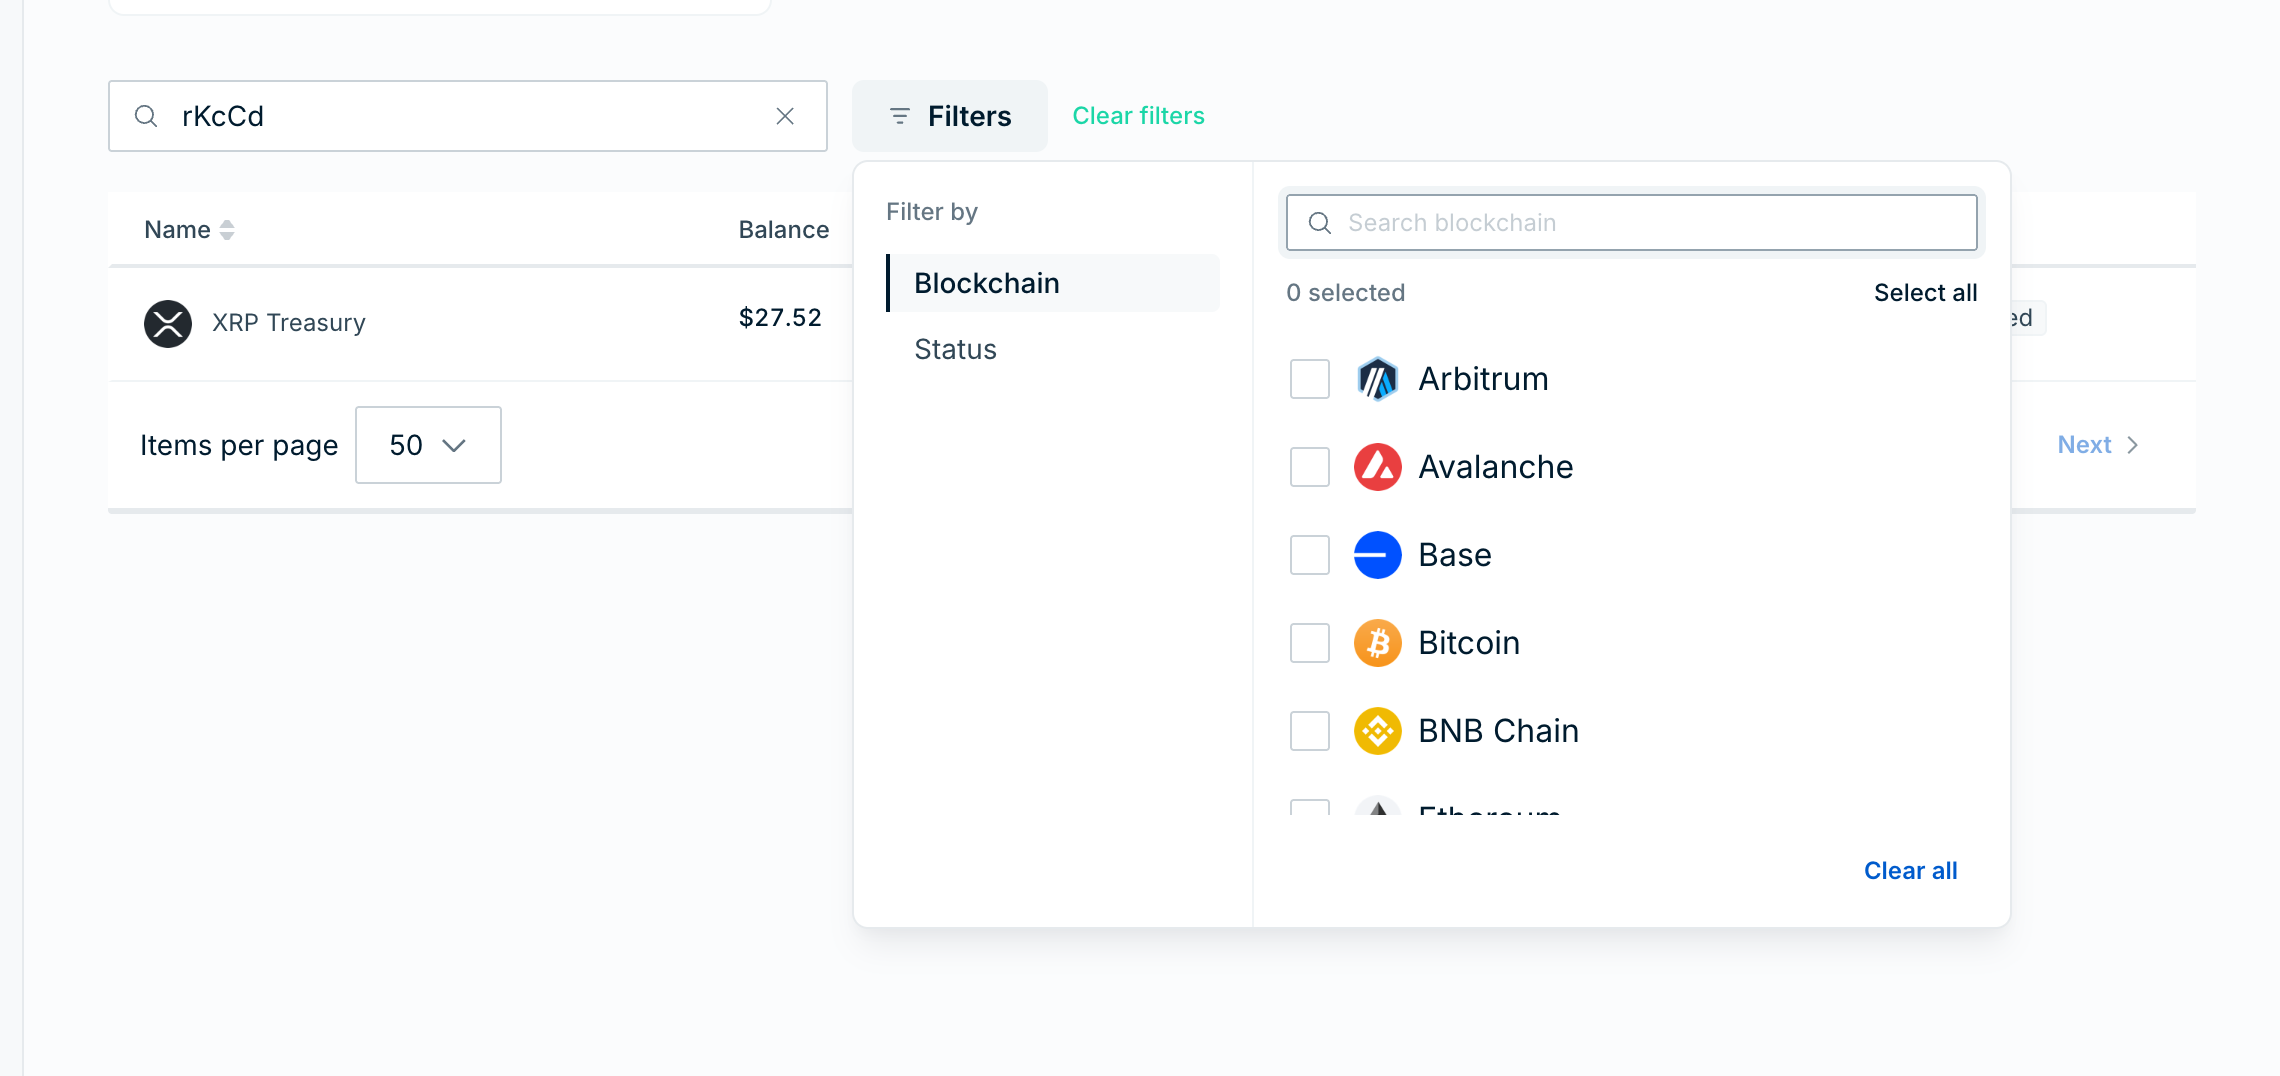
Optionally, to find a wallet, enter text in the Search wallets box. The search matches wallet ID, name, address, alias, external ID, and correlation ID.
Optionally, to narrow the list, select Filters, and then select a category under Filter by:
- Blockchain: select the blockchains to show.
- Status: select Failed, Provisioned, or Provisioning.
Each active filter appears as a chip above the table. To remove one filter, remove its chip. To remove them all, select Clear filters.
Optionally, to sort the list, select the Name, Address, or Status column heading.
To open a wallet, select its name.
Required role: Owner, Administrator, or Proposer.
A new wallet stays in a deposit-only state until it meets the following three conditions:
- At least one transaction policy exists for the asset you want to send. You can add a policy from the Policy tab within the wallet.
- At least one address book entry exists for the destination. You don't need one for internal wallet-to-wallet transfers within Ripple Custody (Wallet).
- Outgoing transactions are explicitly enabled on the wallet.
To enable outgoing transactions:
- Open the wallet.
- Select Enable transactions.
- In the Enable transactions dialog, select Enable.
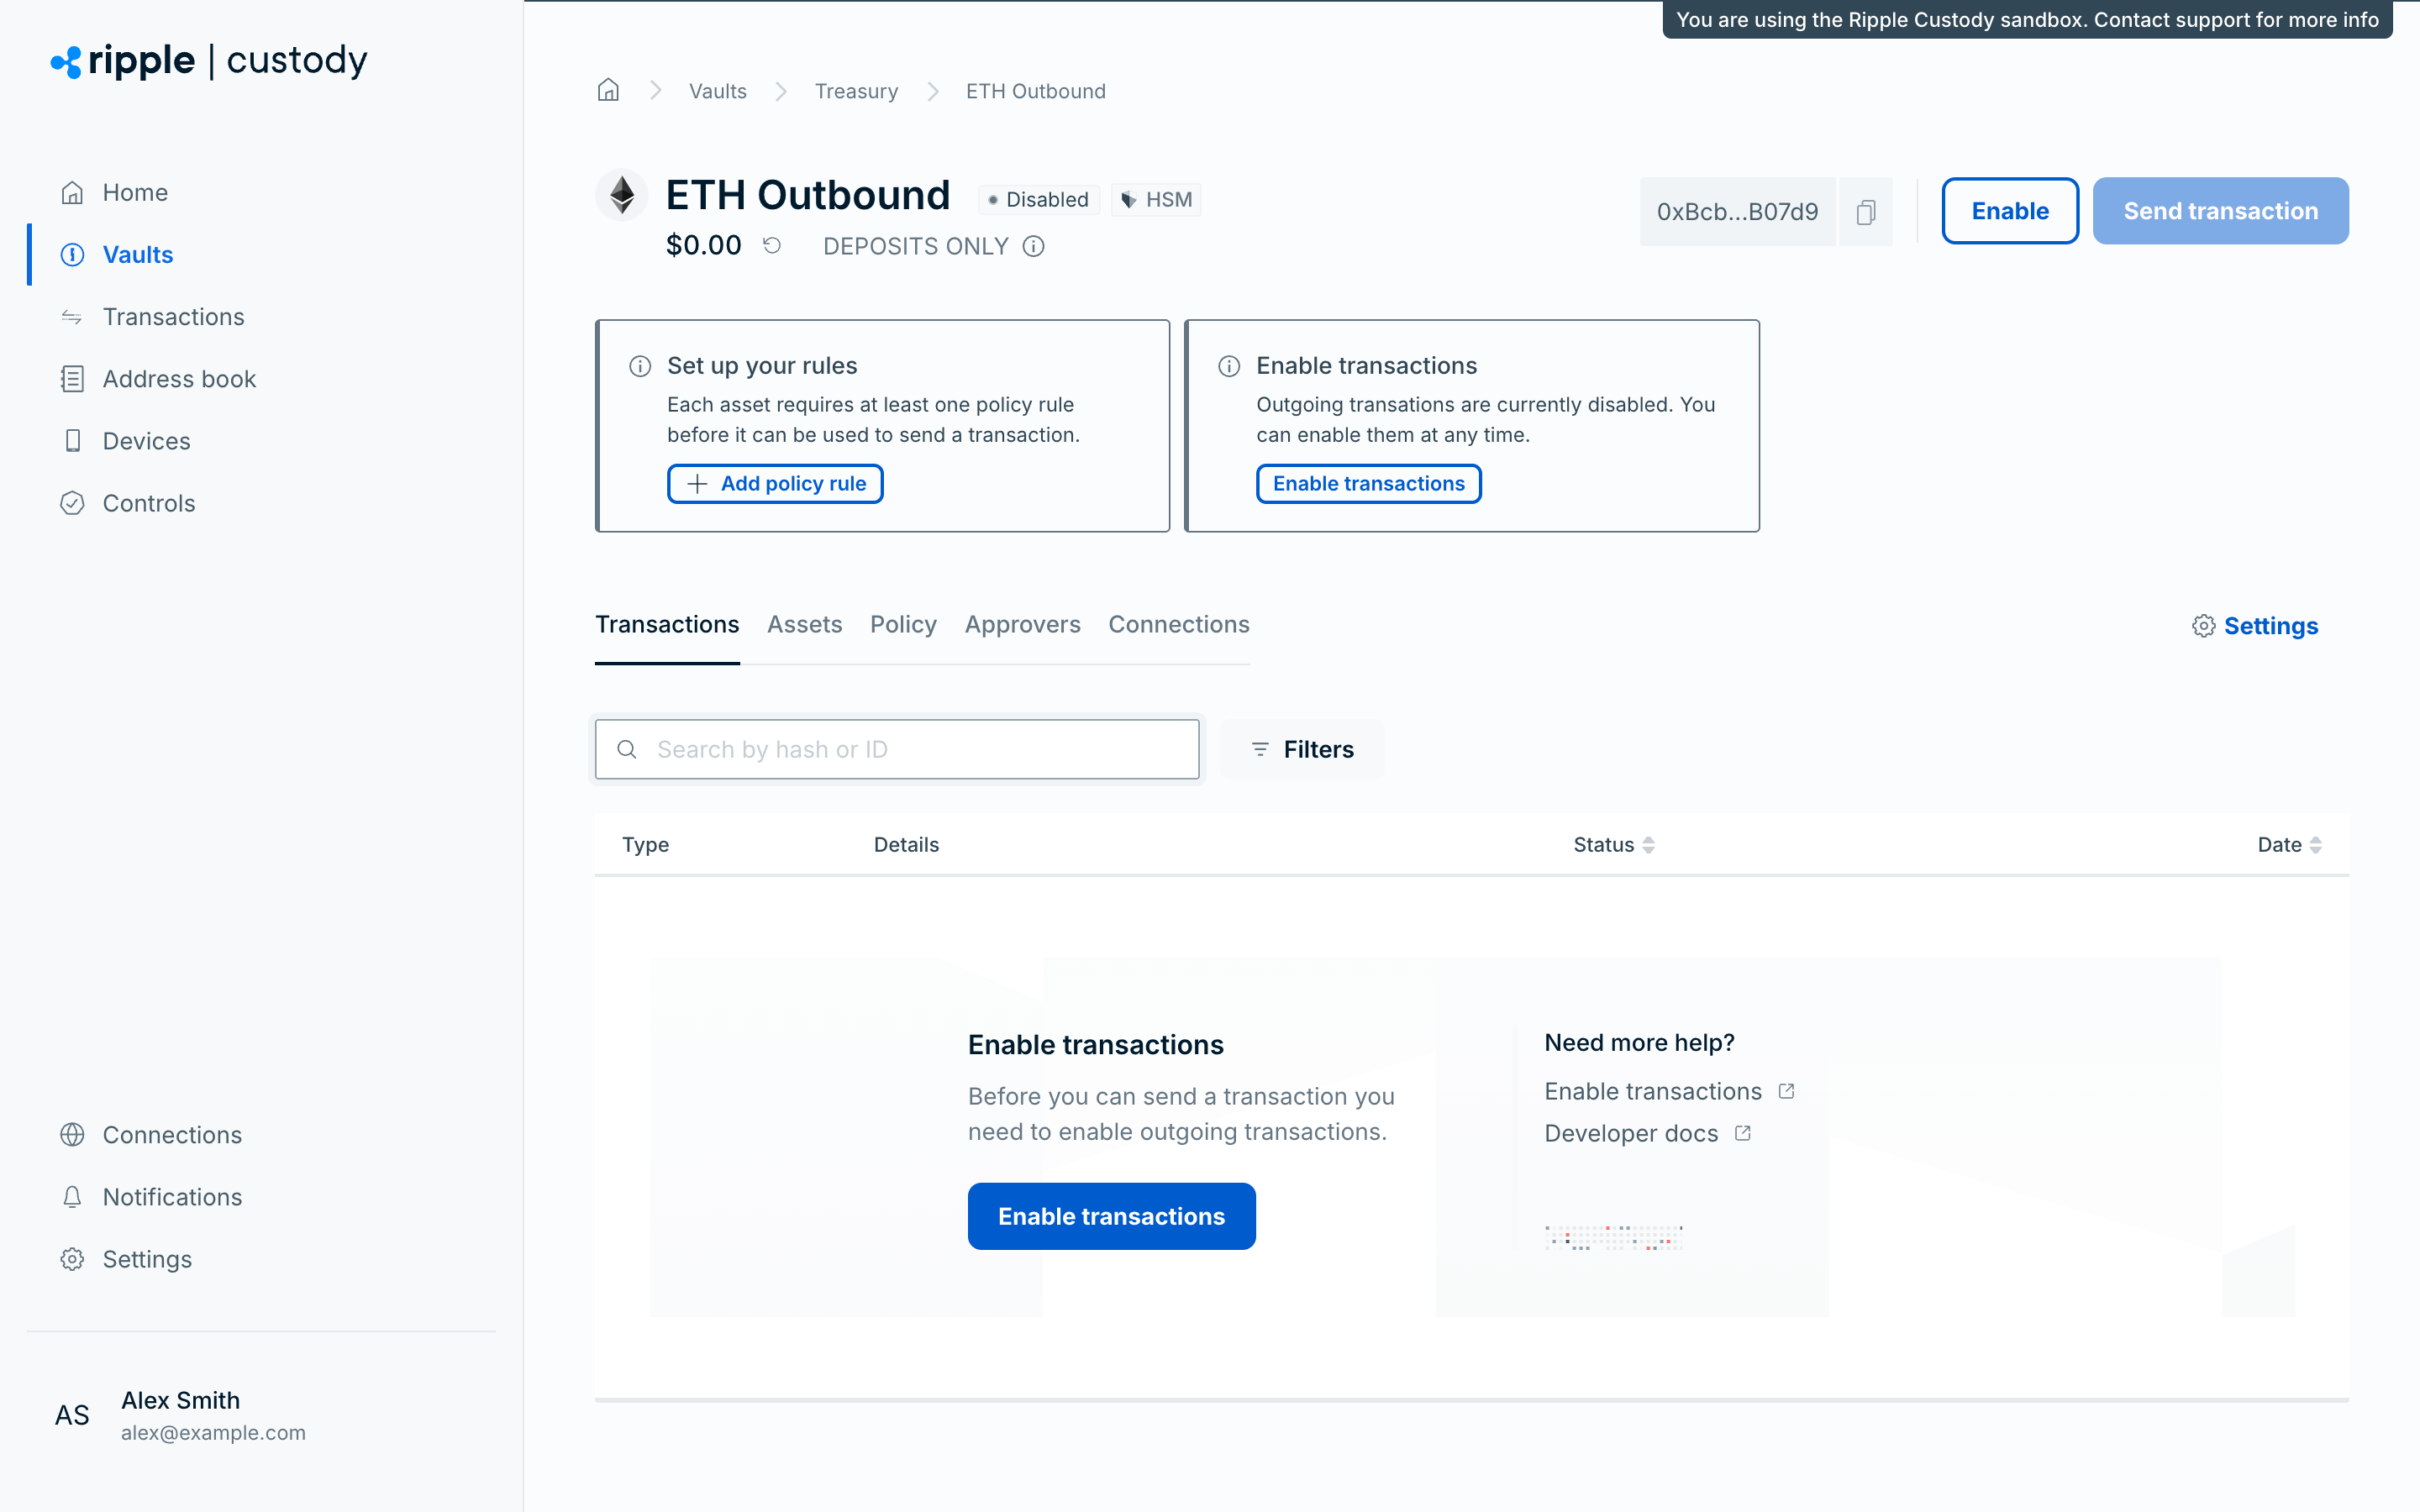
The console doesn't check the other two conditions when you enable outgoing transactions, but the wallet can't send until it meets them.
You can disable outgoing transactions at any time with the Outgoing toggle on the Transactions tab of the wallet settings.
For the full walkthrough, see Unlock outgoing transactions.
To open wallet settings, open a wallet and select the Settings gear icon. The settings page has the following tabs. Every role can see the General tab. Only owners, administrators, and proposers see the Details, Transactions, Sweeping, and Tags tabs and can change wallet settings.
View wallet metadata. You can copy every value:
- Wallet ID
- Wallet address
- Wallet public key
- Vault ID and other vault information
- Correlation ID
- External ID
Change the wallet's name (5 to 50 characters), description (5 to 100 characters), or correlation ID, then select Save changes.
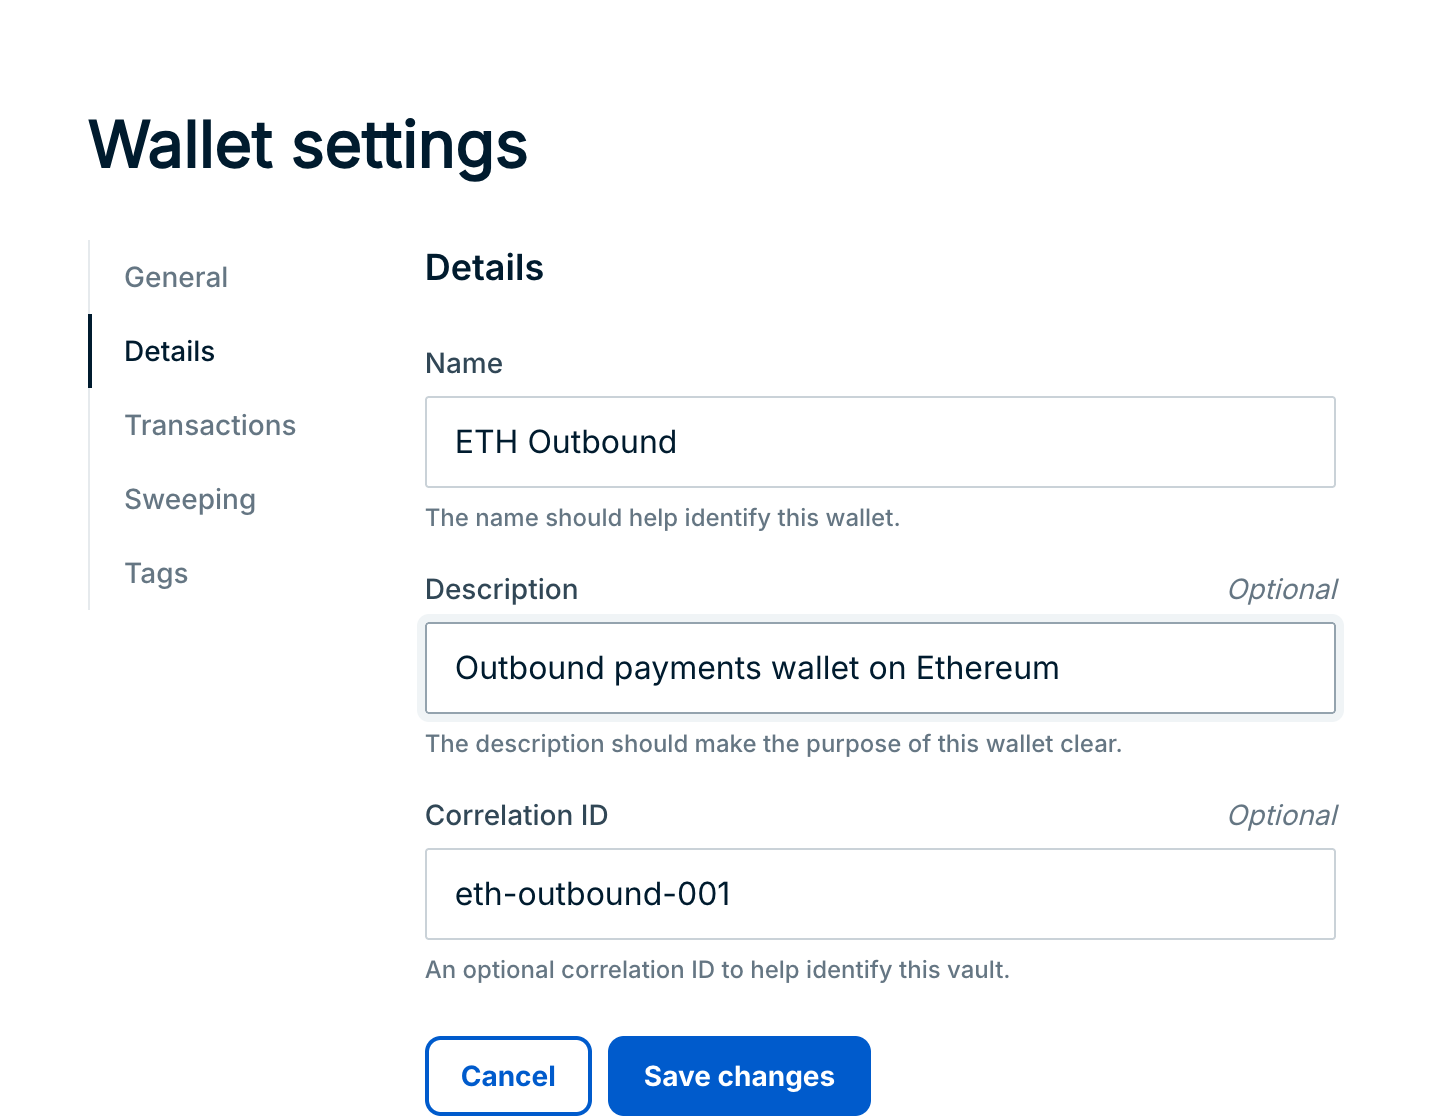
You can also change these details through the API. See Manage wallets via the API.
Configure transaction behavior for the wallet.
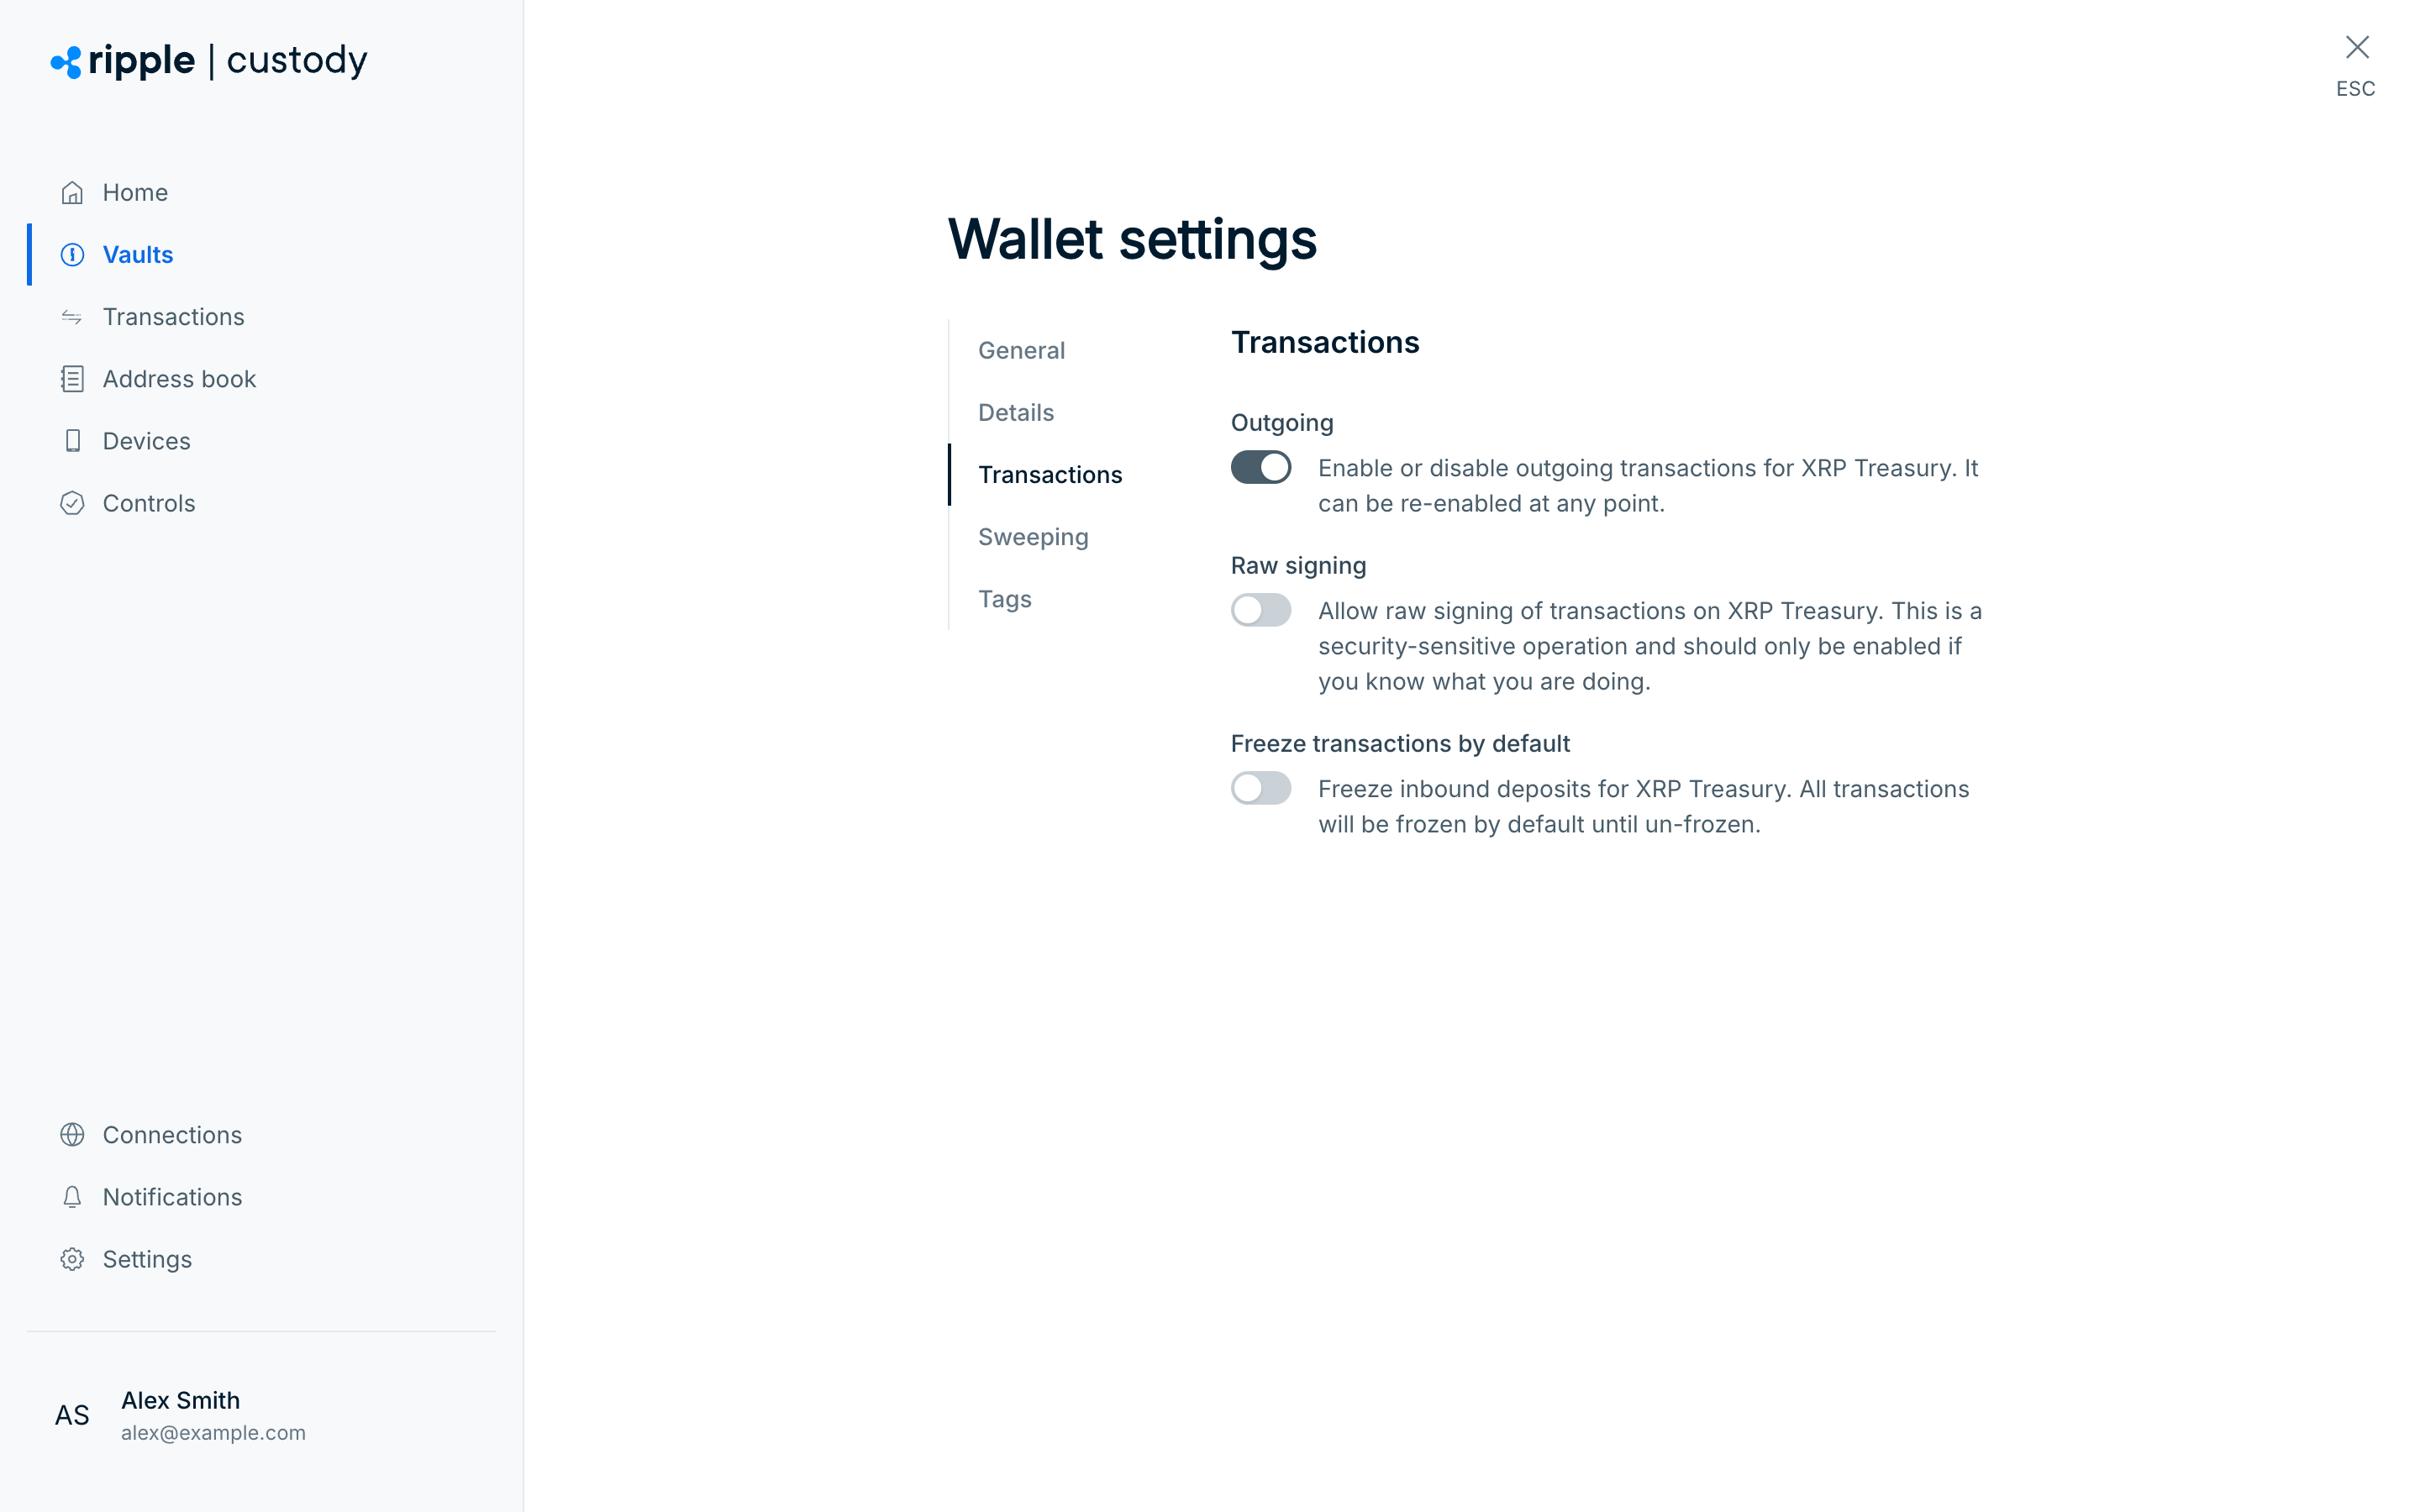
Use the Outgoing toggle to enable or disable the ability to transfer digital assets out of the wallet, then confirm in the dialog. To send from the wallet, it must also meet the conditions in Enable outgoing transactions from a wallet.
Raw signing lets the wallet sign arbitrary data payloads and any transaction type available on a given blockchain, not just standard transfer transactions. Enable it only if your integration requires it. See Raw signing for important information about this feature.
- Open the wallet, select the Settings gear icon, and go to the Transactions tab.
- Turn on Raw signing.
- In the Enable raw signing dialog, select Enable.
Raw signing permits signing any data payload. Enable it only on wallets that need it, and pair it with strict transaction policies and approval groups.
Automatic freeze places all incoming deposits into a frozen state until you manually review and unfreeze them. Funds don't become available until you unfreeze them. Use this for compliance-sensitive wallets that require manual review of every deposit.
- Open the wallet, select the Settings gear icon, and go to the Transactions tab.
- Turn on Freeze transactions by default.
- In the Freeze by default dialog, select Enable.
For full details, see Configure transaction freeze controls.
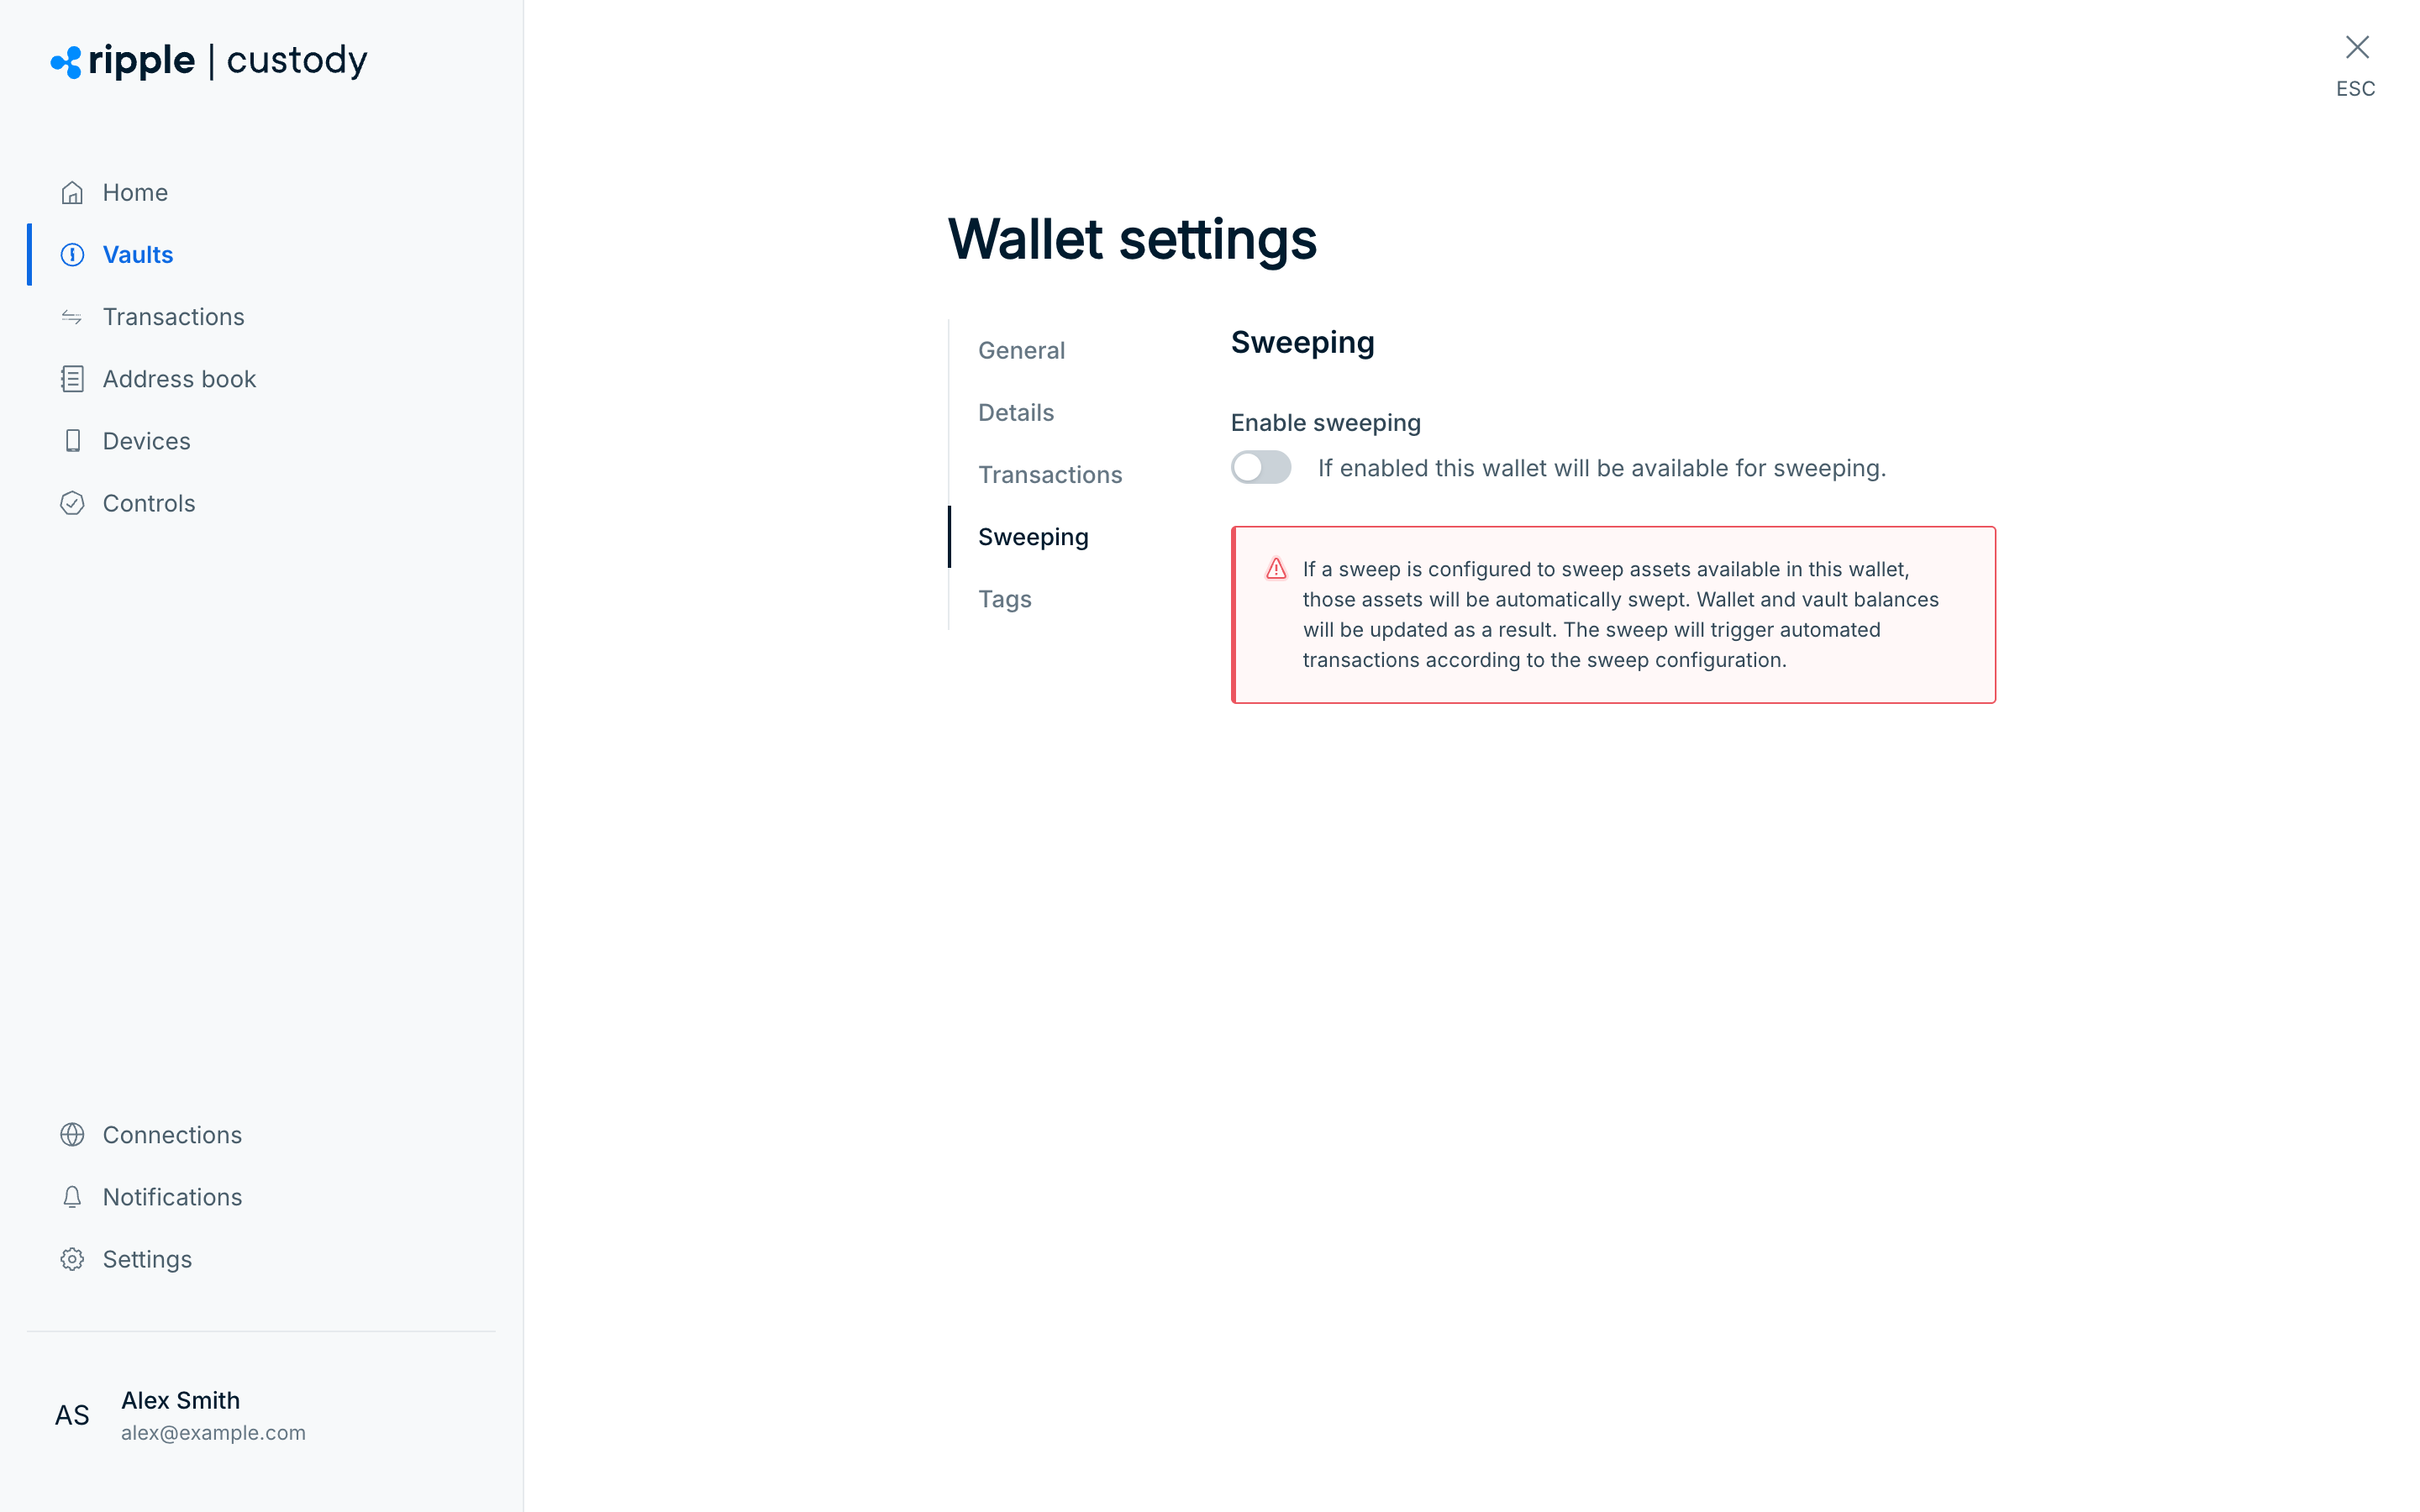
Use the Enable sweeping toggle to enable or disable asset sweeping for the wallet, then confirm in the dialog. See Configure asset sweeping for setup instructions.
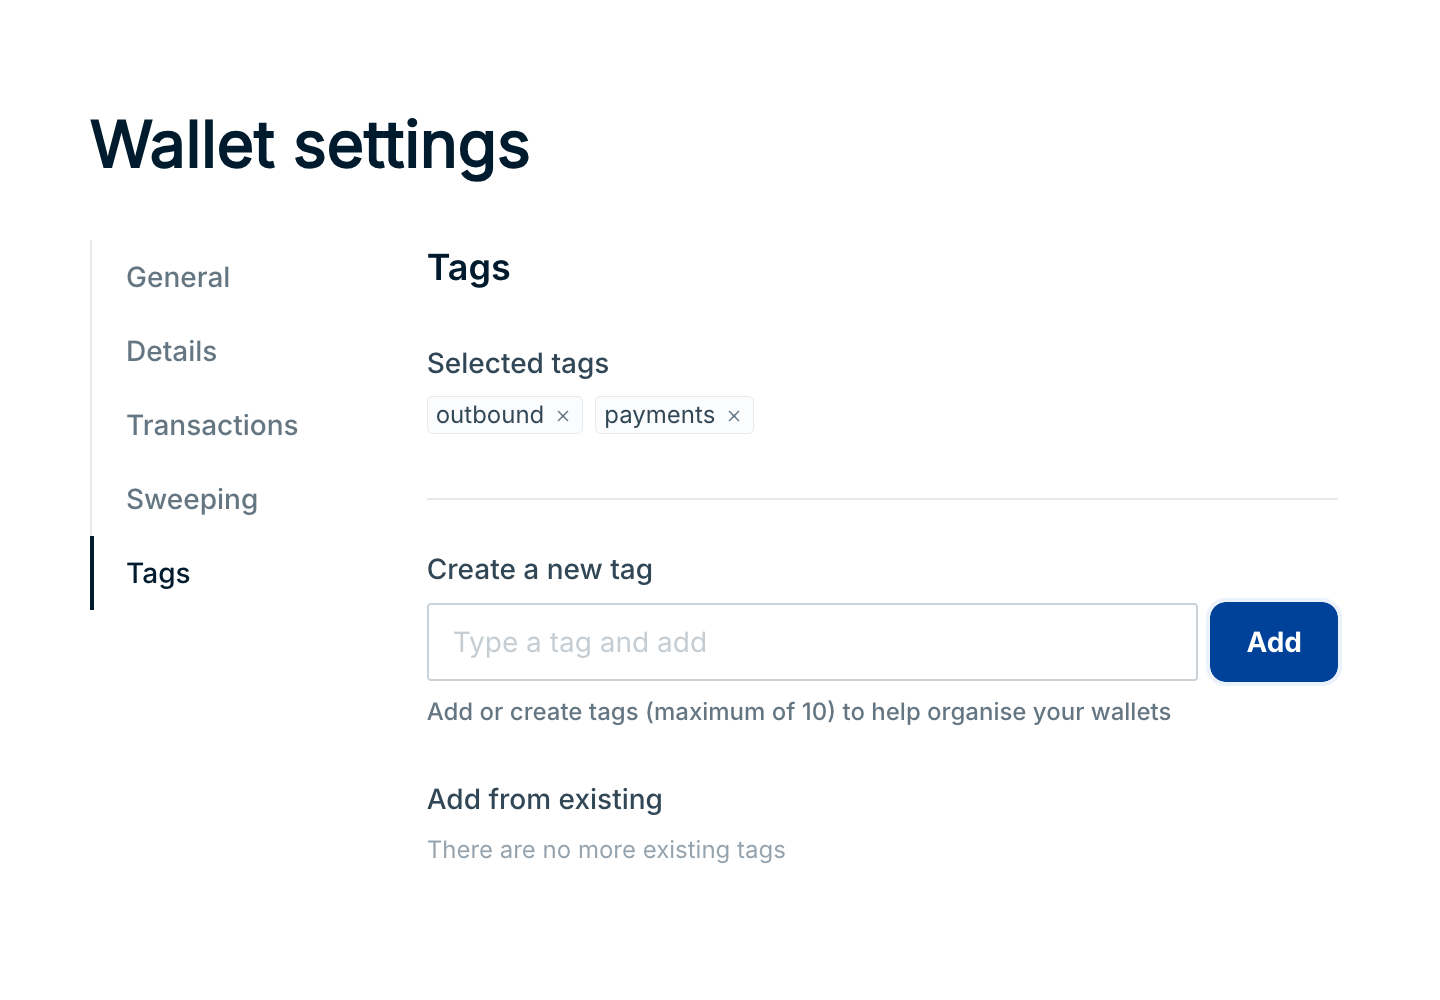
Required role: Owner, Administrator, or Proposer. Only owners and administrators can remove a tag.
Tags are free-form labels you can use to group and find wallets. A wallet can have up to 10 tags, and each tag can be up to 64 characters long. You can also add tags on the Settings step when you create a wallet.
Open the wallet, select the Settings gear icon, and go to the Tags tab.
Add a tag in one of these ways:
- To create a tag, enter it in Create a new tag and select Add.
- To reuse a tag that's already on another wallet in the vault, select it under Add from existing.
The tag appears under Selected tags.
To remove a tag from the wallet, select the × on the tag under Selected tags.
The console saves each tag change as soon as you make it. You don't need to select Save changes.
Only users with the Owner or Administrator role can delete a wallet. Other roles don't see Delete wallet. If you don't see it, ask an owner or administrator in your organization.
You can delete a wallet only if it failed to provision (status PROVISIONING_FAILED). You can't delete a provisioned wallet.
To delete a wallet that failed to provision, open the wallet and select Delete wallet, or use the API.
- Use descriptive names — include the purpose, blockchain, and environment in wallet names (for example, "Treasury - ETH - Production").
- Start with deposit-only — leave outgoing transactions disabled until you have configured policies, addresses, and approval groups.
- Minimize raw signing — only enable raw signing on wallets that specifically need it.
- Enable automatic freeze on compliance-sensitive wallets — use default freeze for wallets that handle funds subject to AML or sanctions screening.
To manage wallets programmatically, see Manage wallets via the API.
- Create your first wallet — Step-by-step wallet creation
- Unlock outgoing transactions — Full guide to enabling sends
- Manage vaults — Create vaults and organize wallets
- Blockchains and tokens — Feature availability by chain