A wallet stores your digital assets on a specific blockchain. Each wallet has a public address for receiving funds and a private key (secured by MPC) for authorizing outgoing transactions.
Required role: Owner, Administrator, or Proposer.
- Click into the vault where you want to create the wallet.
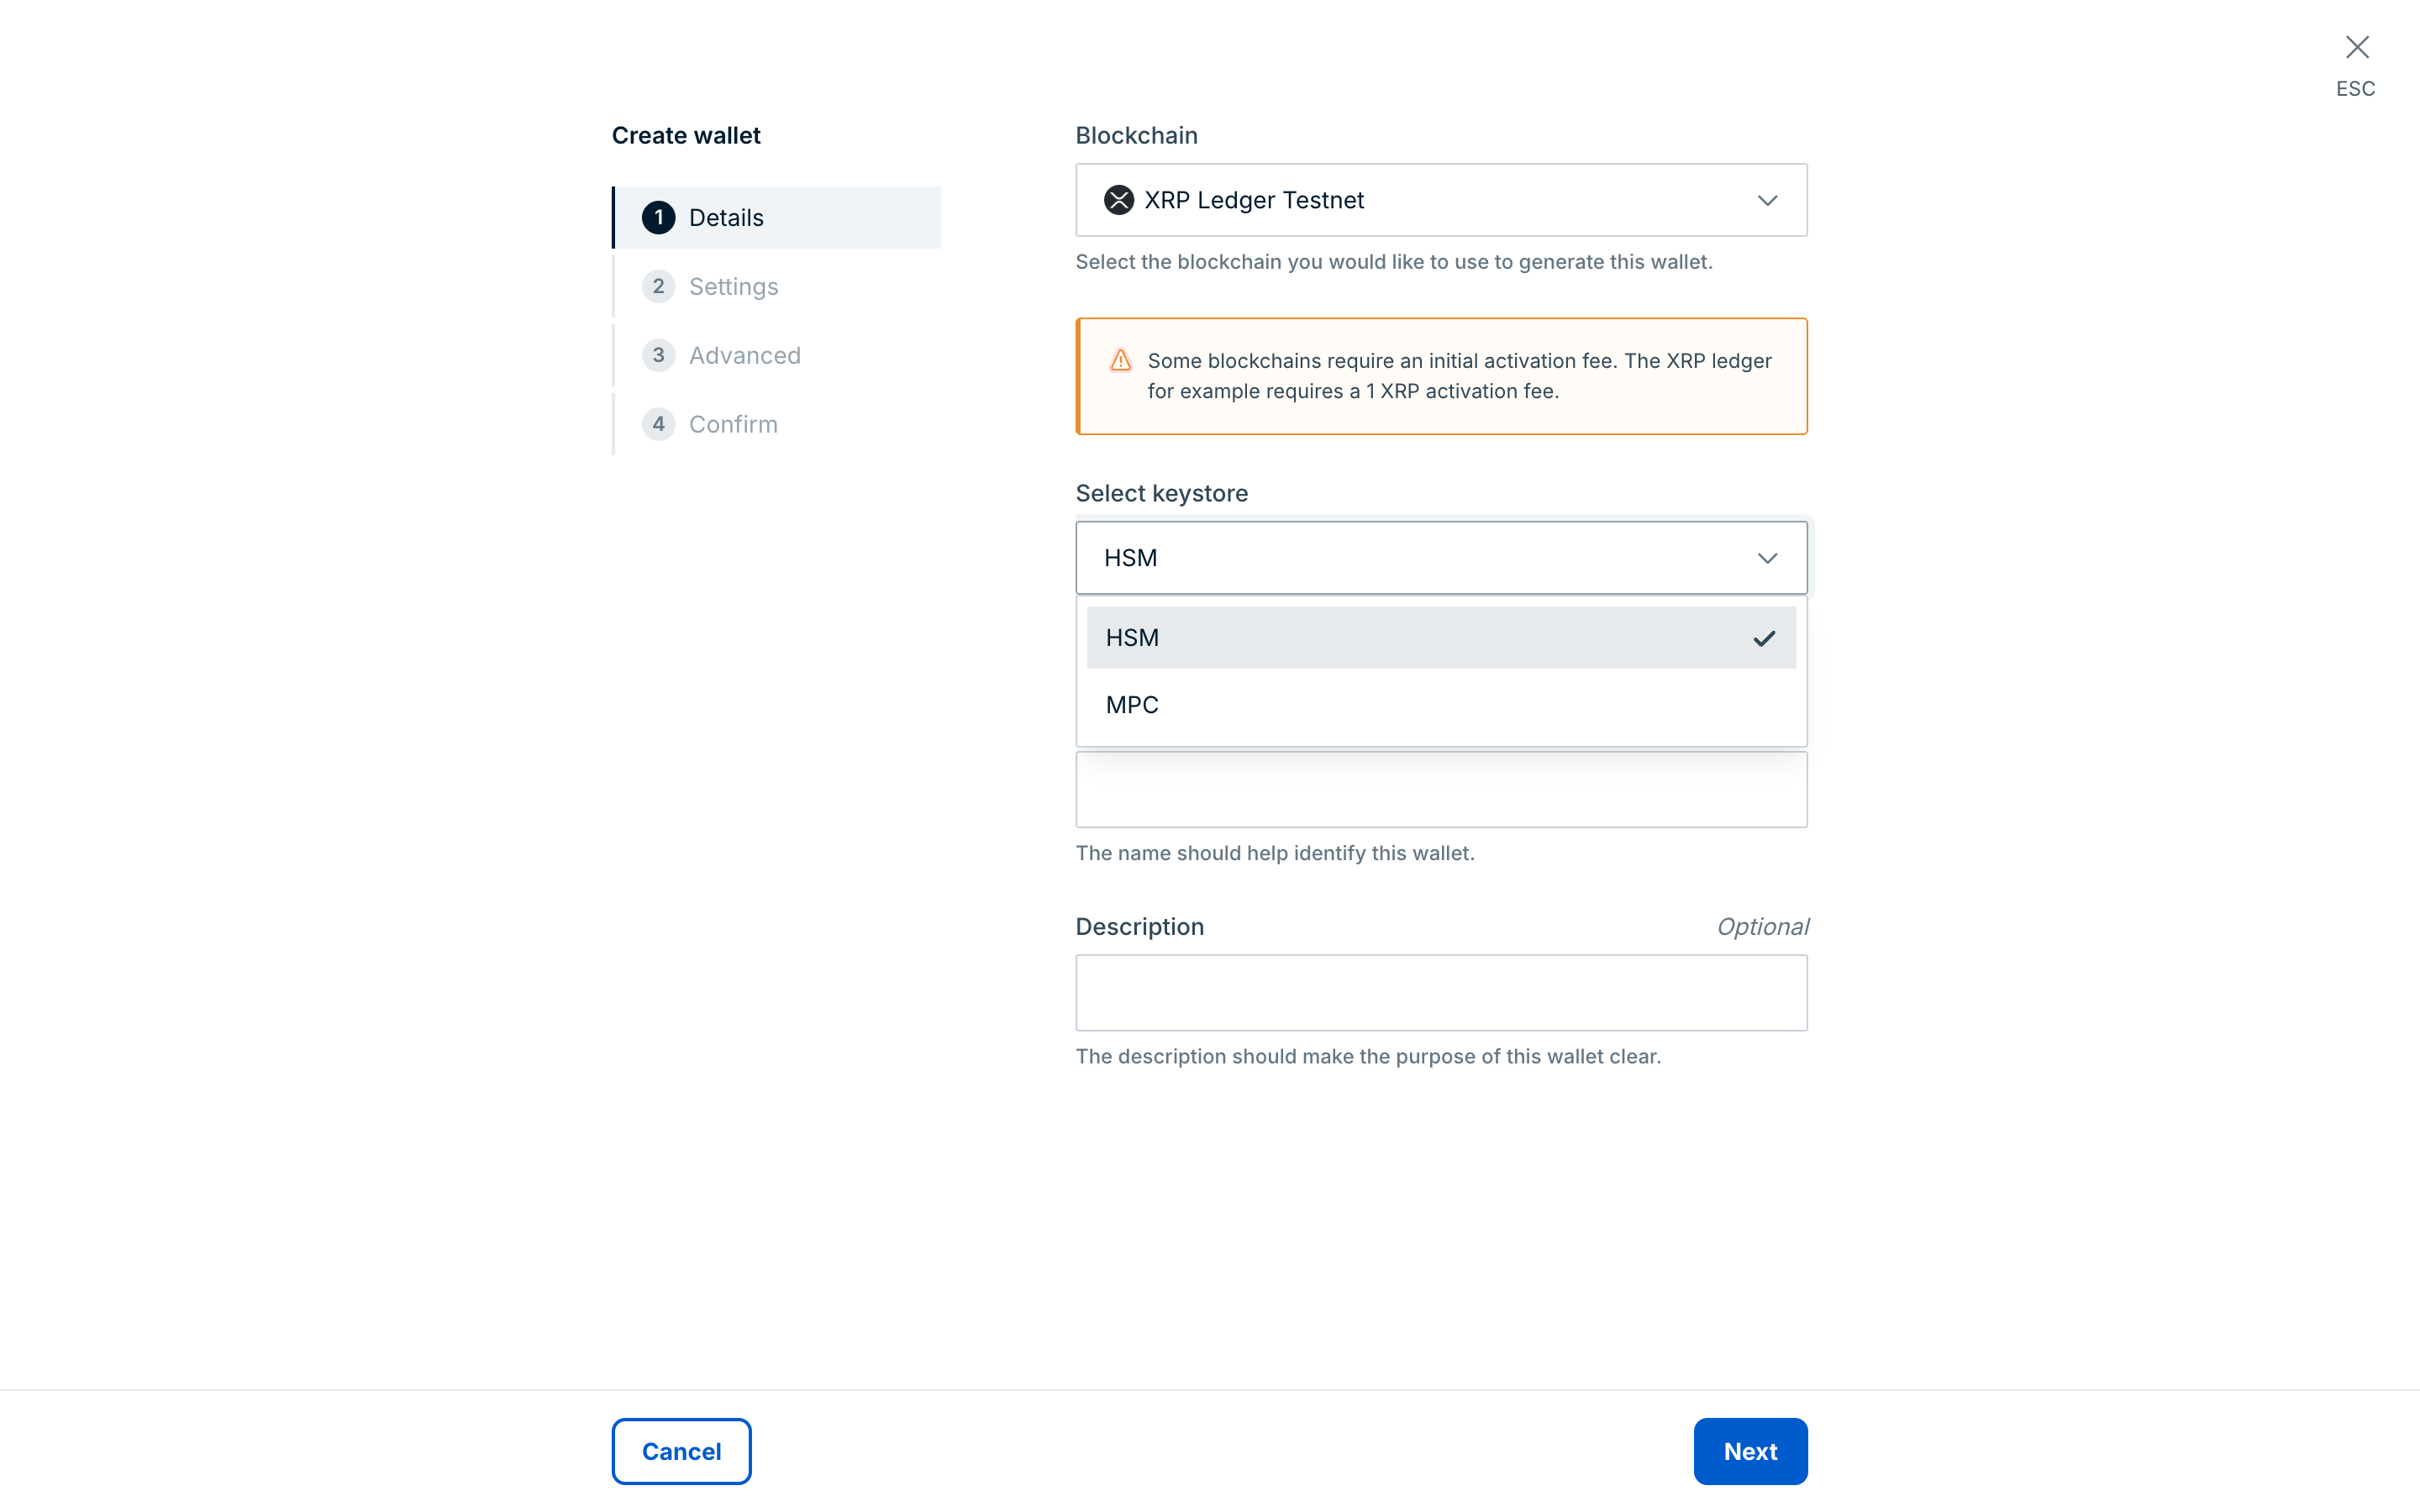
- Click Create wallet. The Create wallet form opens with four steps: Details, Settings, Advanced, and Confirm.
- On the Details step, select the Blockchain you want the wallet to operate on.
Ripple Custody (Wallet) supports the following blockchains:
| Blockchain | Type | Notes |
|---|---|---|
| Ethereum | EVM | Multi-chain EVM address |
| Arbitrum | EVM | Shares address with Ethereum wallet |
| Avalanche | EVM | Shares address with Ethereum wallet |
| Base | EVM | Shares address with Ethereum wallet |
| BNB Chain | EVM | Shares address with Ethereum wallet |
| Polygon | EVM | Shares address with Ethereum wallet |
| 1Money | EVM | Sandbox only. Shares address with Ethereum wallet |
| Bitcoin | Non-EVM | |
| Solana | Non-EVM | MPC keystore only |
| Tron | Non-EVM | |
| XRP Ledger | Non-EVM | Requires activation fee before use |
If you create an Ethereum wallet, the same address is valid on all supported EVM chains (Arbitrum, Polygon, Base, BNB Chain, and Avalanche). Ripple Custody (Wallet) detects deposits on any supported EVM chain automatically and lets you send on any chain where you hold a balance.
The XRP Ledger requires an activation fee of 1 XRP before the wallet can send or receive transactions. Fund the wallet with at least 1 XRP to activate it.
- Under Select keystore, choose how the wallet's private key is secured. In sandbox, HSM is preselected after you choose a blockchain, except Solana, which supports MPC only.
- MPC — Private key shards are distributed across your MPC quorum devices. Required for production.
- HSM — Private key is stored in a Hardware Security Module. Available in sandbox only, and not for Solana.
The keystore method is permanent once the wallet is created. Choose carefully.
To select MPC, you must have a confirmed quorum. If you haven't created one yet, complete Configure devices and quorums first. After selecting MPC, use the Quorum dropdown to choose the quorum for this wallet.
- Enter a Name that identifies the wallet (for example, "ETH Outbound" or "XRP Treasury"). Must be 5–50 characters.
- (Optional) Enter a Description that explains the wallet's purpose. Must be 5–100 characters.
- Click Next. On the Settings step, you can turn on Outgoing transactions, Raw signing, and Freeze transactions by default, and add up to 10 Tags. All three settings are off by default. Leave them off for now: you enable outgoing transactions after you set up a policy in Unlock outgoing transactions.
- Click Next. On the Advanced step, optionally enter a Correlation ID or External ID if you use external tracking systems.
- Click Next. On the Confirm step, review the wallet details and click Create wallet.
- If you selected MPC, all quorum devices receive a notification to approve the wallet creation. Every device must approve within 5 minutes.
The console confirms that the wallet was created and finishes provisioning it in the background. It then offers to create a policy rule for the wallet. You can do that now, or click Not now and follow Unlock outgoing transactions.
Your wallet starts with a zero balance. Deposit funds from an external source before you attempt any outgoing transactions.
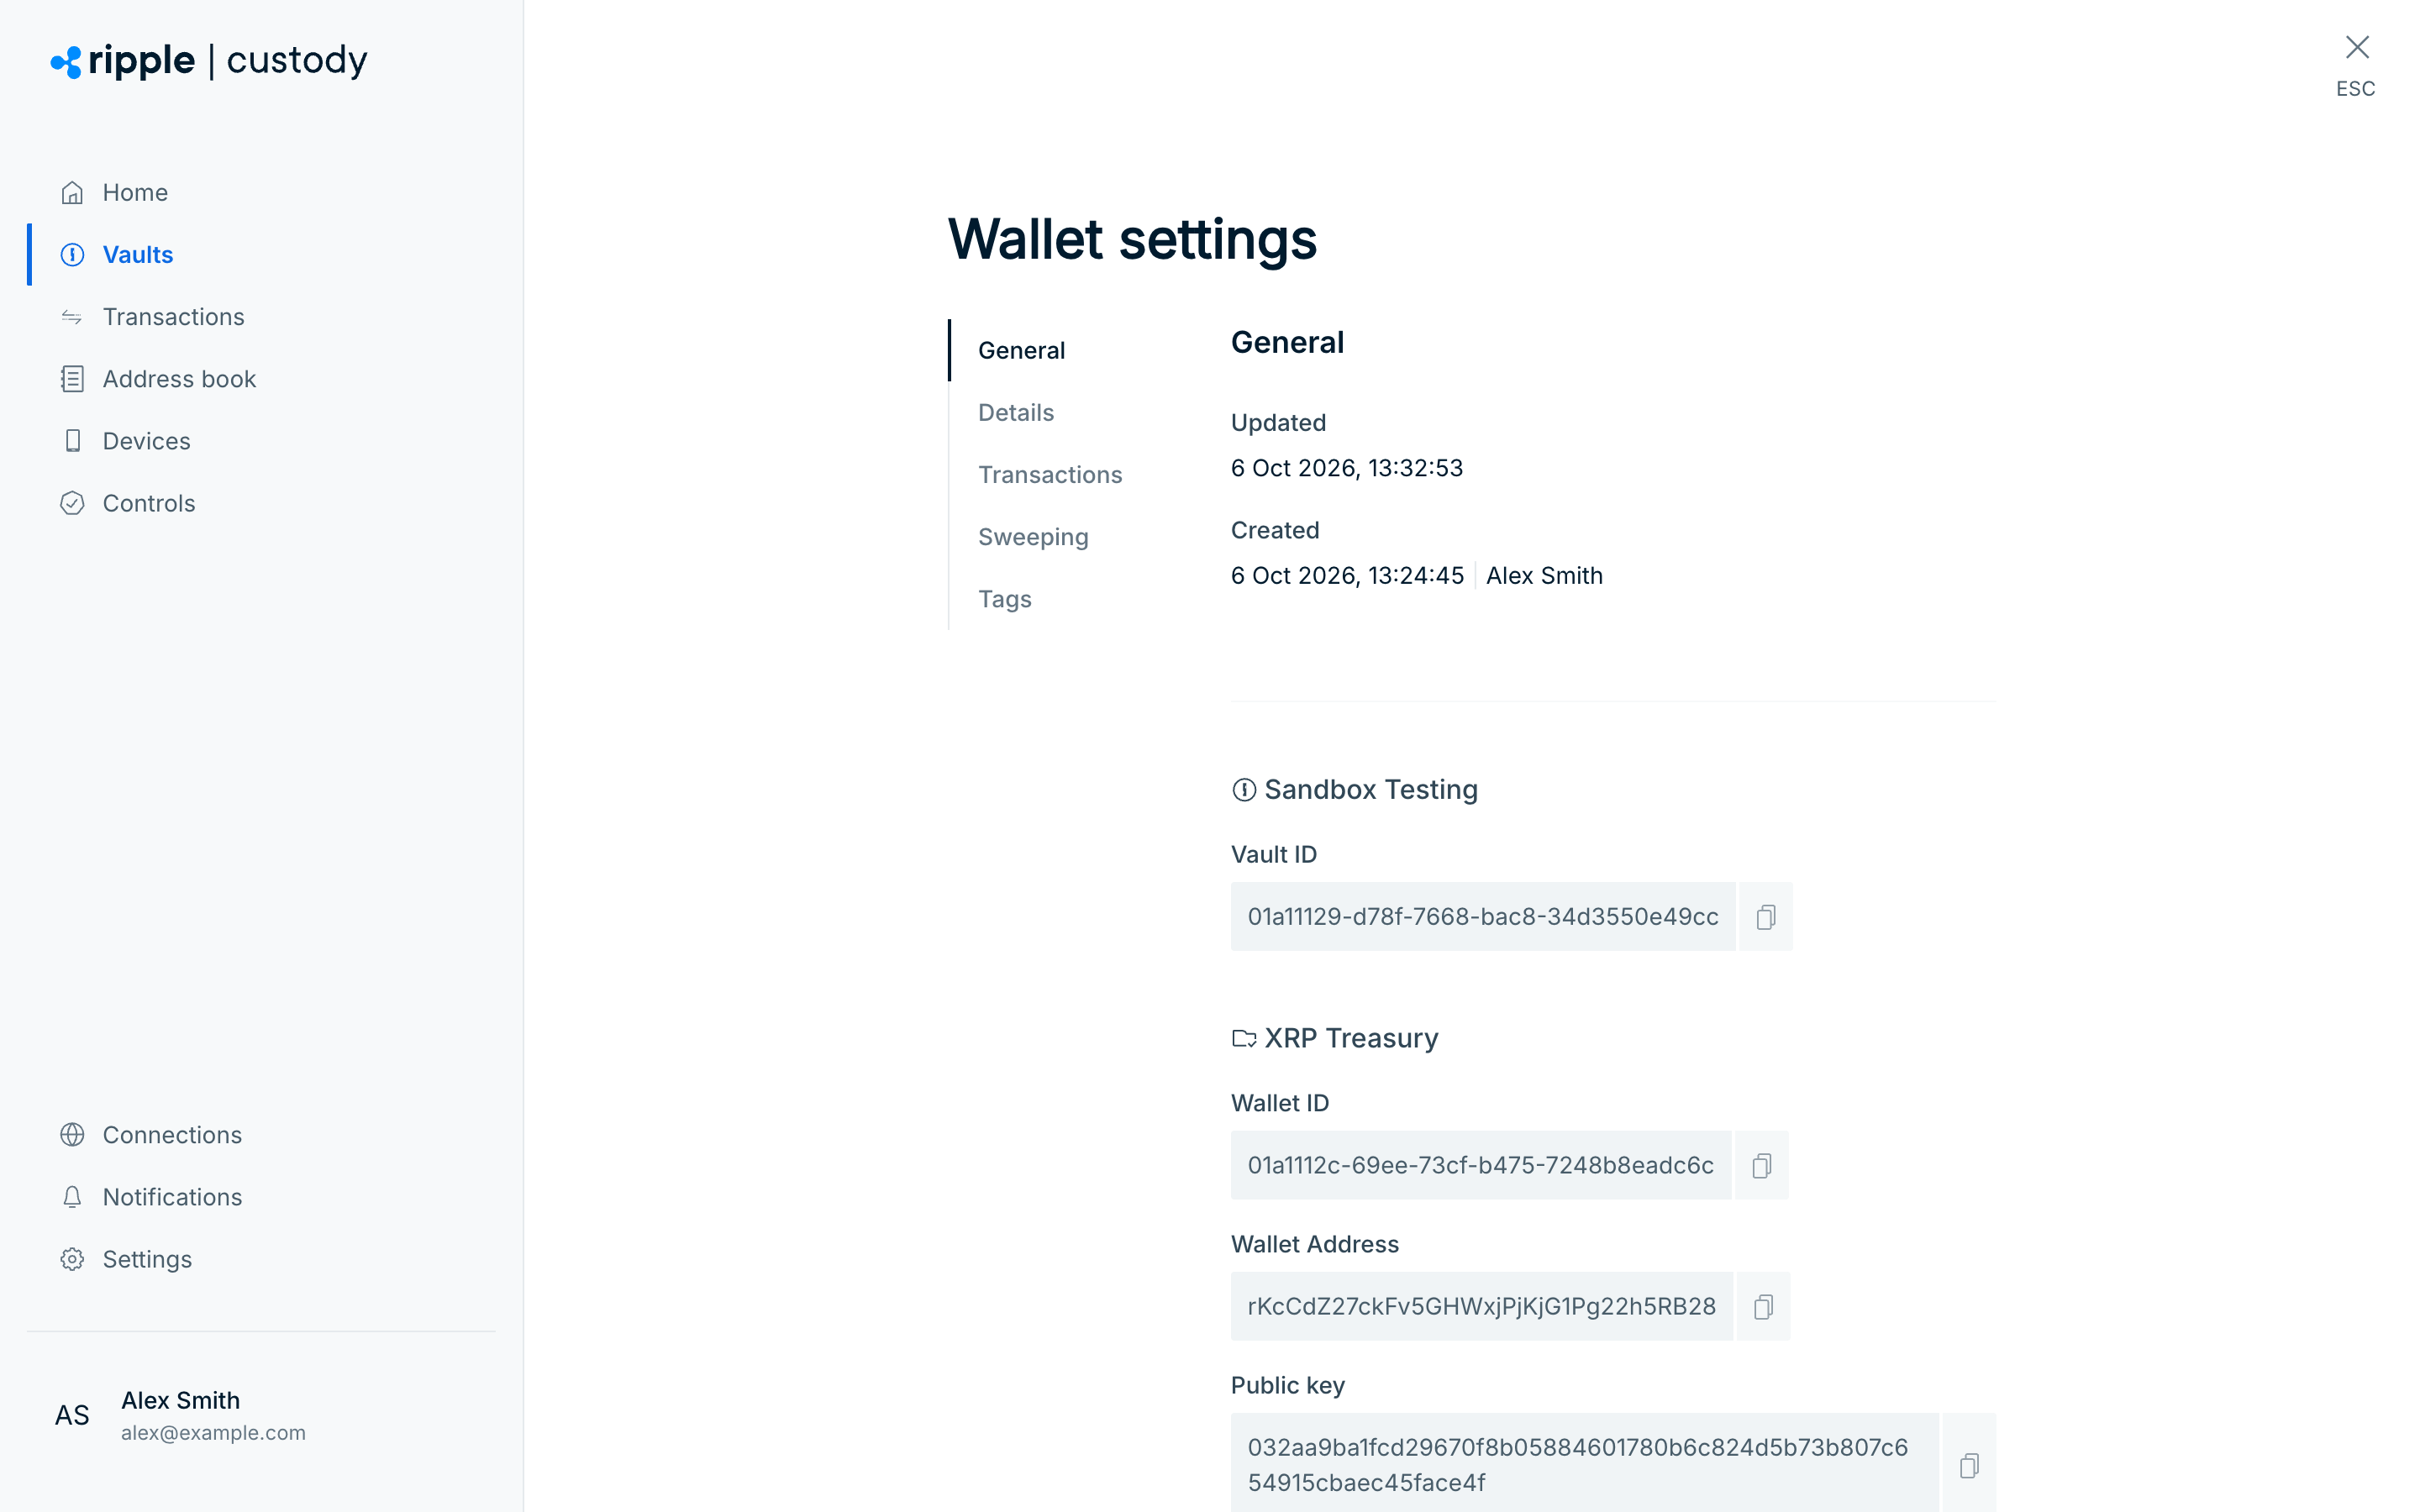
- Open the wallet. The wallet address appears at the top of the wallet page, and in Settings > General under Wallet Address.
- Copy the wallet address.
- Send funds to that address from an exchange, another wallet, or any external source.
- Wait for on-chain confirmation. The balance appears on the wallet's asset list once the transaction confirms on the blockchain.
At this point, your wallet can receive funds but cannot send outgoing transactions. Ripple Custody (Wallet) operates a zero-trust model — you must create a transaction policy, register destination addresses, and enable outgoing transactions before you can send anything. The next step walks you through this process.
Unlock outgoing transactions by setting up policies and addresses: