Transaction policies define the rules that govern outgoing transactions from your wallets. Without an applicable policy for a given asset, Ripple Custody (Wallet) blocks all outgoing transactions for that asset. Design policies that balance operational flexibility with security controls.
This page explains how to create, change, and delete policy rules in the Ripple Custody (Wallet) console: limit rules, approval rules, and Travel Rule rules. For how the rule kinds work together, see Policies. To manage rules with the API, see Manage policy rules via the API.
| Action | Console role | Console procedure | API procedure |
|---|---|---|---|
| Create a limit, approval, or Travel Rule rule | Owner, Administrator | Create a policy | Create a policy rule |
| Check rule status | All except Viewer | View policy status | List a wallet's policy rules |
| Get a policy rule | All except Viewer | Open the wallet's Policy tab. | Get a policy rule |
| Change a rule | Owner, Administrator | Modify a policy | Change a policy rule |
| Delete a rule | Owner, Administrator | Delete a policy | Delete a policy rule |
| Manage wallet limits | - | - | Use the wallet limits endpoints |
Permissions: In the console, owners and administrators can create and delete policy rules. Owners, administrators, proposers, and approvers can approve them, and every role except viewer can view them. See User roles and permissions. The API procedures need an API credential of type CONTROLS. See Prerequisites.
Complete these prerequisites before creating policies:
| Requirement | Description |
|---|---|
| Vault created | You need an existing vault. See Create your first vault. |
| Wallet created | You need an existing wallet within the vault. See Create your first wallet. |
| Console access | You need the Owner or Administrator role to create or delete policy rules. The Add a new rule button appears only for these roles. |
| API credentials (for API usage) | Credentials with the policy:create, policy:read, and policy:delete permissions for the policy rules API, or keylimit:create, keylimit:read, and keylimit:delete for the older wallet limits endpoints. See Manage policy rules via the API. |
You must create a policy for an asset before you can send outgoing transactions with that asset.
When a user or API credential submits a transaction, the Ripple Custody (Wallet) policy engine automatically evaluates it against the wallet's active policies. The engine checks:
- Does a policy exist for this asset?
- Does the transaction amount fall within the policy's limit?
- Is the destination permitted by the policy?
- Is the initiator permitted by the policy (if restricted)?
- Do any other policy matchers, such as transaction type, signing address, or chain ID, match the transaction?
If a policy with matchers matches the transaction, only the matching policies with matchers apply. Otherwise, the policies without matchers apply. The transaction must satisfy every applicable policy. If no policy applies, or the transaction exceeds any applicable policy, the platform blocks it. See Policy evaluation.
Required role: Owner or Administrator.
Open the wallet in the Ripple Custody (Wallet) console and go to the Policy tab.
Select Add a new rule.
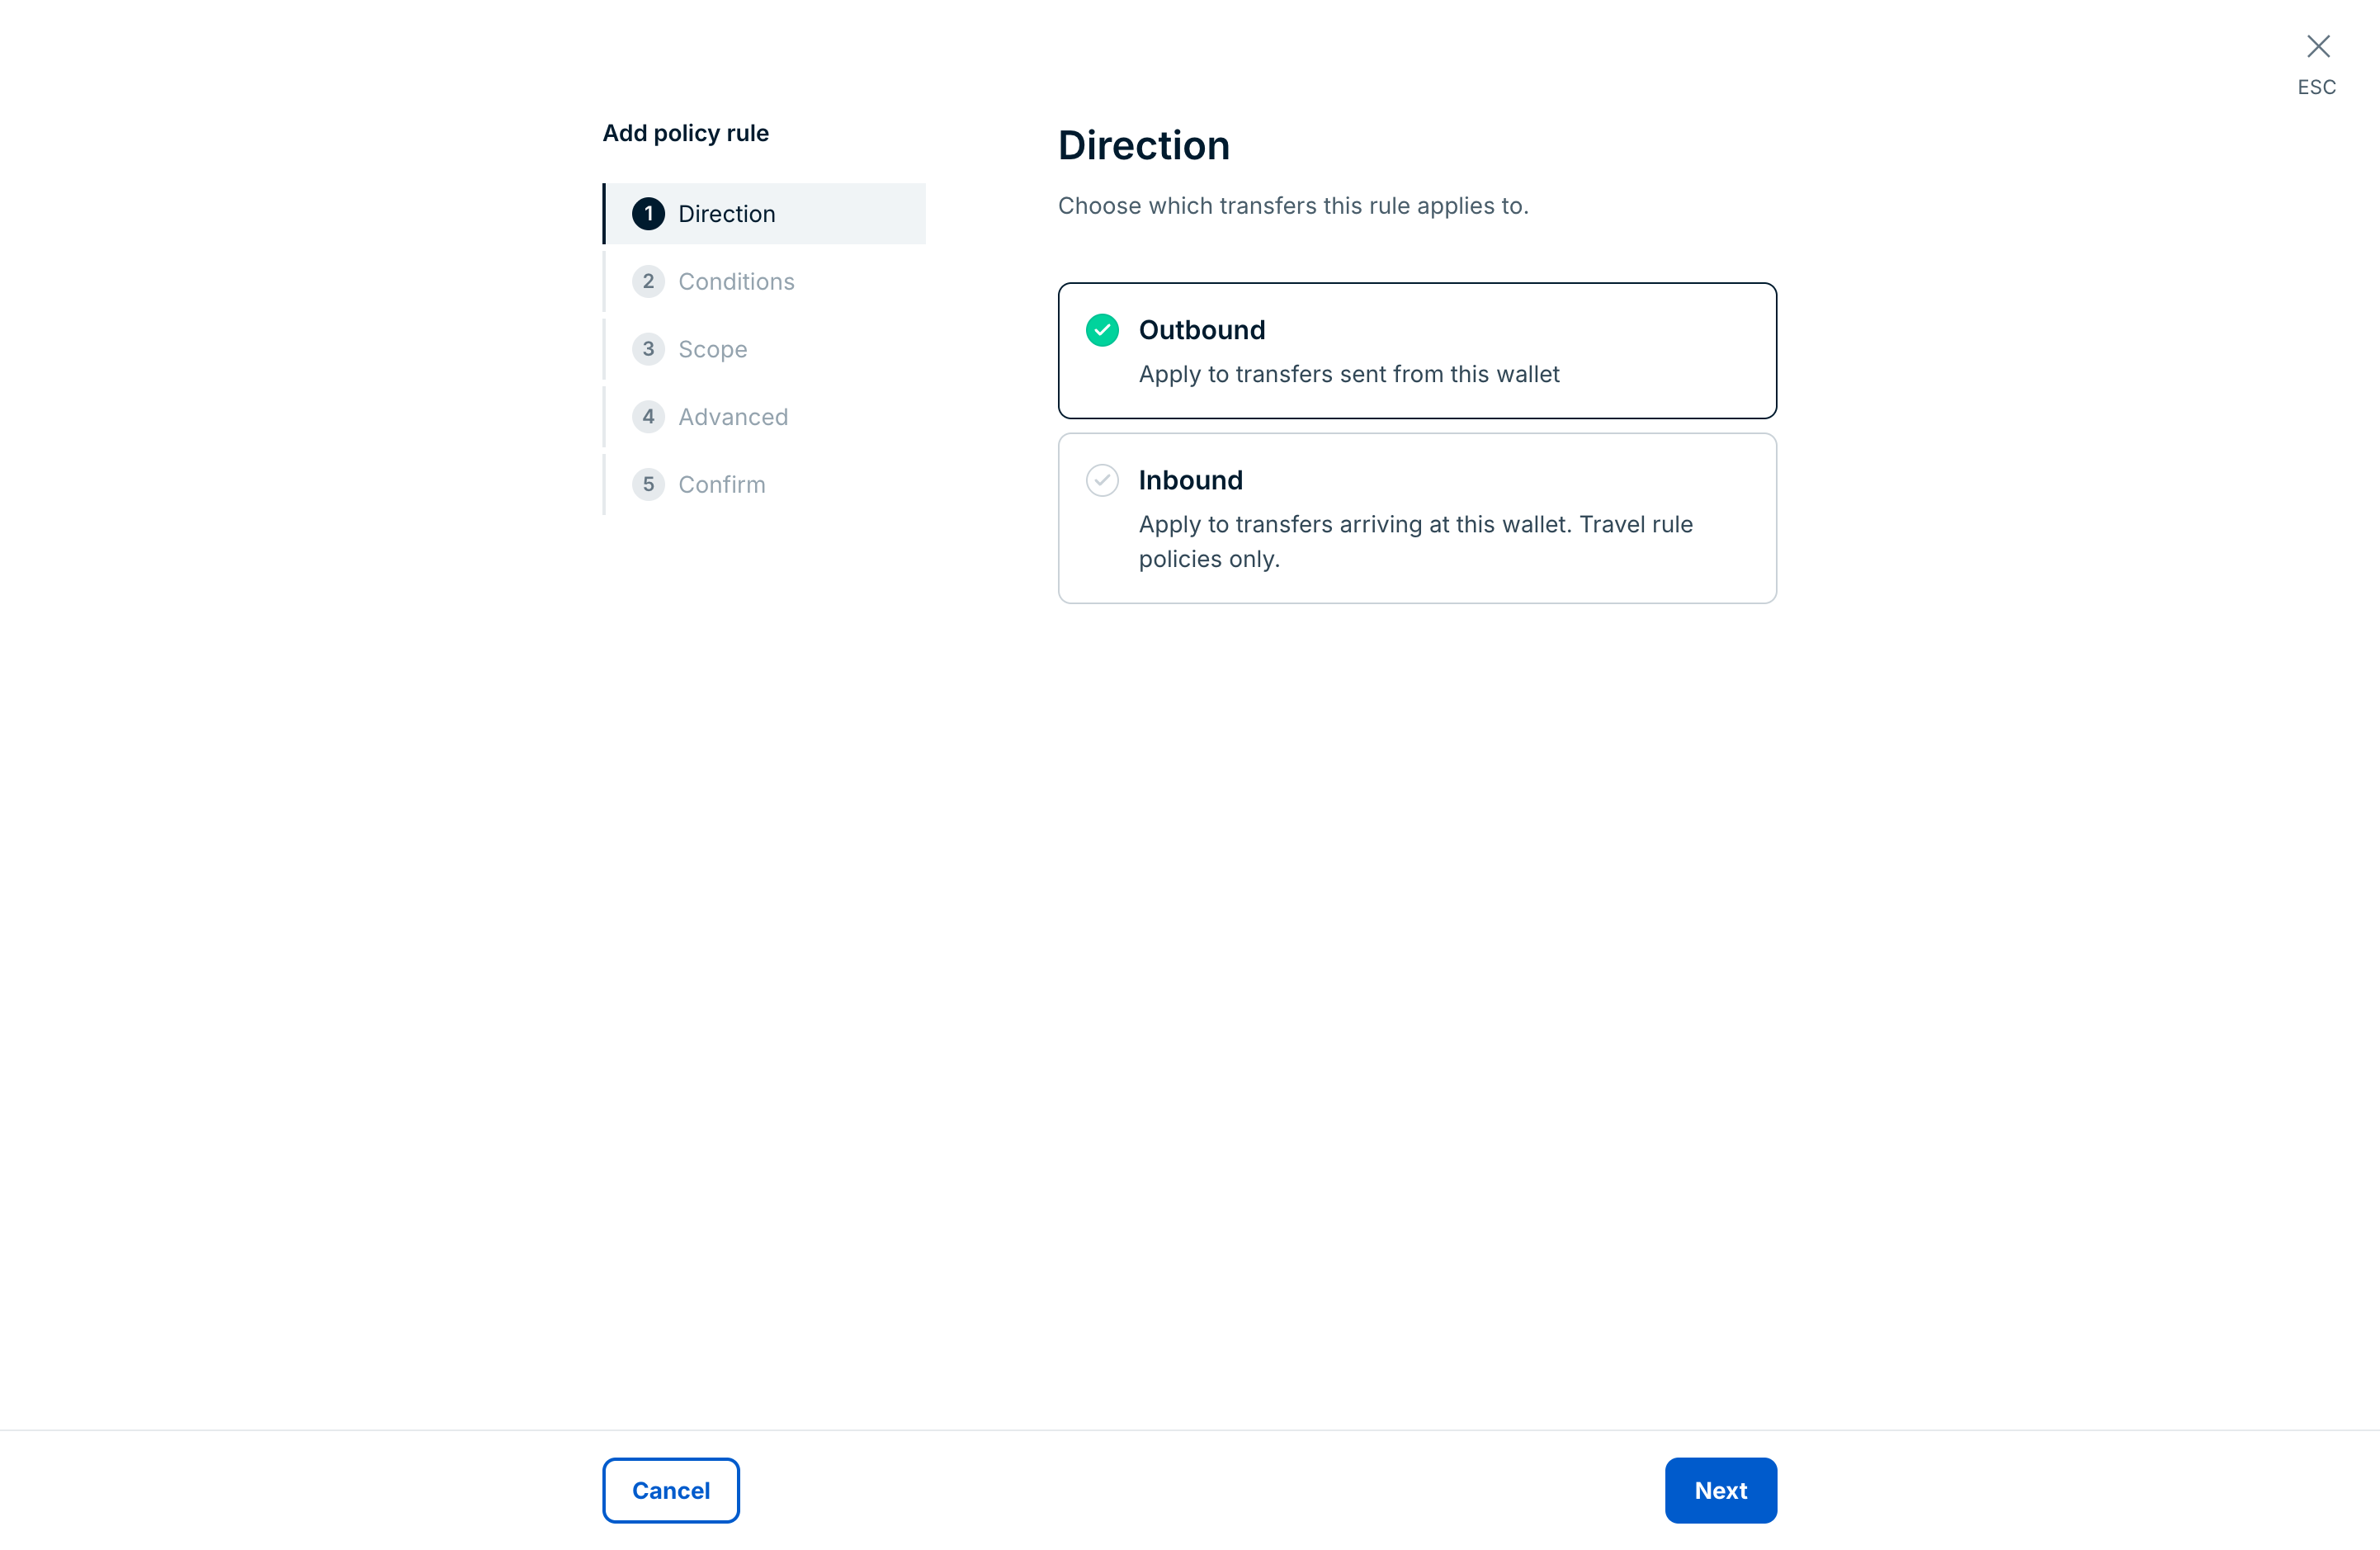
On the Direction step, select Outbound for transfers from this wallet, or Inbound for deposits into this wallet. Only Travel Rule rules support Inbound. Select Next.
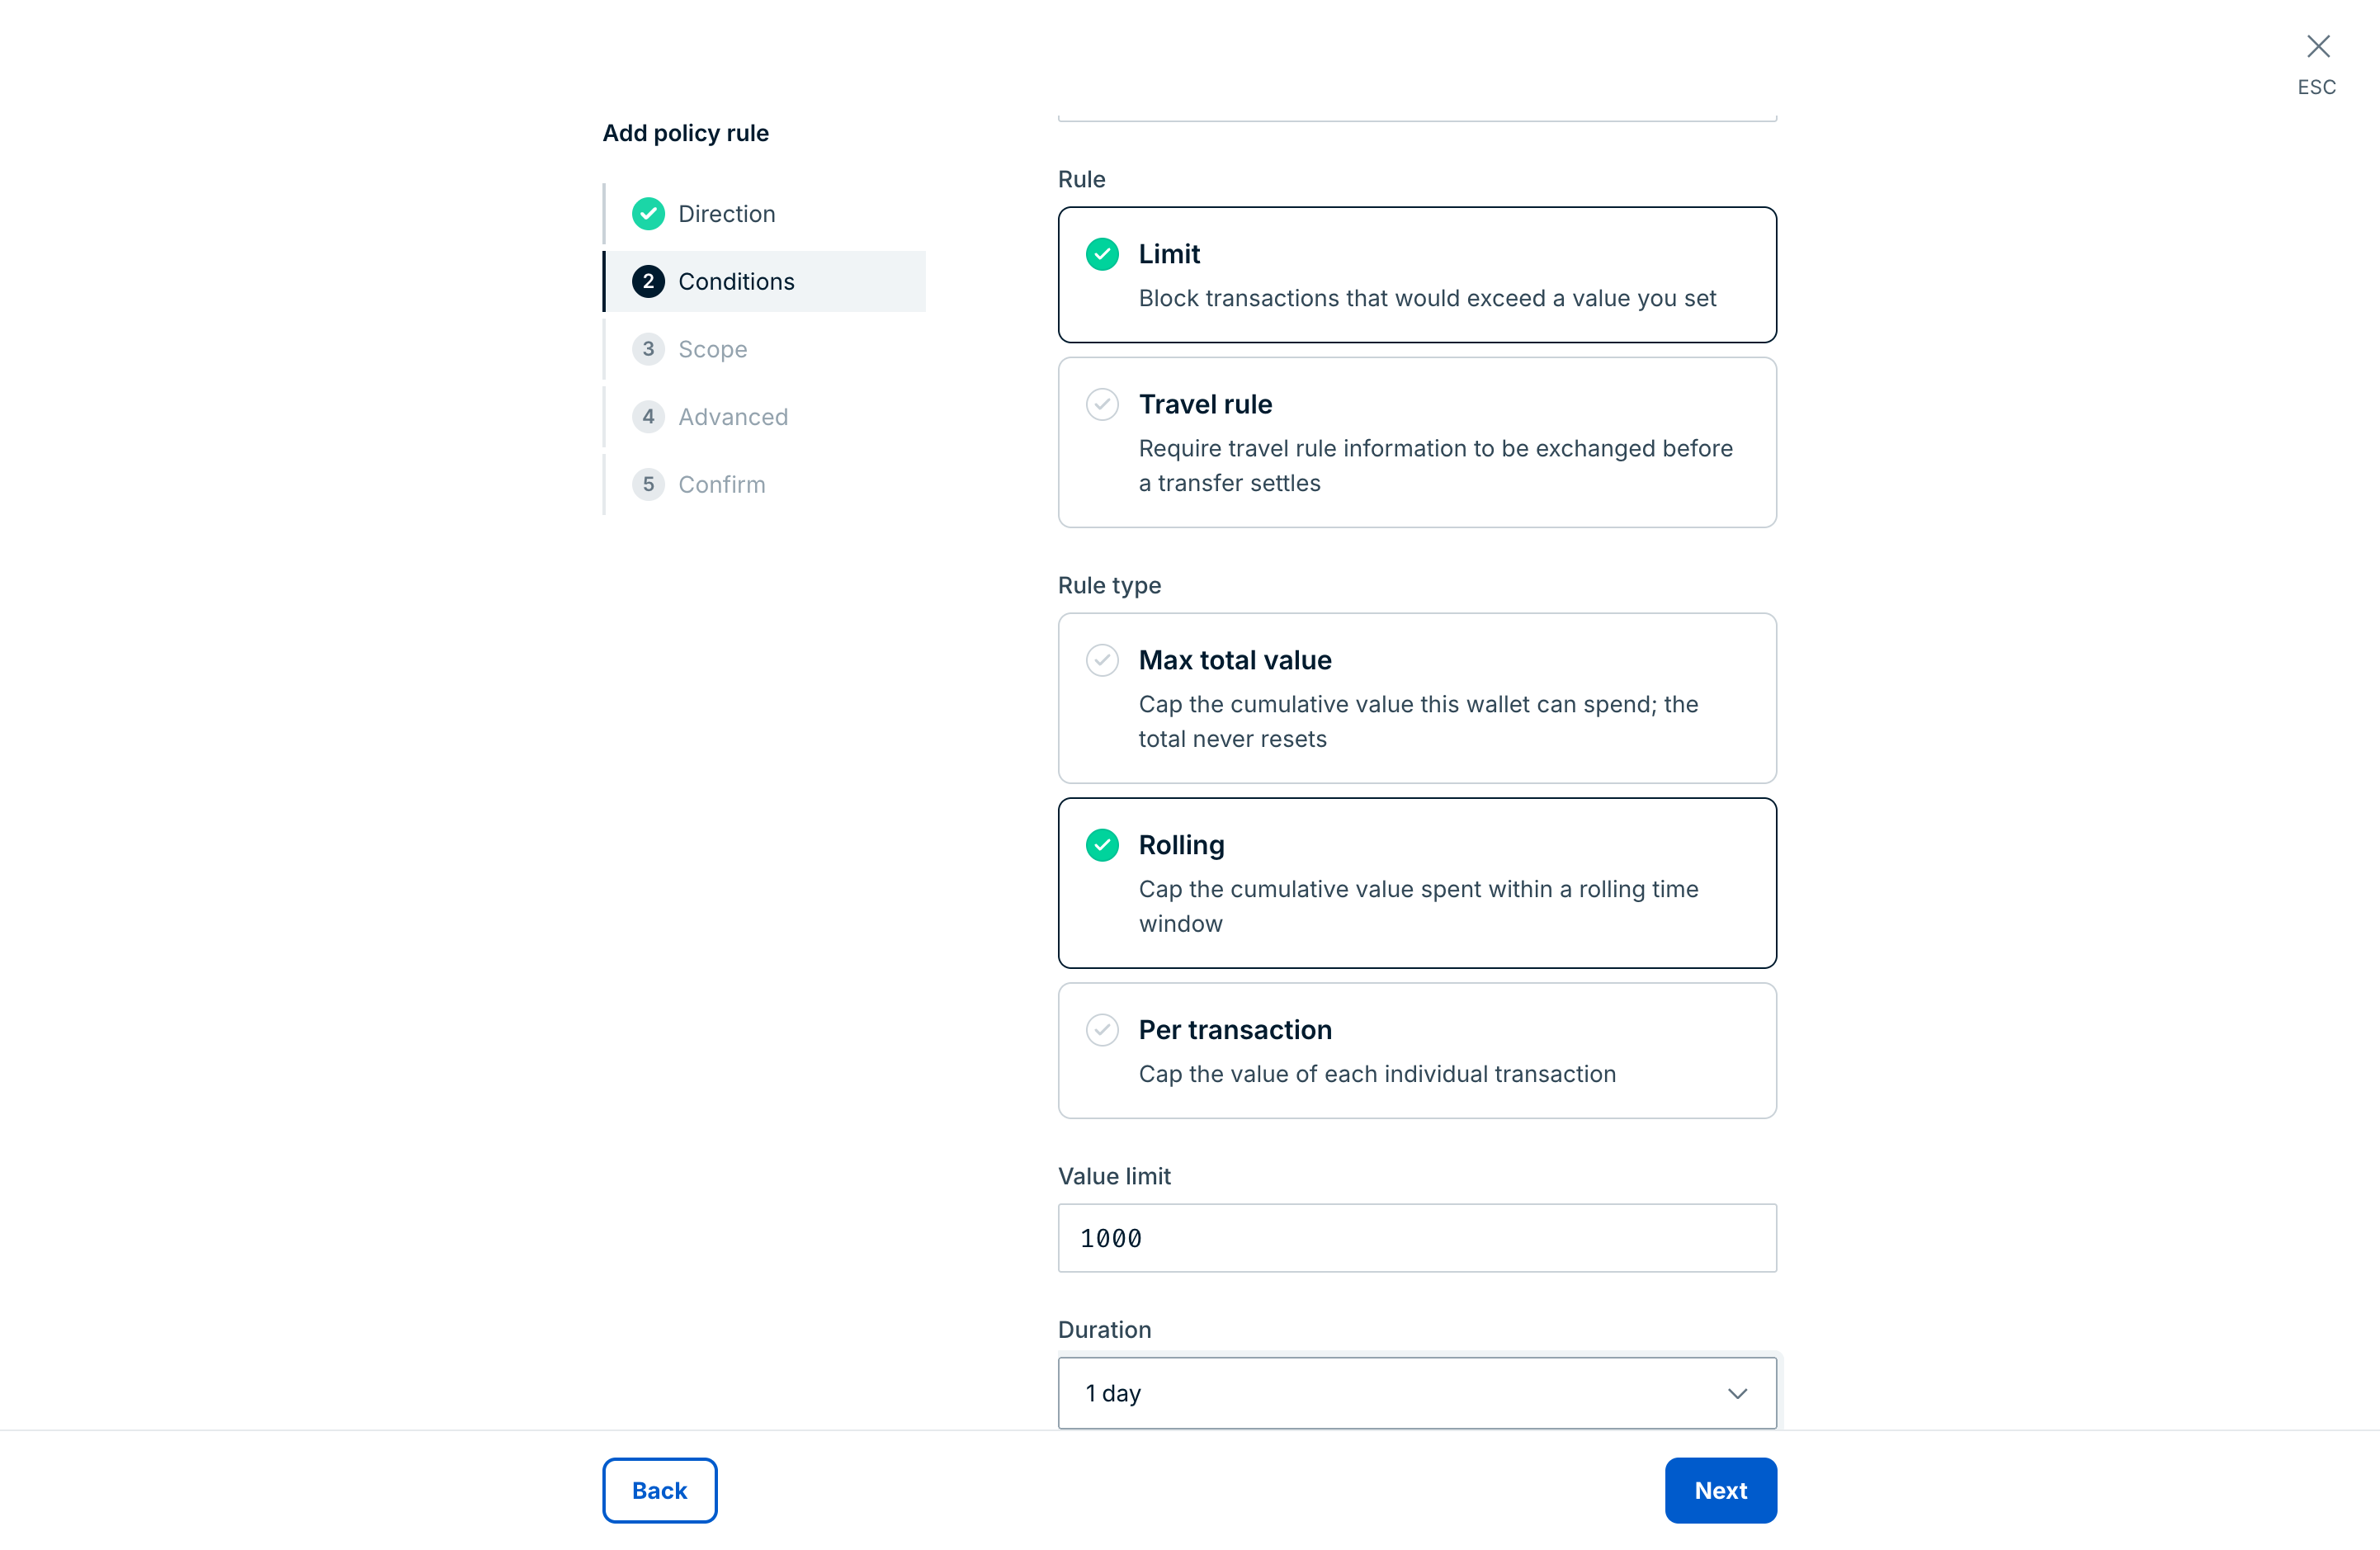
On the Rule step, select Limit, Approval, or Travel rule, and then select Next. Travel rule is unavailable until you connect a Travel Rule provider.
On the Conditions step, select the asset the rule applies to. The list shows assets currently held in the wallet.
Non-standard assetsIf the asset you need isn't listed, select Add asset and enter the asset's blockchain, standard, symbol, and contract address.
Set the conditions for the rule:
Limit: Enter the Value limit in the asset's native units (for example, ETH, not wei), and then select the limit type. See Policy reference for details on each limit type.
Limit type What it controls Example Per transaction (API: SINGLE_TX)Maximum amount for any single transaction No single transaction can exceed 10 ETH Rolling (API: ROLLING)Maximum amount within a time window No more than 100 ETH per 24 hours Max total value (API: TOTAL)Lifetime cap on total withdrawals No more than 1,000 ETH can ever leave this wallet For Rolling, select a Duration: 1 hour, 1 day, 1 week, 2 weeks, 1 month, 3 months, 6 months, or 1 year. To enter another window, select Custom..., enter a number, and select Hours, Days, Weeks, Months, or Years. The window must be shorter than one year. The console offers 1 year, but Ripple Custody (Wallet) rejects a rule with that duration.
Approval: See Create a step-up approval rule via the console.
Travel rule: See Create a Travel Rule policy rule via the console.
Select Next.
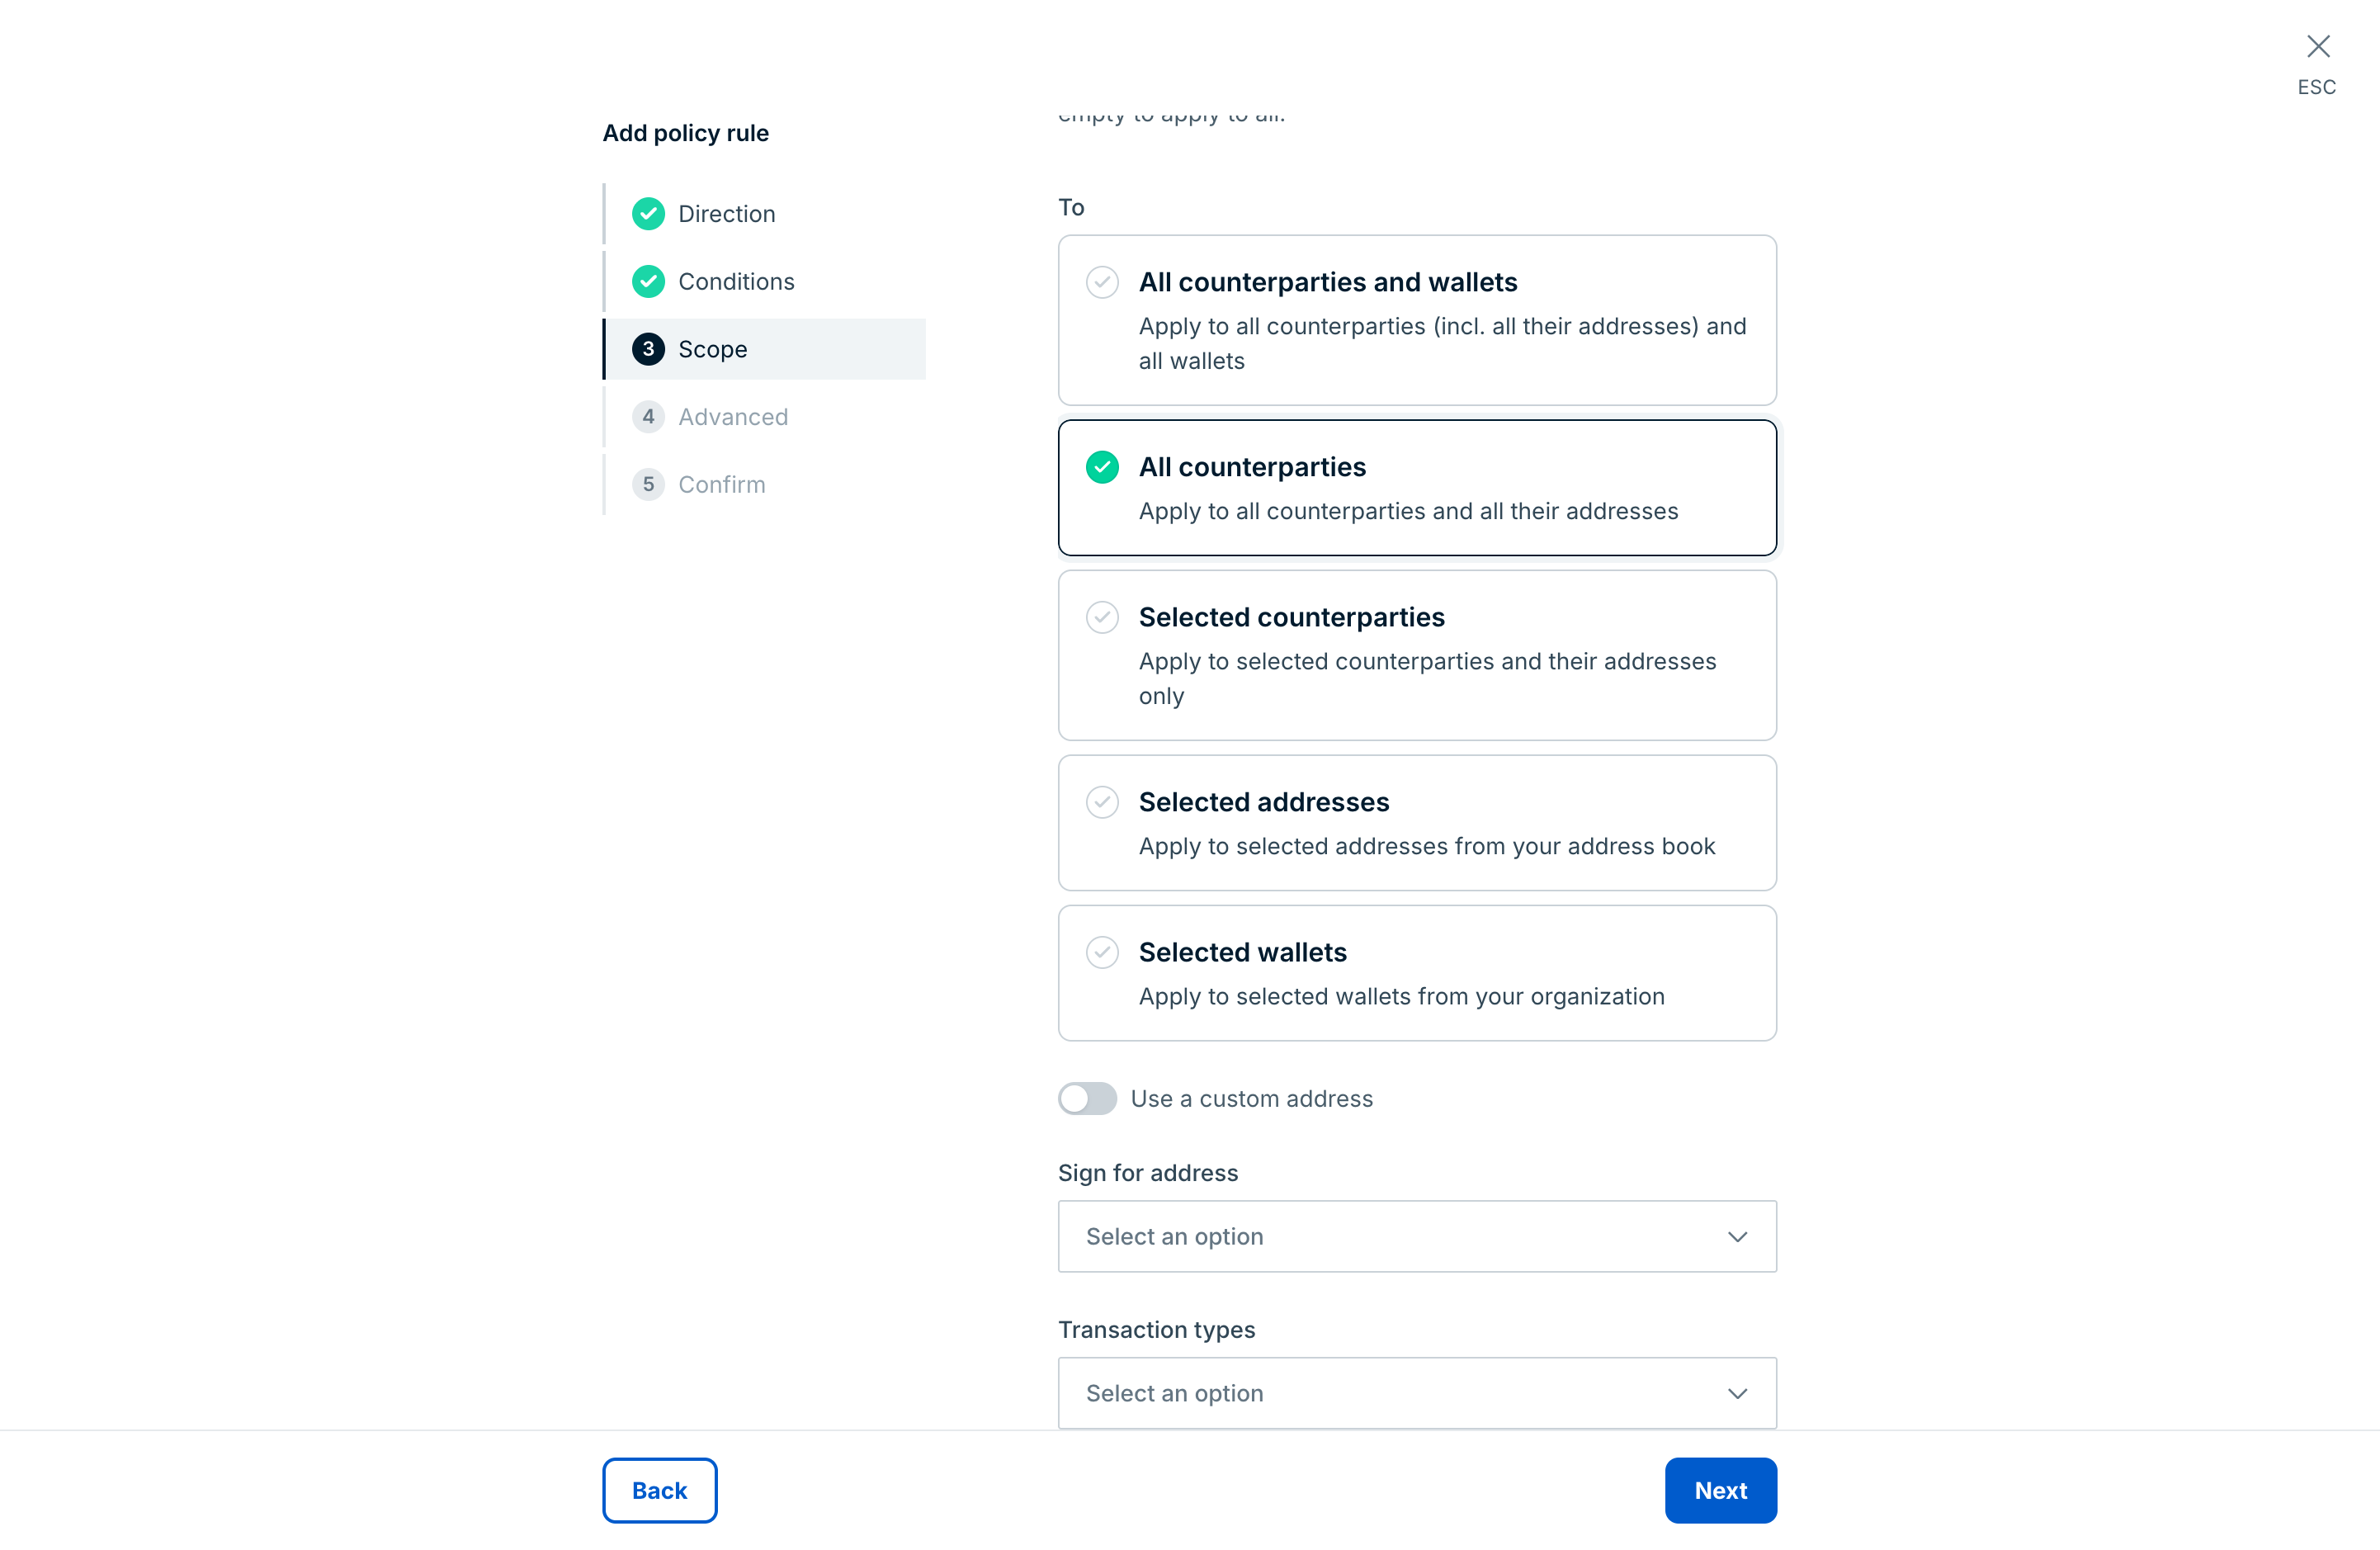
On the Scope step, under To, select the destinations the rule applies to:
- All counterparties and wallets: Selected by default. The broadest option, which covers every destination.
- All counterparties: Covers transactions to any counterparty and all its addresses. It doesn't cover transfers to your own wallets. In the API, this is the
ALL_COUNTERPARTIESmatcher. - Selected counterparties: Covers transactions only to specific counterparties and all addresses on those counterparty records. In the API, this is the
COUNTERPARTY_IDmatcher. - Selected addresses: Covers transactions only to specific addresses from your address book.
- Selected wallets: Covers transactions only to specific wallets within your organization.
You can also narrow the rule by Sign for address and Transaction types, and, on an EVM wallet, by Chain IDs. To enter a signing address that isn't listed, turn on Use a custom address. Leave a field empty to apply the rule to all values. Select Next. Approval rules skip the Scope and Advanced steps, because they don't support matchers.
 Cross-chain raw signing requires Chain ID
For cross-chain raw signing to an EVM chain that Ripple Custody (Wallet) doesn't natively support, add the target chain ID under Chain IDs (the
CHAIN_IDmatcher). Rules without a matchingCHAIN_IDmatcher don't authorize those transactions.On the Advanced step, leave All selected, or restrict the rule to one User or API credential. Select Next.
Each option in the Scope and Advanced steps sets a matcher:
Option API value What it controls Transaction types TRANSACTION_TYPEApplies the rule only to selected transaction types (for example, OfferCreateonly on an XRP Ledger wallet).User USERApplies the rule only to transactions initiated by the selected user. API credential API_CREDENTIALApplies the rule only to transactions initiated by the selected API credential. Sign for address SIGN_FORApplies the rule only to transactions signed for selected addresses (multi-signature scenarios). Selected counterparties COUNTERPARTY_IDApplies the rule only to selected counterparties and their registered addresses. Selected addresses ADDRESS_IDApplies the rule only to selected address book entries. Selected wallets WALLET_IDApplies the rule only to selected wallets in your organization. Chain IDs CHAIN_IDApplies the rule only to selected EVM chain IDs for cross-chain raw signing. On the Confirm step, review the rule, and then select Add policy rule.
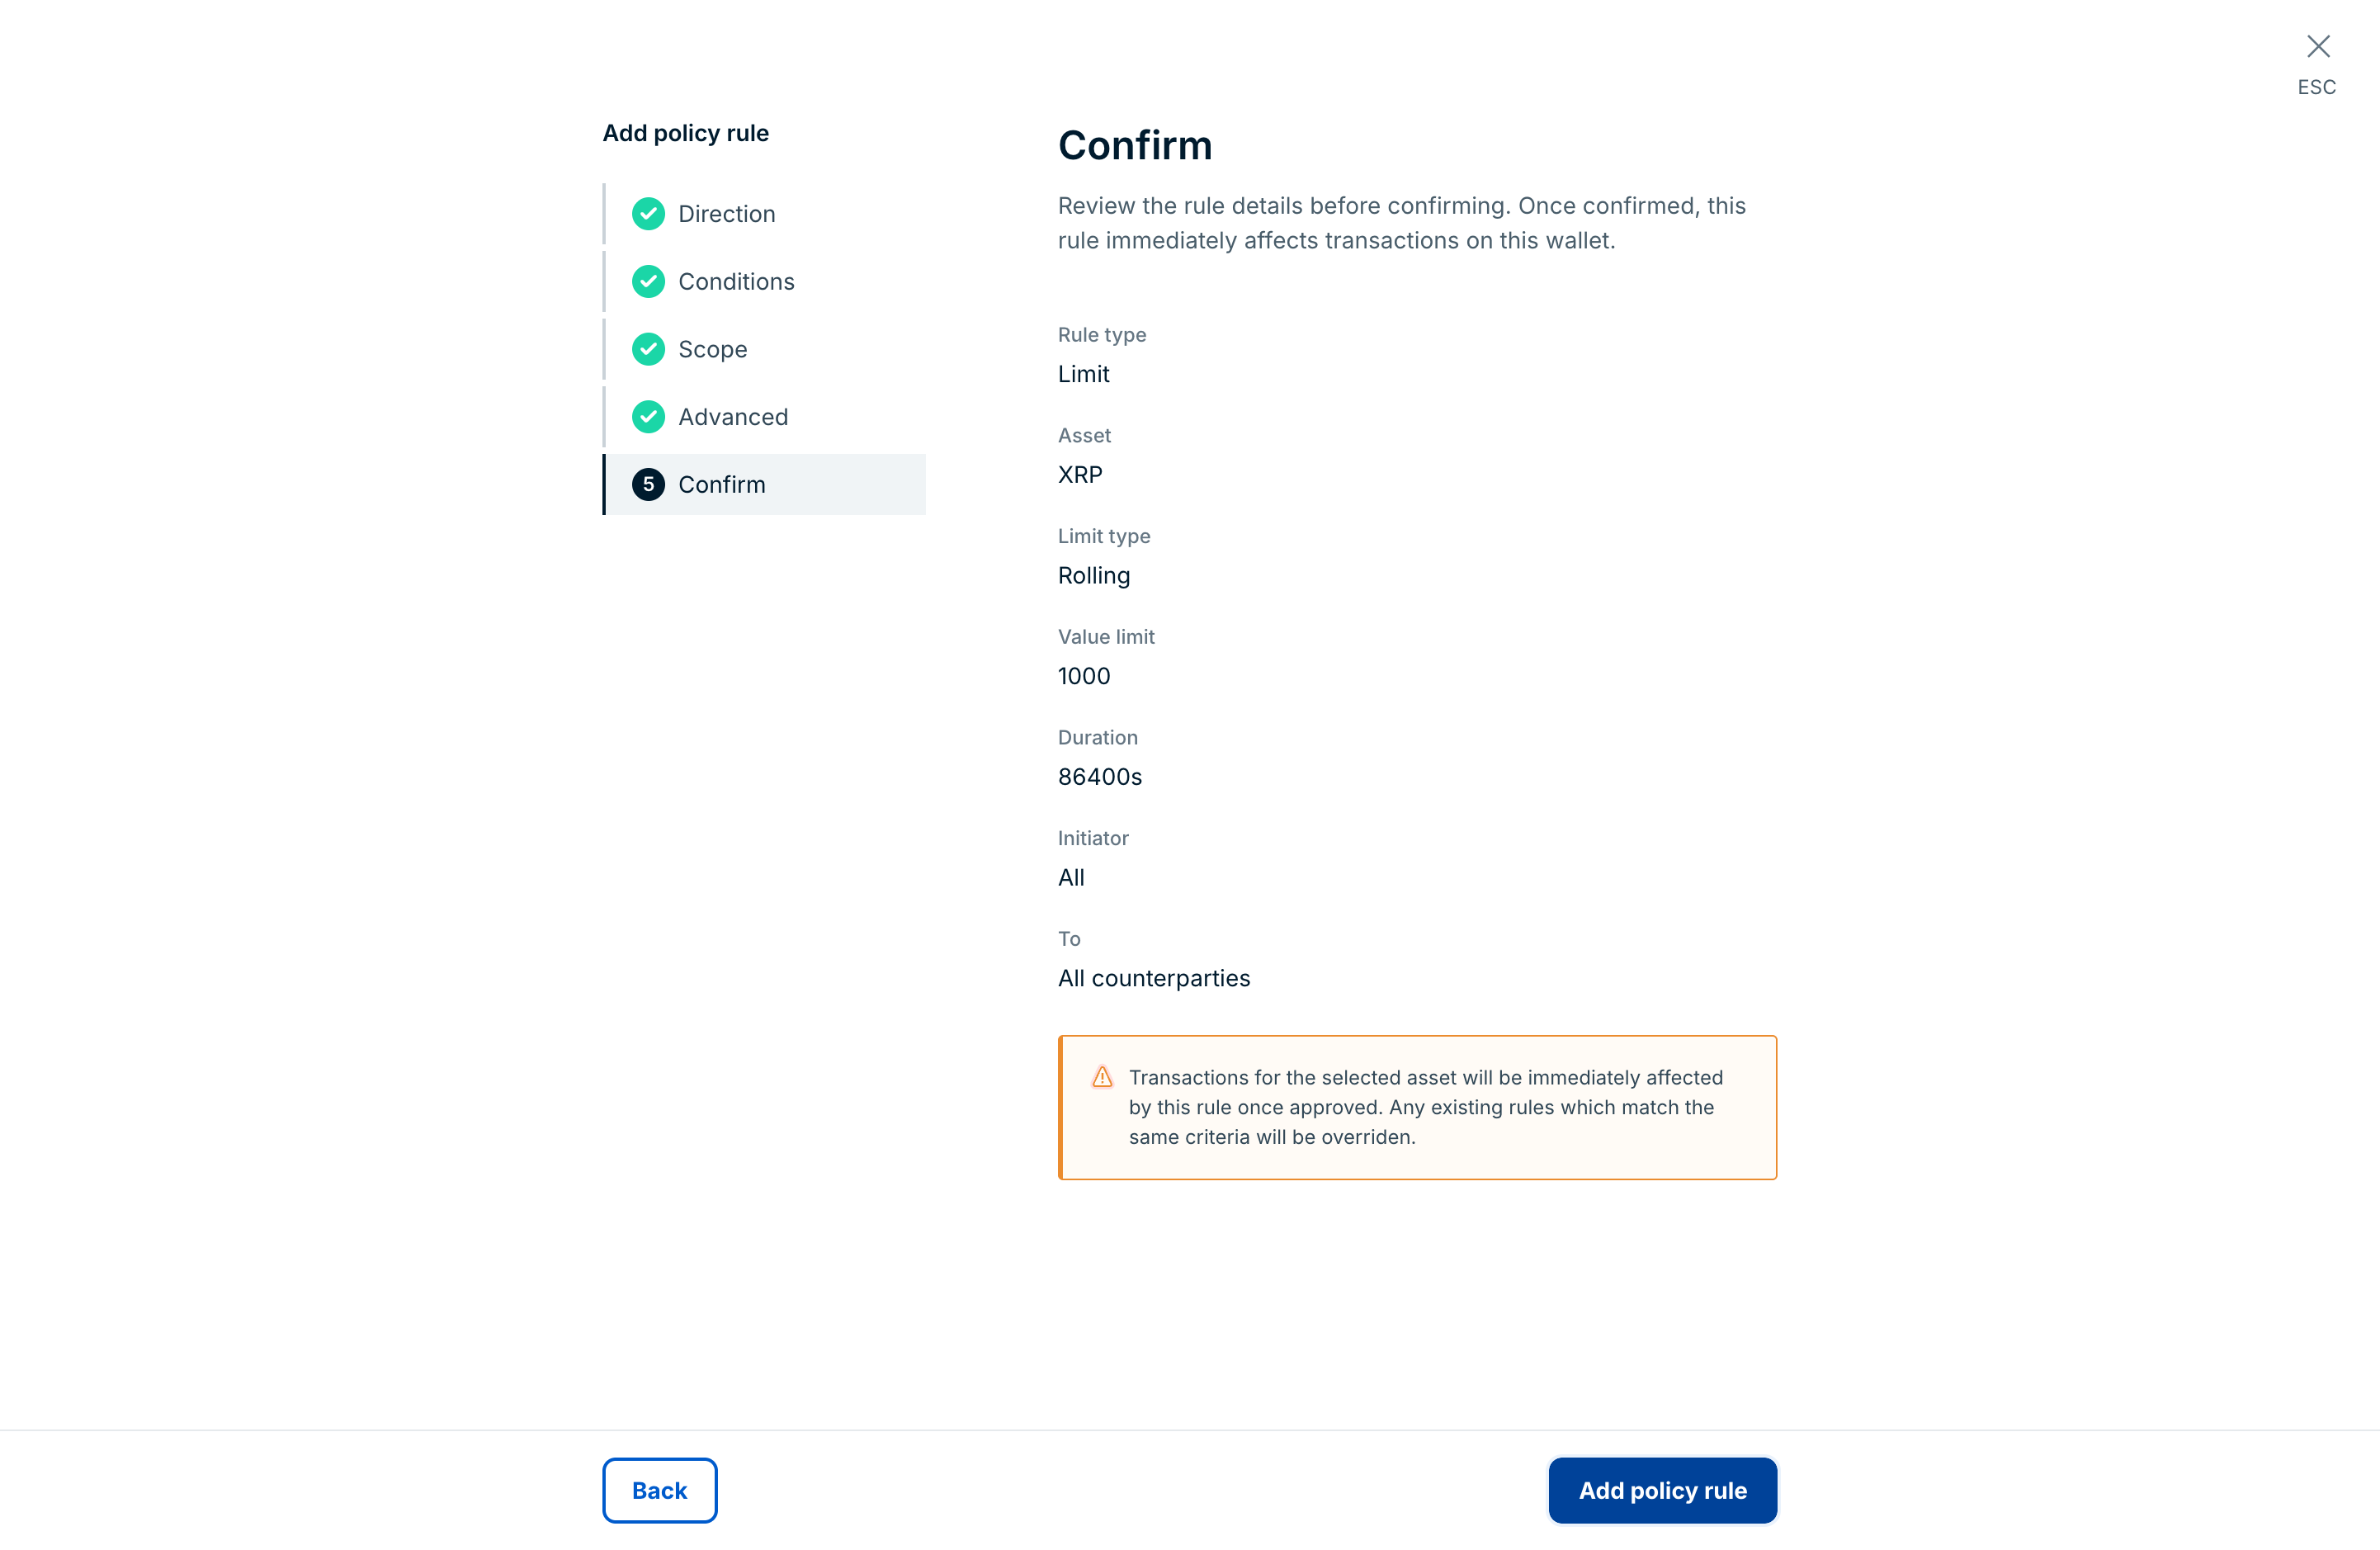
What happens next depends on your organization's approval configuration:
With approval groups configured: The policy shows Inactive | Approval pending. Designated approvers receive a notification to review the policy, and find the request under Notifications > Approvals. After the required number of approvers authorize it, the policy shows Active | Enabled. If approvers don't respond within the timeout window, or if too many skip, the policy is rejected.
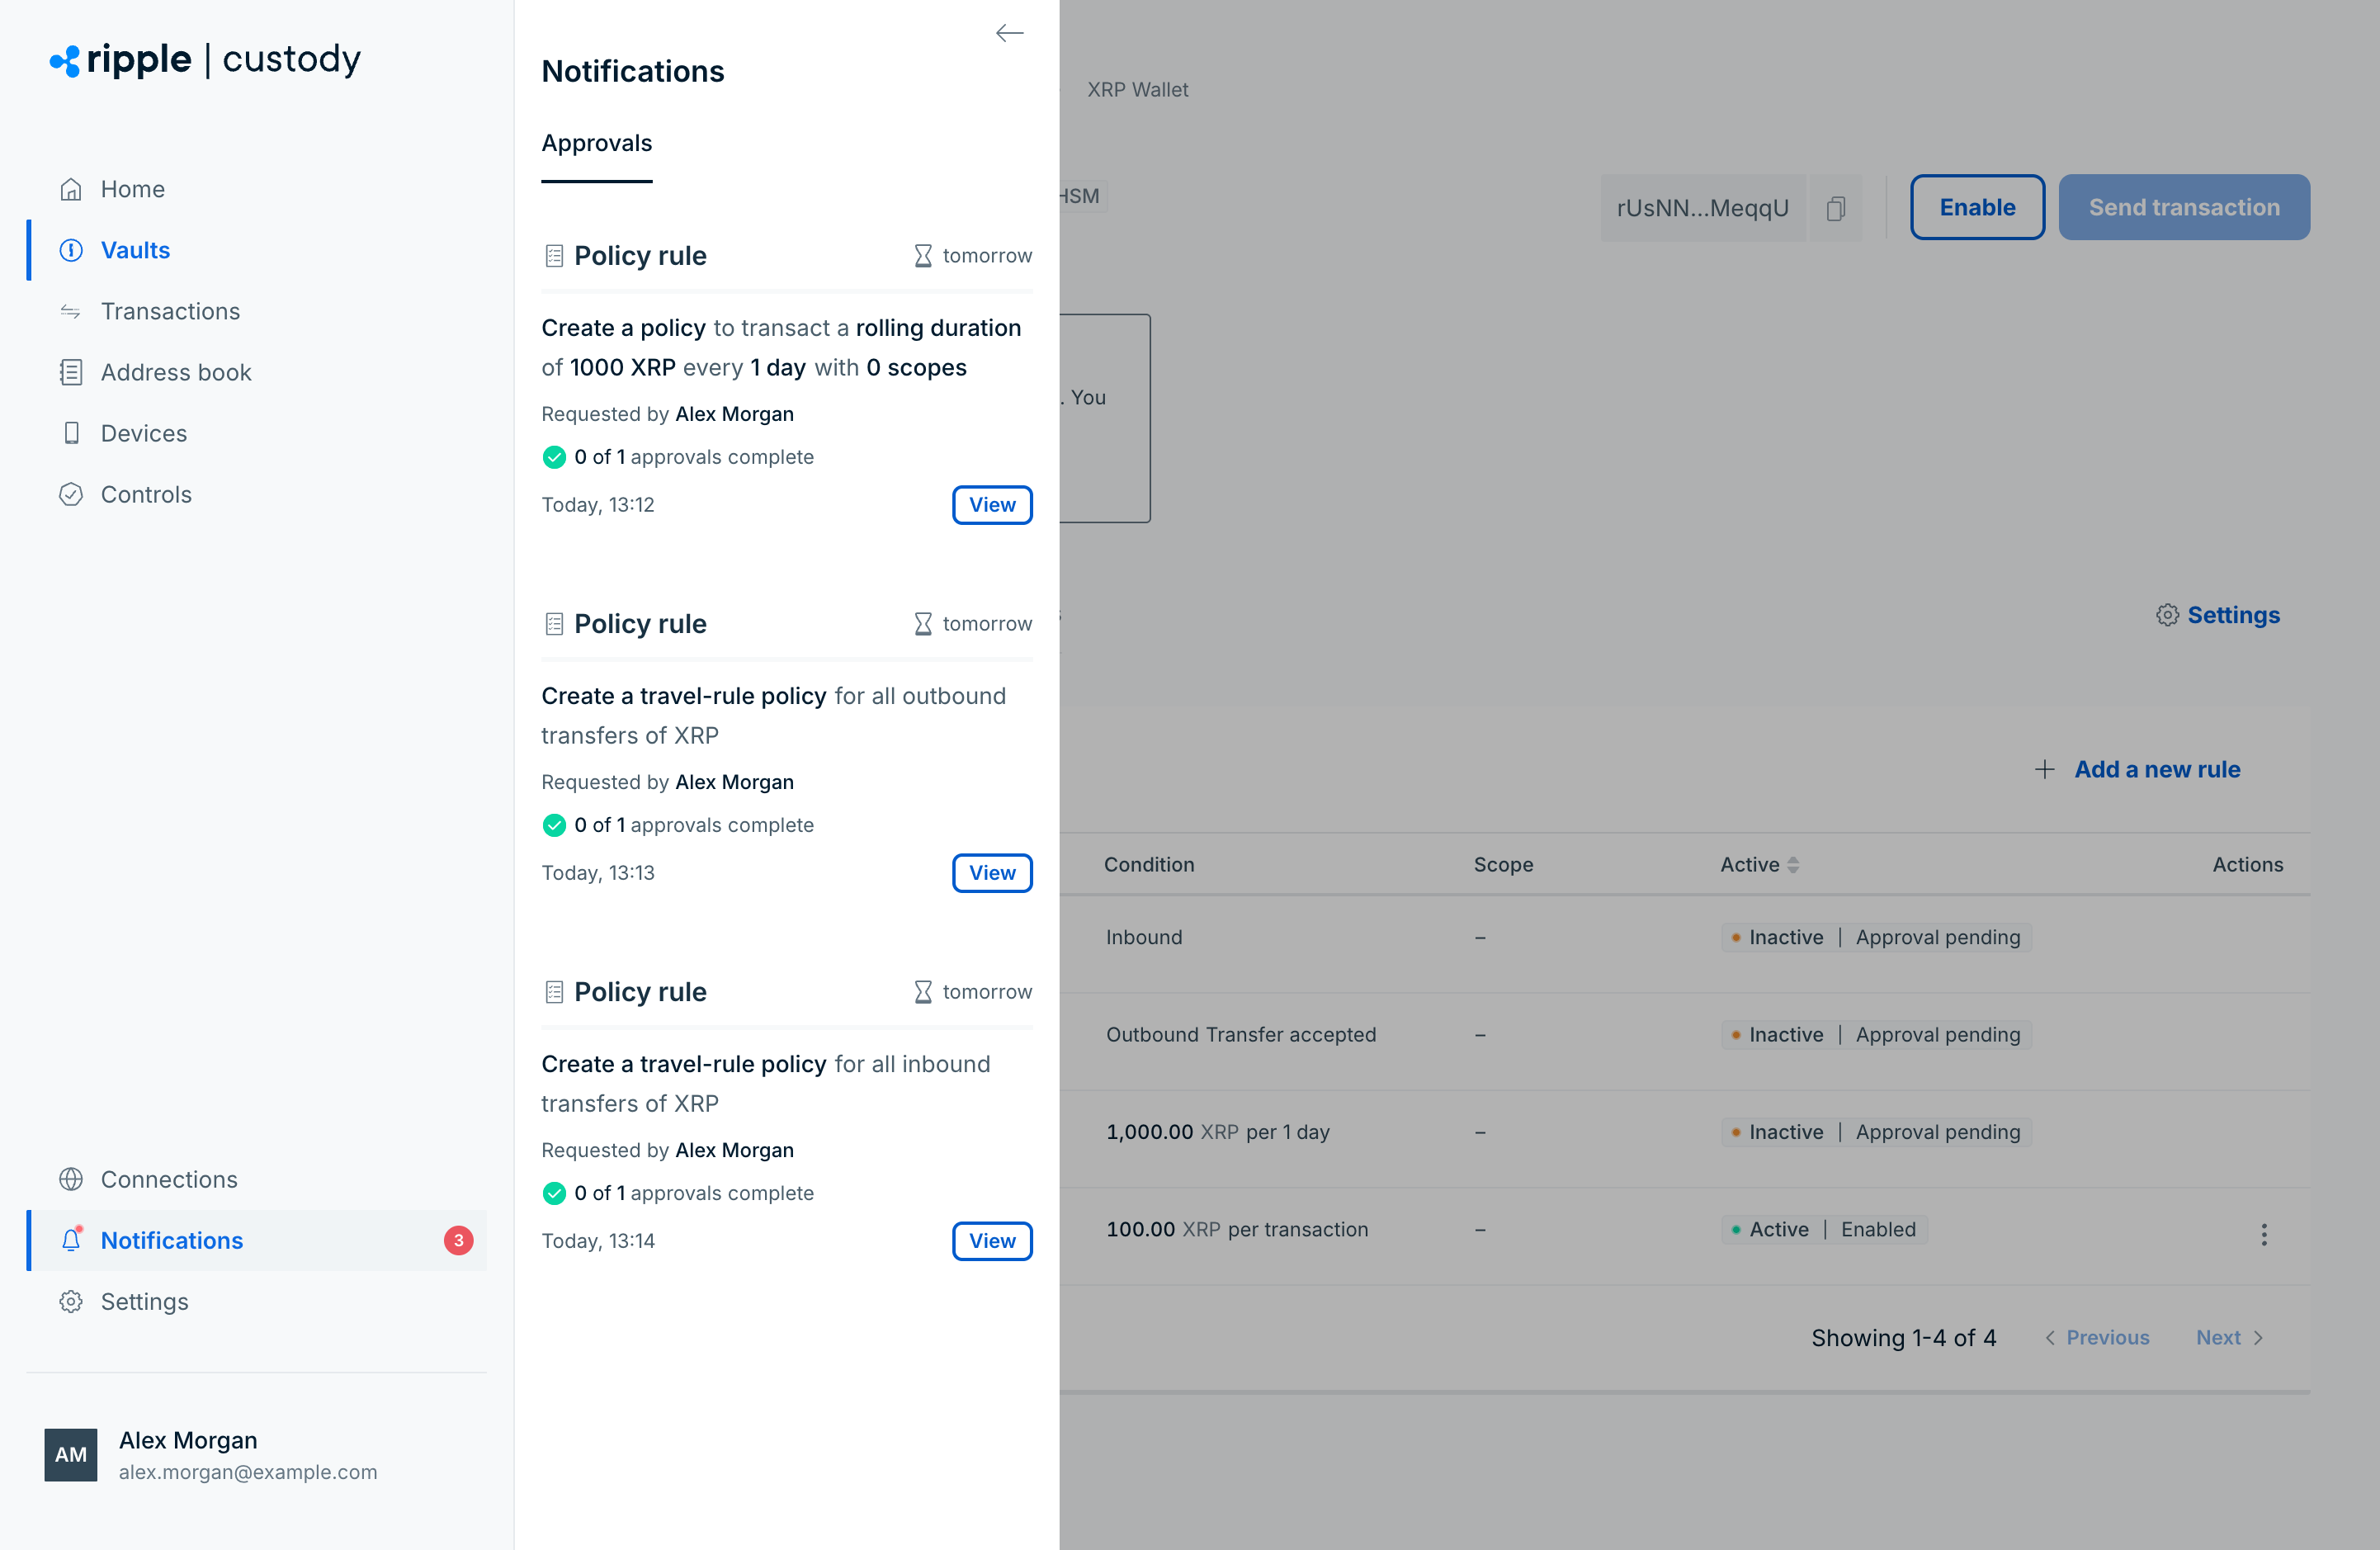
Without approval groups configured: The policy activates immediately after creation. You can start using it right away.
The policy engine evaluates every outgoing transaction against a policy the moment the policy becomes active. Ripple Custody (Wallet) blocks any transaction that exceeds the limits or targets an unpermitted destination.
Go to Controls > Approval groups to see if an approval group exists for Policy rules. See Configure approval flows to create one.
Each policy displays its current status in the Active column of the Policy tab. For example, a policy shows Inactive | Approval pending while its creation waits for approval, Active | Enabled while it's active, and Active | Approval pending while its deletion waits for approval. After a deletion takes effect, the policy no longer appears in the list. See Rule statuses for the complete status reference.
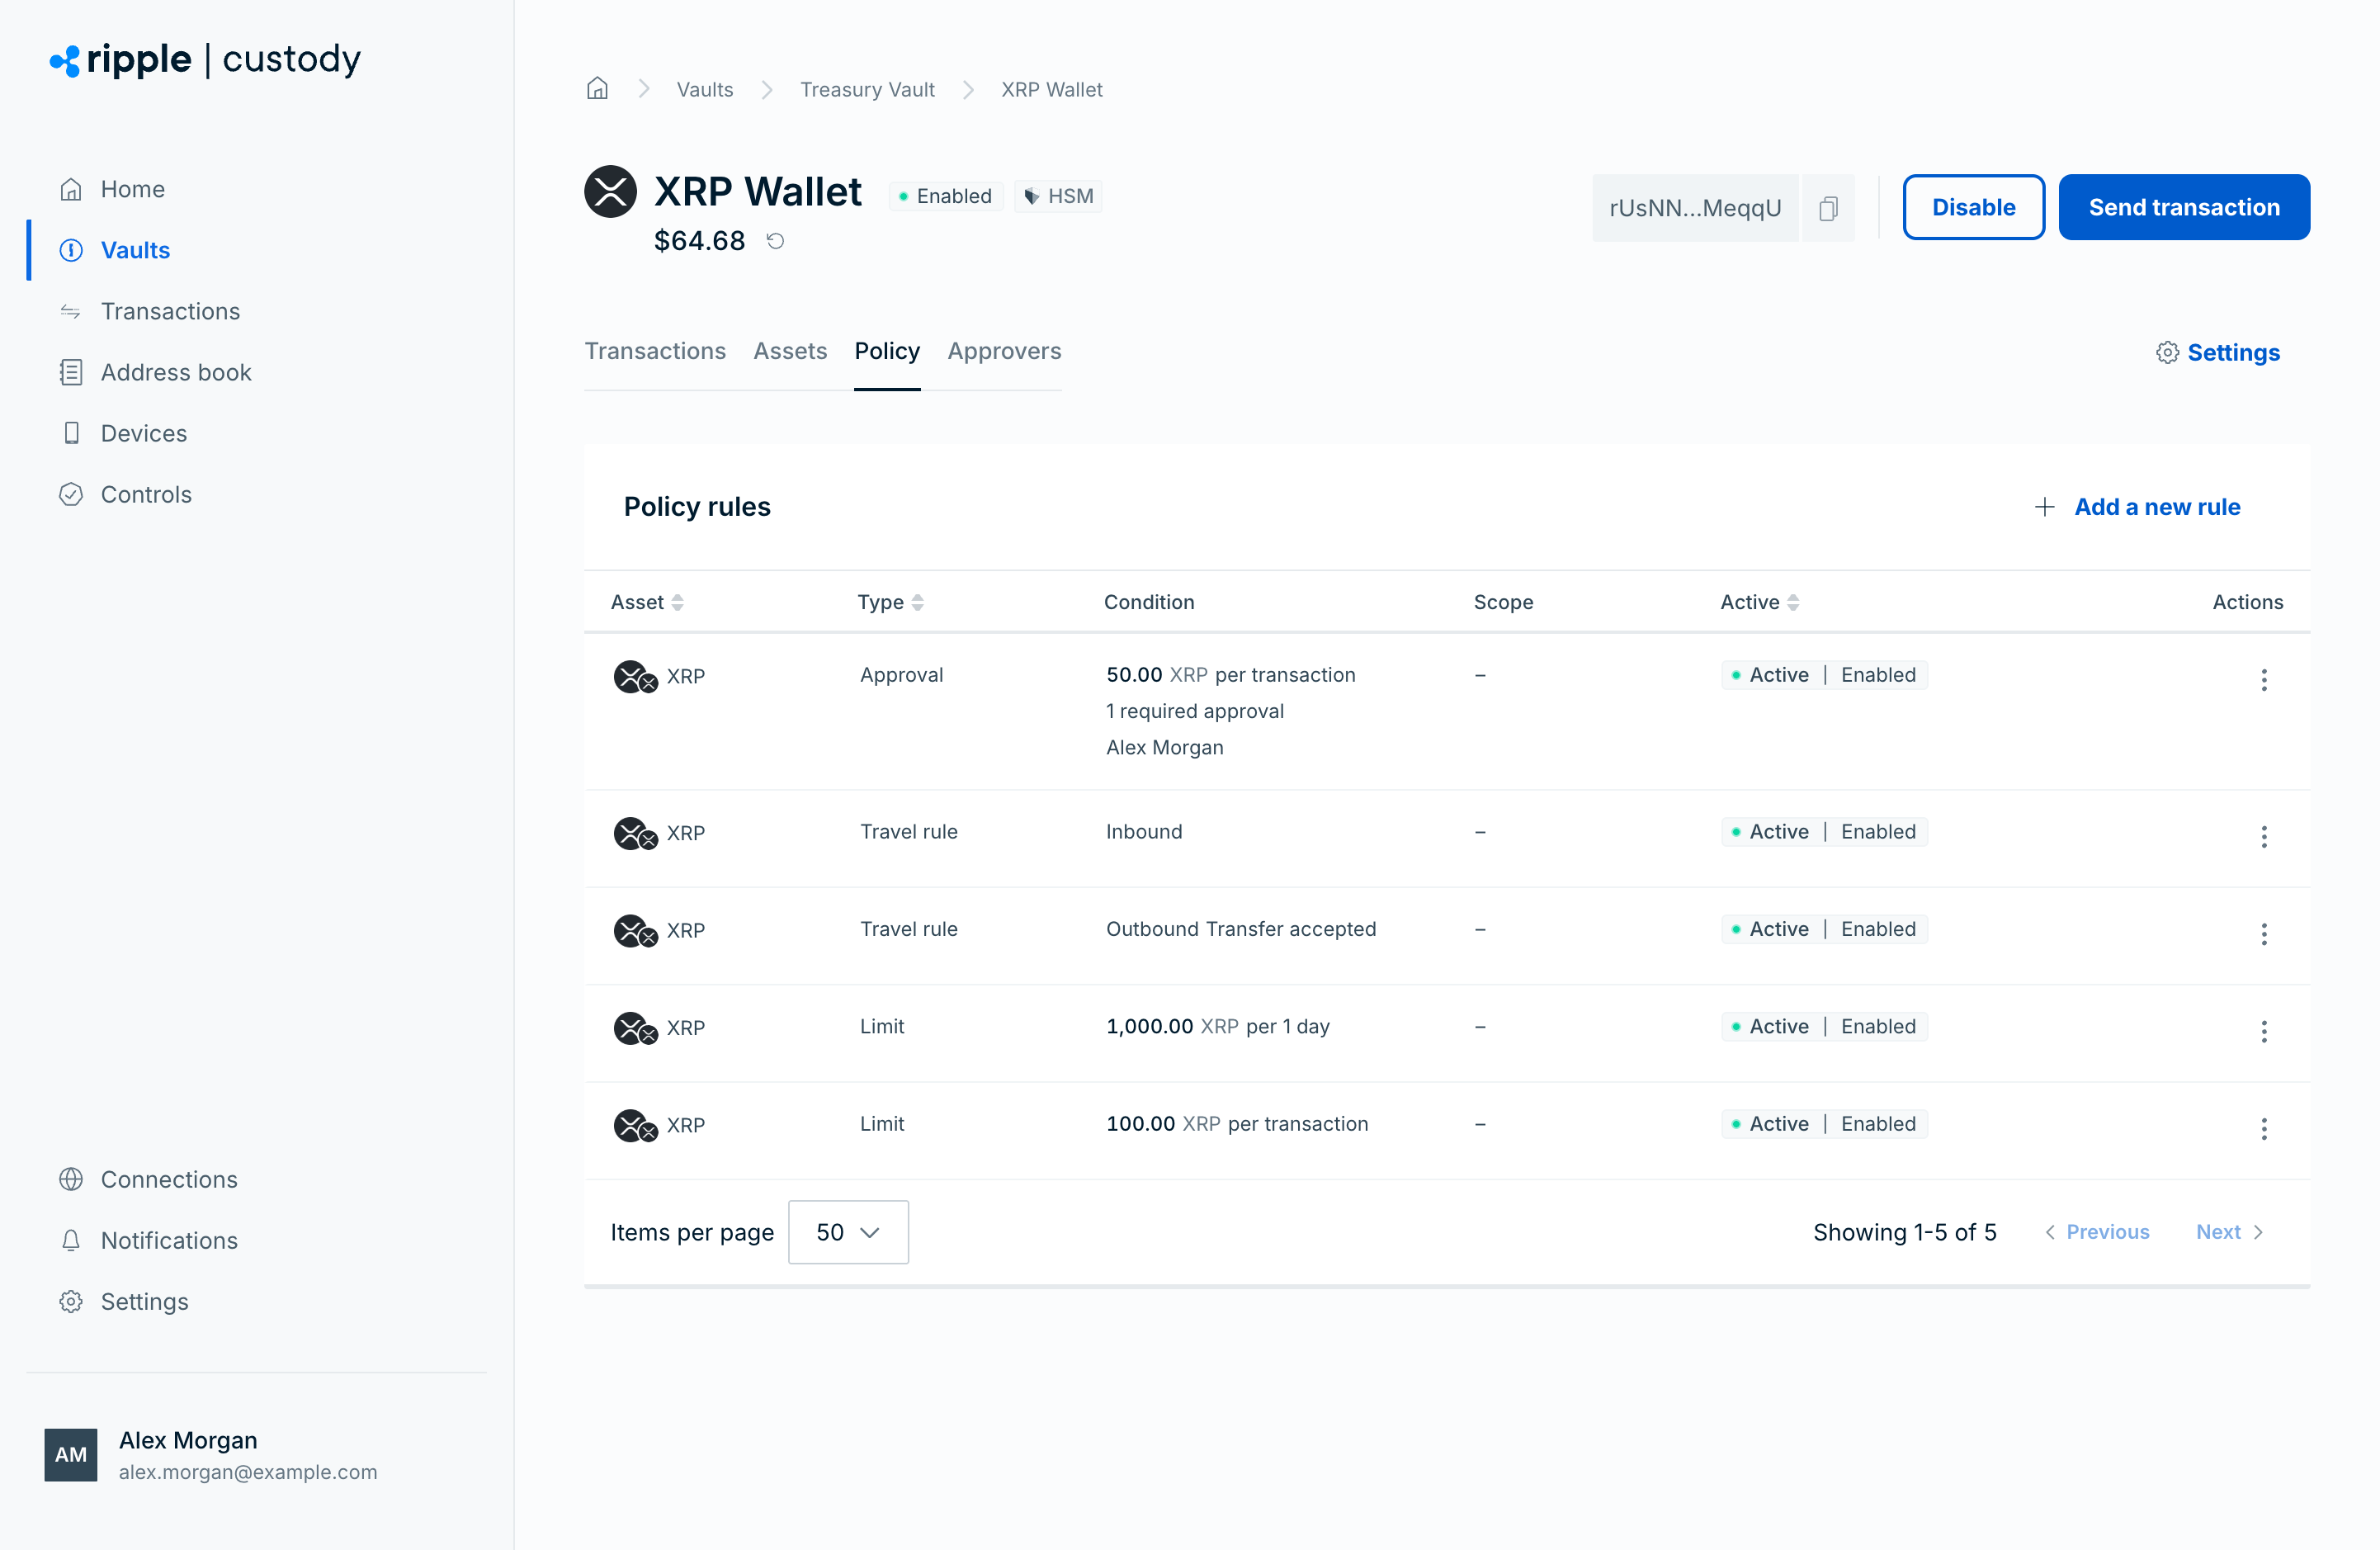
Policies are immutable. You can't edit an existing policy. To change a policy:
- Create a new policy for the same asset with the updated values.
- Wait for the new policy to be approved, if your organization requires approval, and become active.
- Delete the old policy.
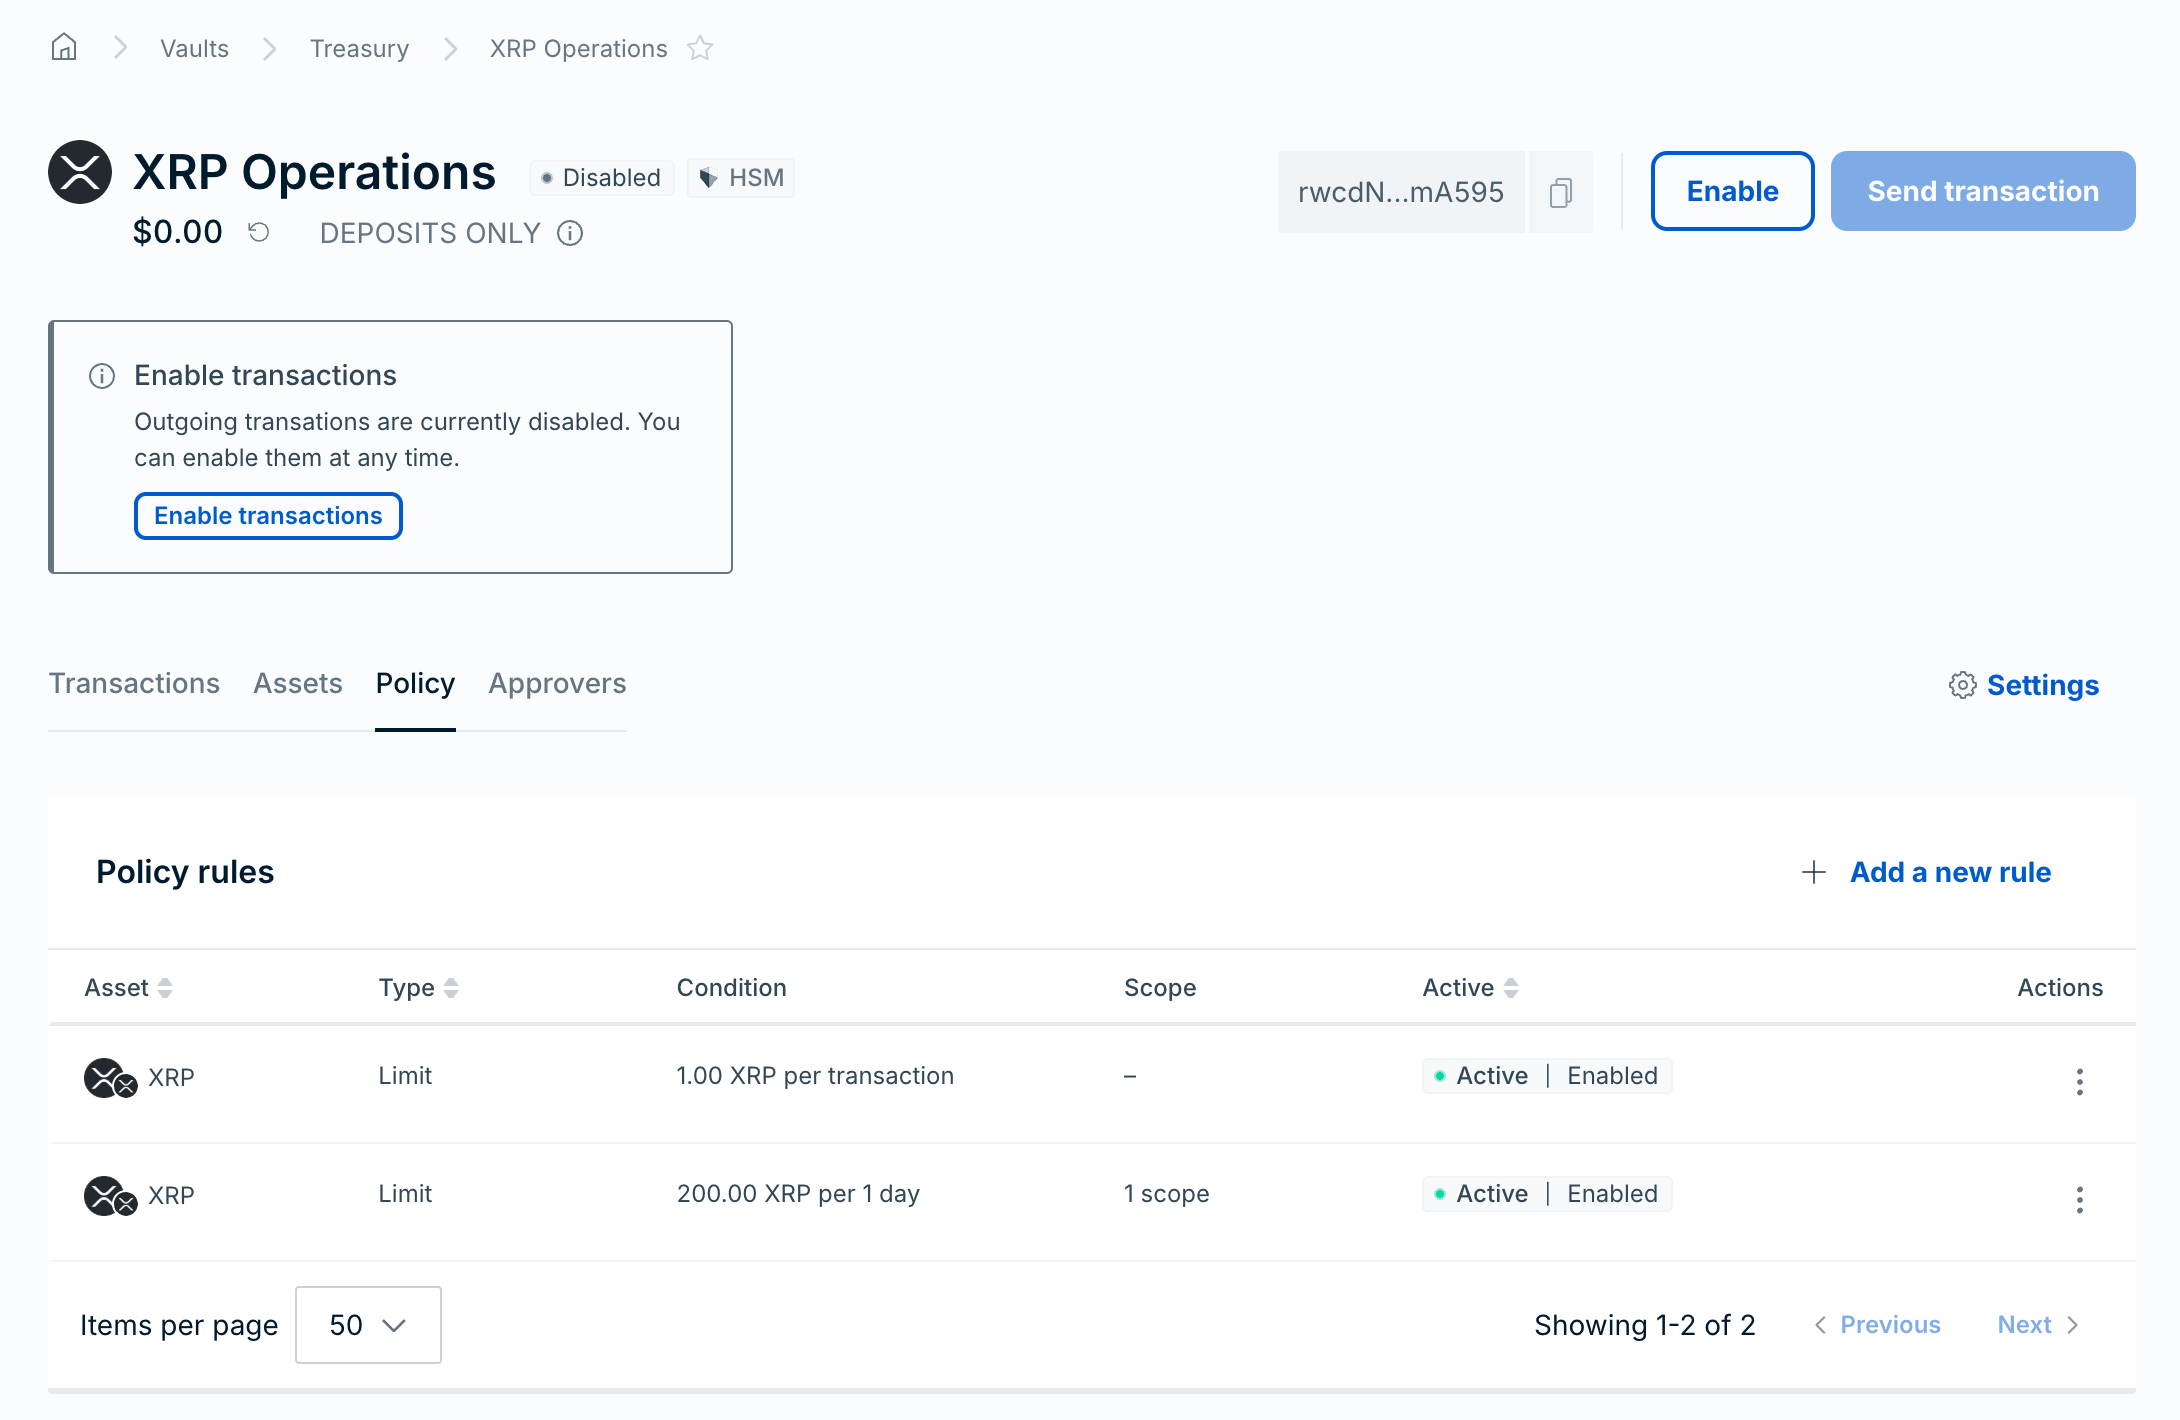
Create the new policy before deleting the old one. This ensures continuous protection with no window where no policy applies.
See Policy concepts for why policies are immutable.
Required role: Owner or Administrator.
- Open the wallet and go to the Policy tab.
- Find the policy in the table.
- Open the Actions menu (three dots) on the policy row and select Delete.
- In the Delete policy dialog, select Submit.
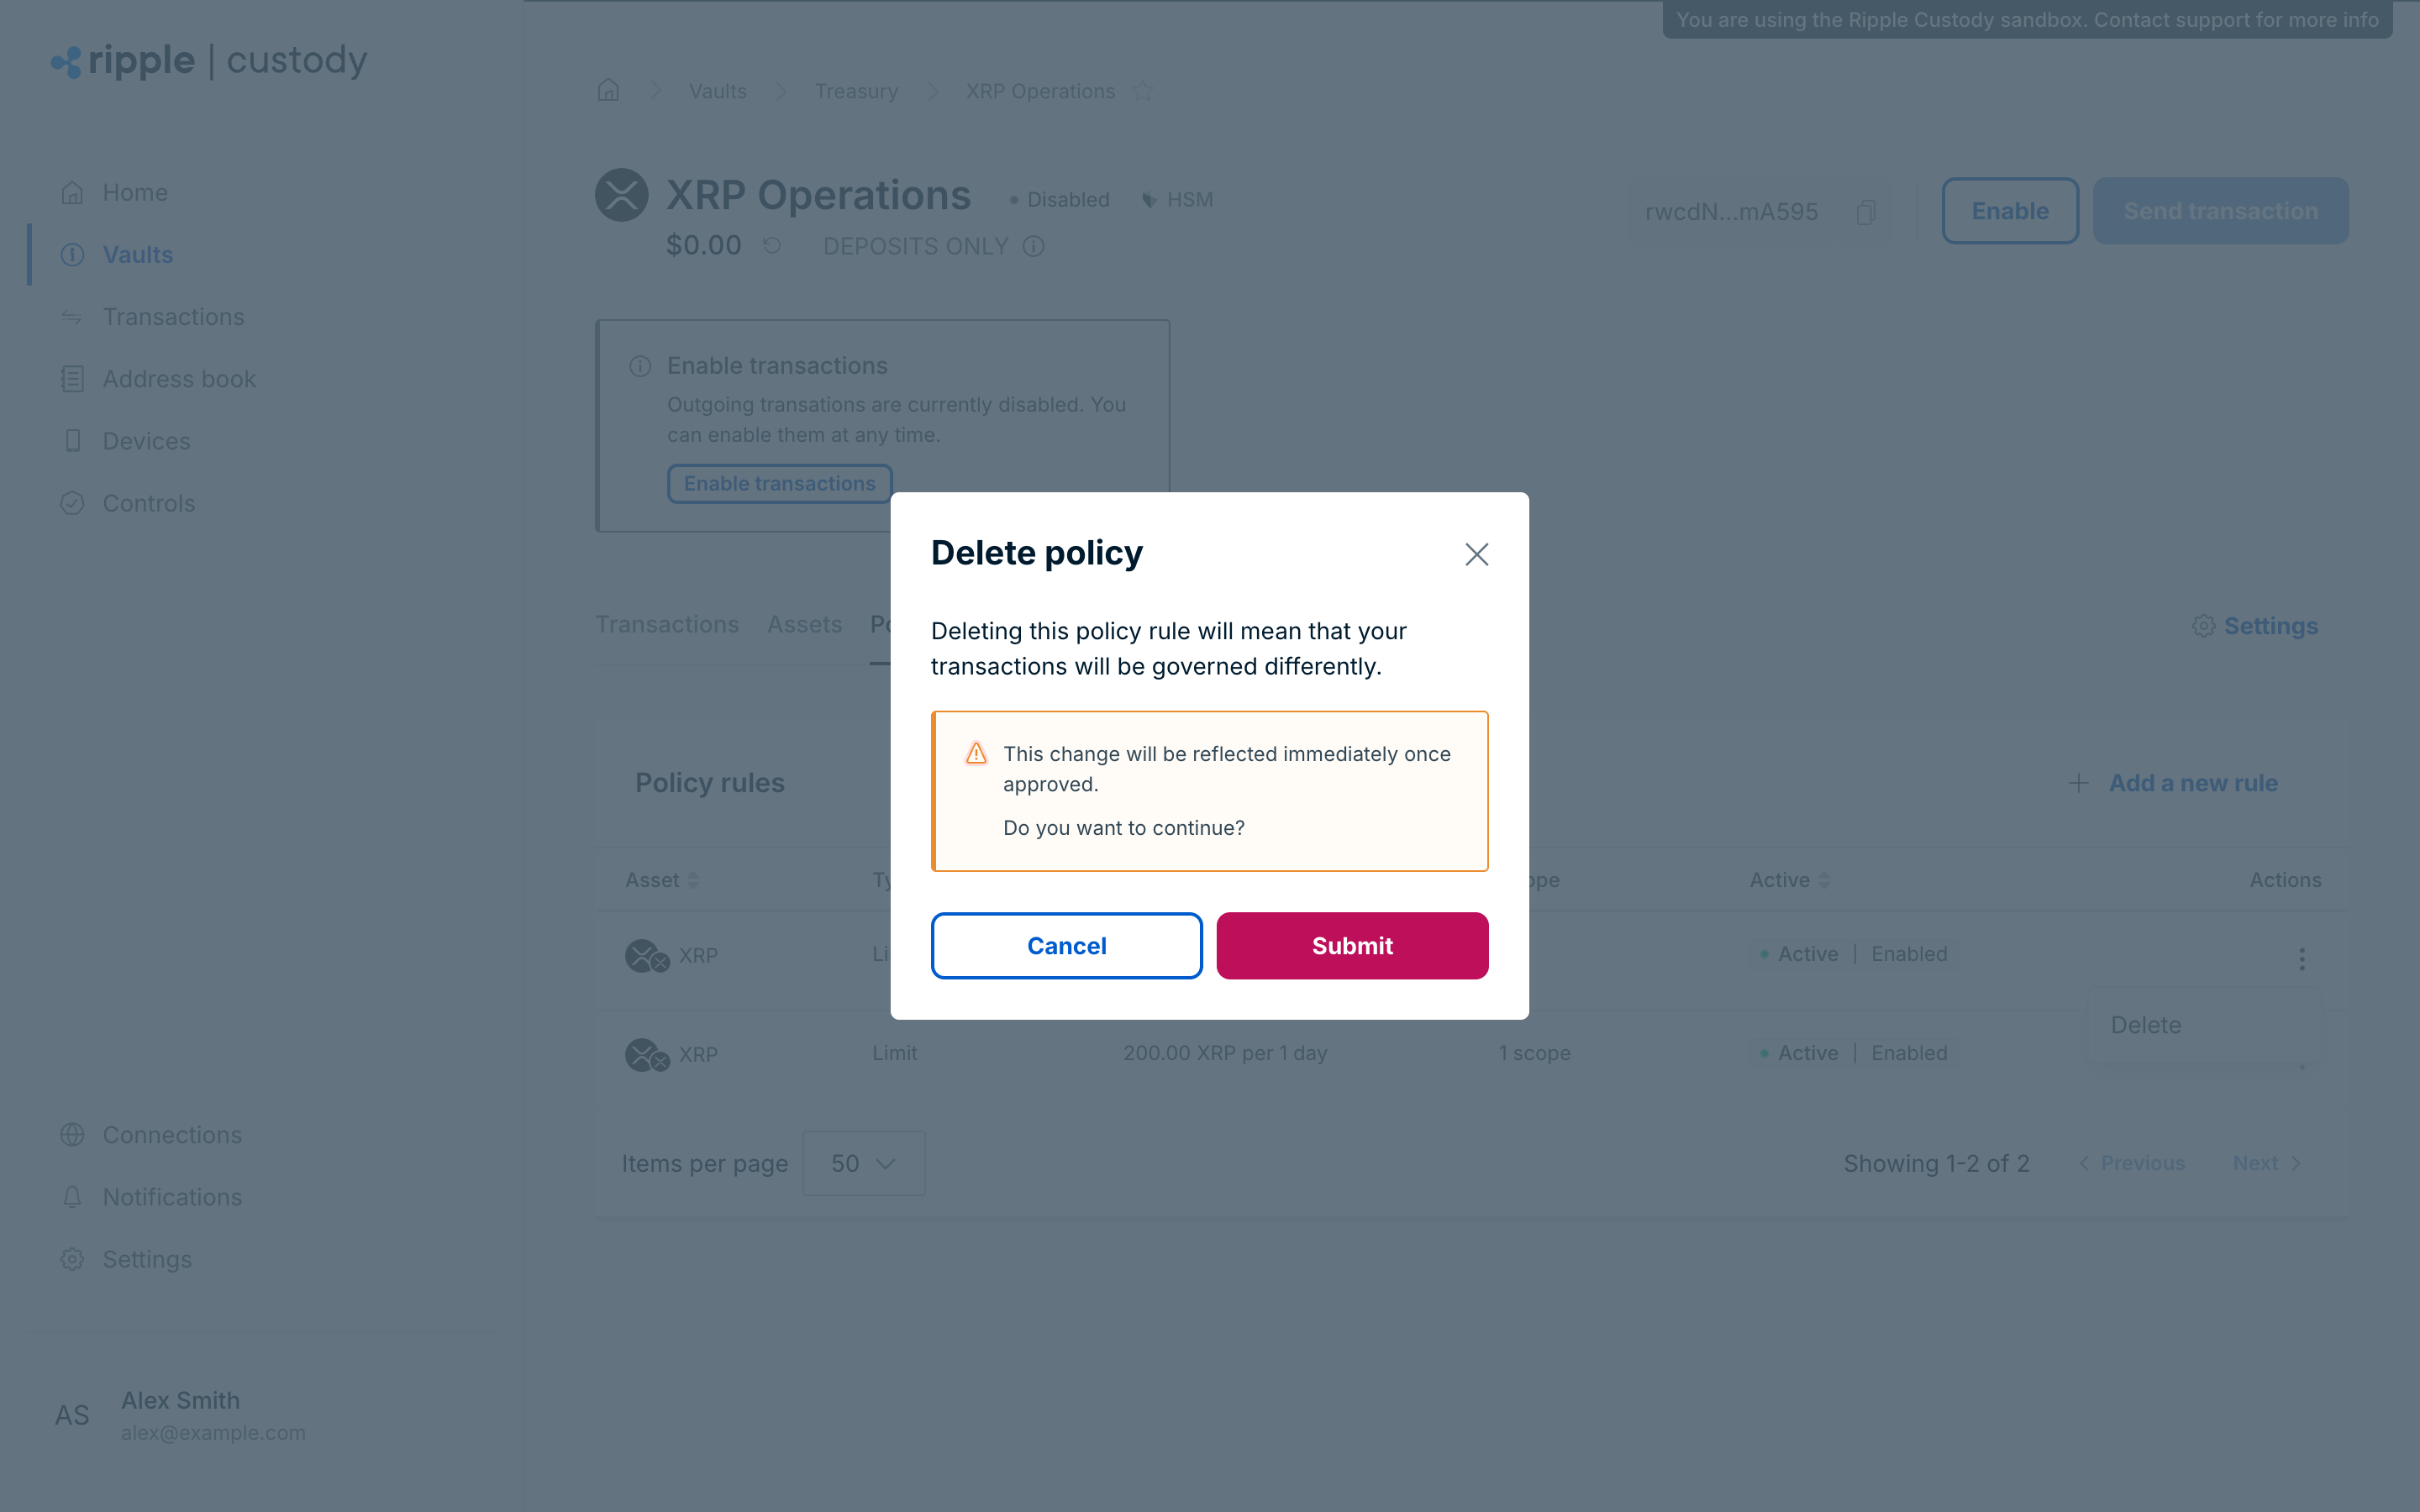
What happens after deletion:
- With approval groups: The policy shows Active | Approval pending. It continues enforcing transactions until approvers authorize the deletion.
- Without approval groups: The policy is deleted immediately and stops enforcing.
If you delete the only policy for an asset, the wallet can no longer send that asset until you create a new policy.
You can't delete a policy that is still pending creation approval. Wait for it to be approved or rejected first.
To create, list, get, and delete policy rules programmatically, see Manage policy rules via the API.
You can create multiple policies for the same asset in a wallet when:
- The policies have different limit types (for example, one per-transaction and one rolling policy)
- The policies have different filters (for example, one for all transactions and one for a specific user)
When a user or API credential submits a transaction, the transaction must pass every applicable policy. This lets you create layered policies. For example:
- A per transaction policy limiting individual sends to 10 ETH
- A rolling policy limiting total sends to 100 ETH per 24 hours
When a policy with matchers applies to a transaction, policies without matchers don't apply to it. For example, if you add a 5 ETH policy for one API credential, Ripple Custody (Wallet) checks that credential's transactions against the 5 ETH policy only, not against the 10 ETH or 100 ETH policies. To keep a rolling cap for that credential, add a rolling policy with the same matcher.
A policy matches a transaction if the wallet, asset, and all configured filters align with the transaction details. See Policy concepts for how policy evaluation works.
Consider these strategies when designing your policy structure:
- Layer multiple rule types. Combine per-transaction limits with rolling limits and lifetime caps for defense in depth. Scoped policies replace unscoped ones, so repeat each layer with the same matchers.
- Restrict destinations. Use selected counterparties or addresses instead of "all" to limit where funds can go.
- Restrict initiators. Assign specific policies to specific users or API credentials. This prevents unauthorized users from initiating high-value transactions.
- Start conservative. Begin with low limits in sandbox, validate your operations, then adjust limits upward as needed.
- Pair with approval groups. Policies control allowed actions; approval groups add human oversight. Use both together. See Configure approval flows.
- Escalate large transactions. Use step-up approvals to require specific approvers for transactions of more than an amount, instead of blocking them.
- Meet Travel Rule obligations. If your organization is a regulated VASP, use Travel Rule policy rules to exchange originator and beneficiary information through Notabene.
For more patterns, see Policy best practices.
- Policies - Understand scope, lifecycle, and evaluation
- Policy reference - Complete reference for limit types, matchers, statuses, permissions, and error codes
- Manage policy rules via the API - Create, list, get, and delete policy rules with the API
- Policy best practices - Recommended patterns and troubleshooting
- Unlock outgoing transactions - Full walkthrough including policy setup