This guide walks you through sending an outgoing transaction from the Ripple Custody (Wallet) console.
Before you proceed, make sure you've completed Unlock outgoing transactions. Your wallet must have:
- At least one active transaction policy for the asset you want to send.
- The destination address registered in your address book (for external transfers).
- Outgoing transactions enabled.
Required role: Owner, Administrator, or Proposer.
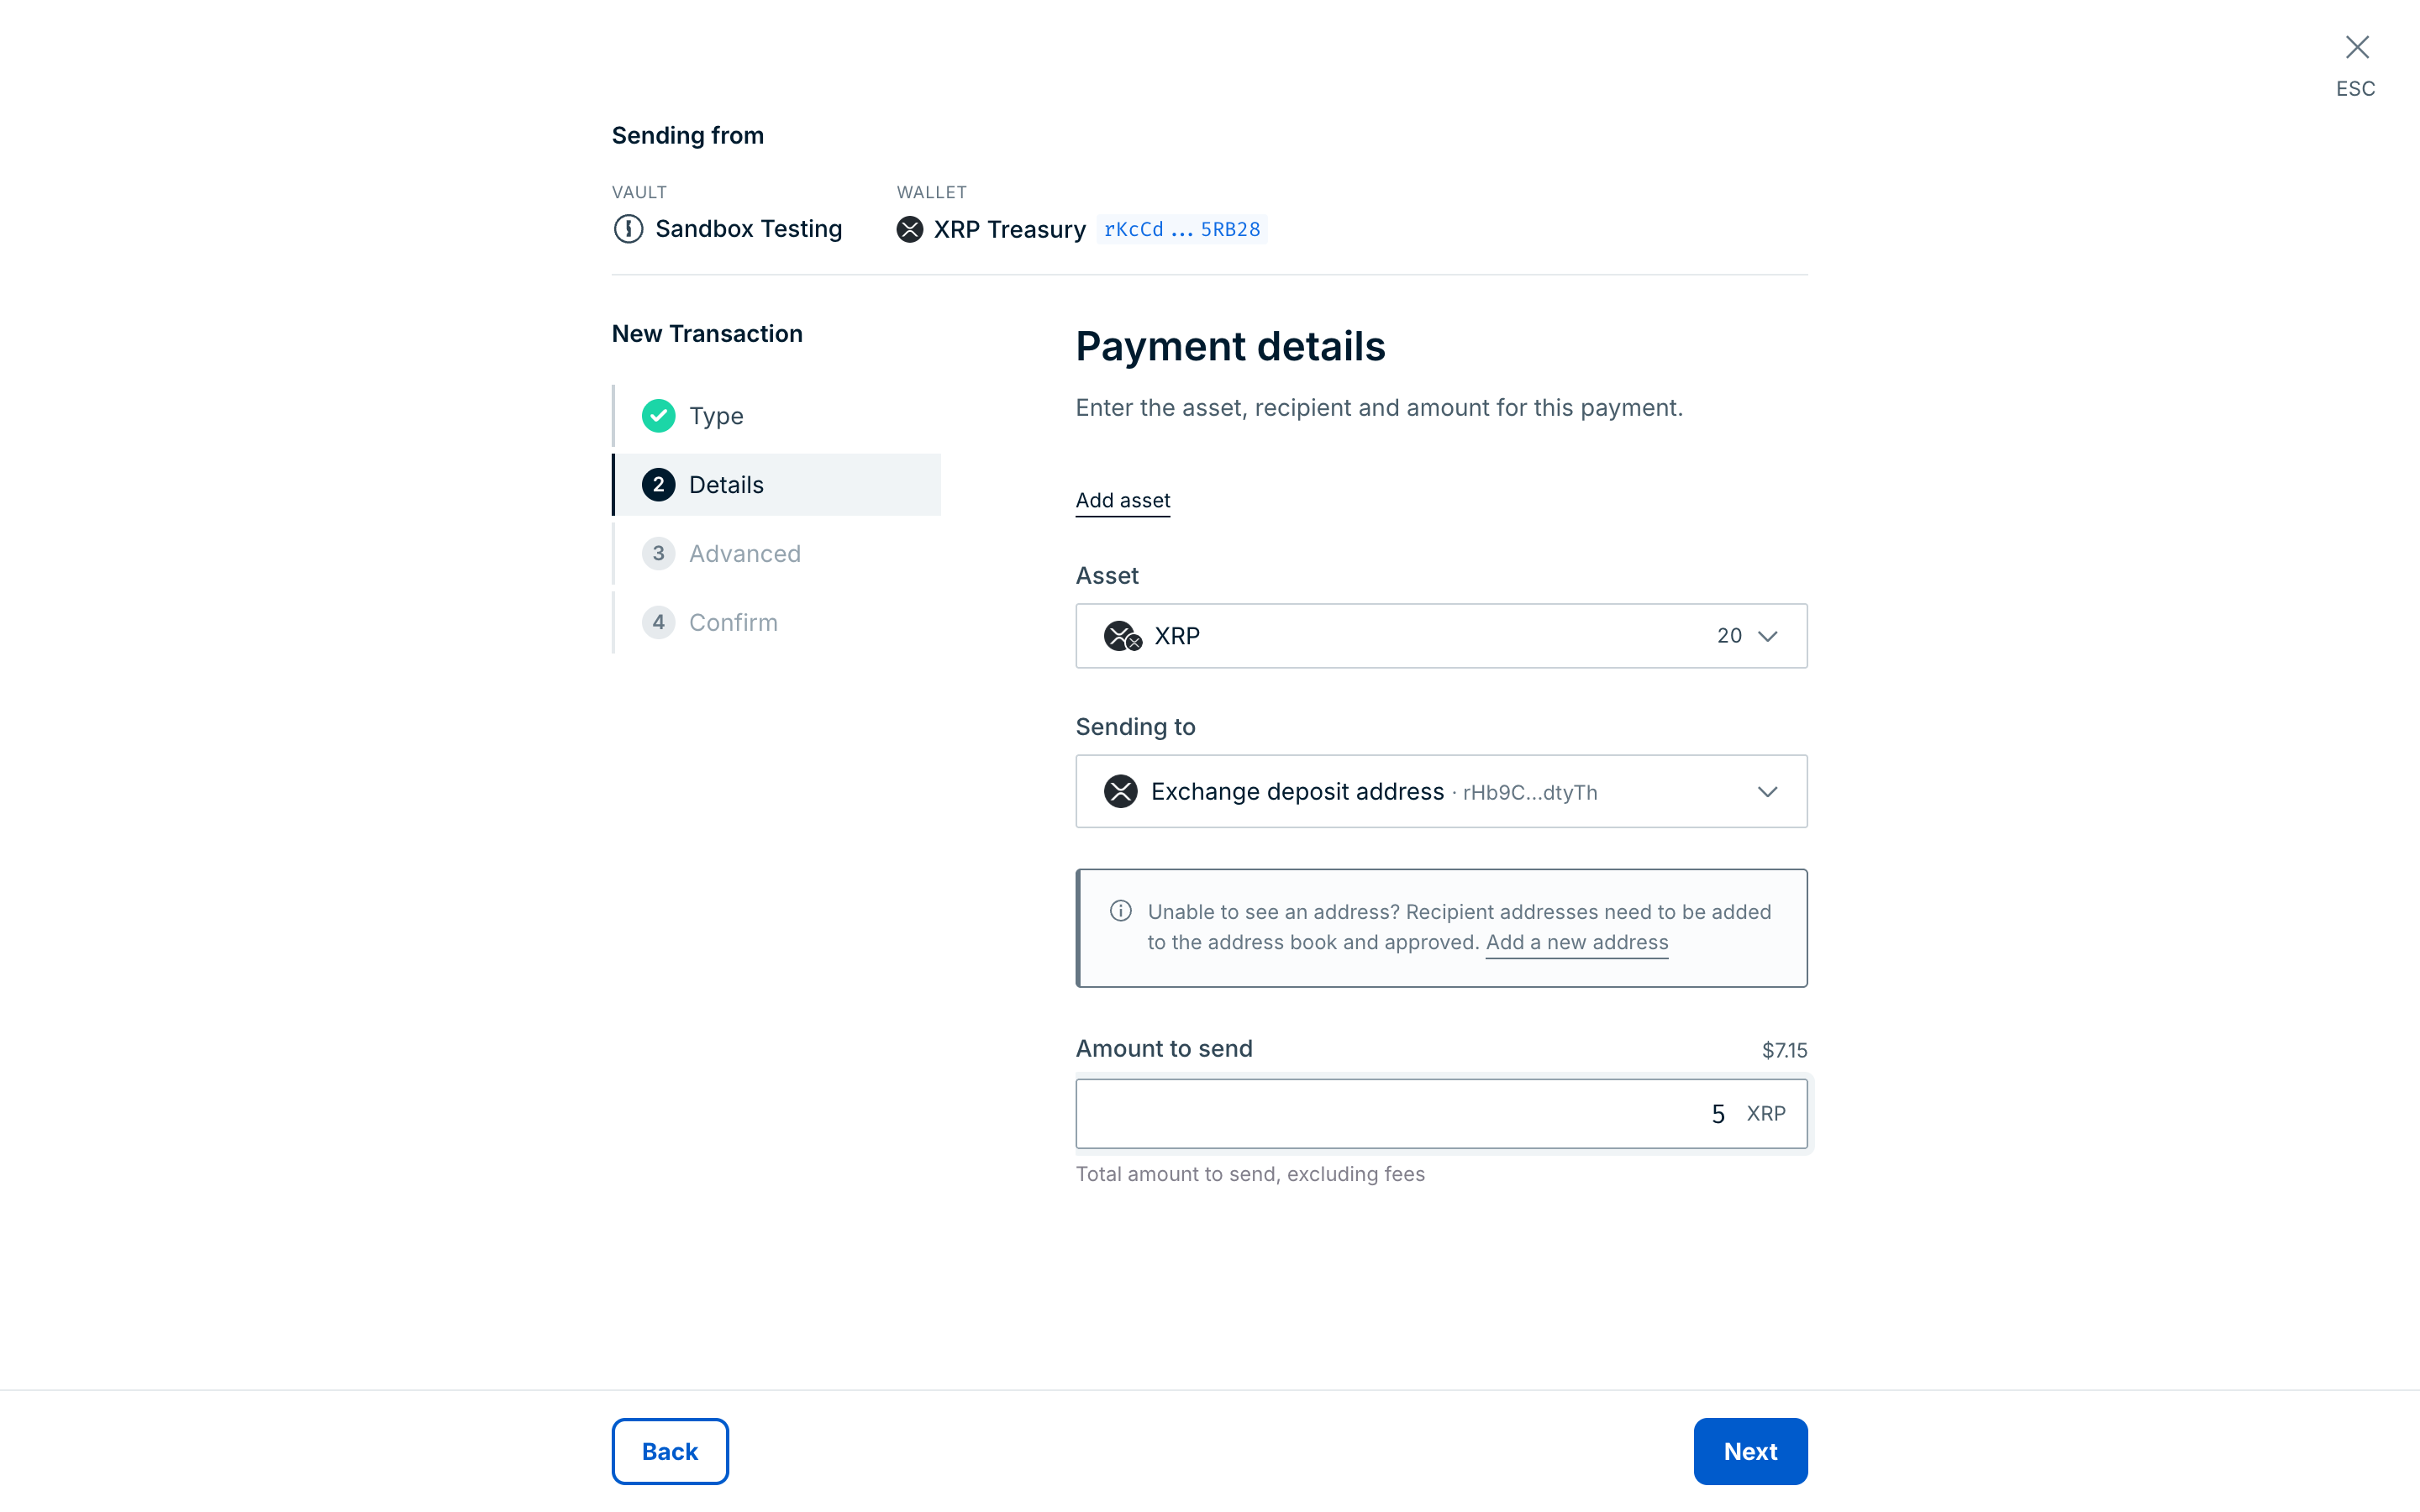
The New Transaction form has four steps for a payment: Type, Details, Advanced, and Confirm.
- Navigate to your wallet.
- Click Send transaction. The New Transaction form opens.
- On the Type step, keep the Payment transaction type and click Next. (XRP Ledger wallets also list other XRP Ledger transaction types.)
- On the Details step, select the Asset you want to send. The list shows your available balance for each asset and whether it has a policy rule.
- Under Sending to, select the destination:
- An address from your address book (for external transfers), or
- A wallet within your organization (for internal transfers).
- Enter the Amount to send, excluding fees, then click Next.
- (Optional) On the Advanced step, enter a Correlation ID or External ID for tracking purposes. XRP Ledger wallets also show Source tag and Destination tag: enter a destination tag if the recipient requires one.
- Click Review transaction.
- On the Confirm step, review the transaction summary. Verify the asset, amount, and destination are correct.
- Click Confirm transaction to submit.
Once a transaction is submitted and confirmed on the blockchain, it cannot be reversed. Double-check all details before you confirm.
Required role: Owner, Administrator, Proposer, or Approver.
If your organization has configured an approval group for transactions, the transaction enters the Approval checks pending state after submission.
- Designated approvers receive a notification in the Ripple Custody (Wallet) web console and on their mobile device (if they have one registered).
- Each approver reviews the transaction details and clicks Approve or Reject.
- After the required number of approvers authorize the transaction, it moves to the signing stage.
Approvers must respond within the configured timeout window (default: 1 hour). If the required number of approvals isn't met before the timeout expires, the transaction is automatically rejected.
If no approval group is configured for transactions on this wallet, the transaction skips this step and goes directly to signing.
After the transaction passes policy checks and approvals (if configured), the MPC quorum signs it.
- CloudSign devices sign automatically within seconds.
- Mobile devices send a notification to the device owner, who reviews and signs manually.
The minimum number of signatories defined in the quorum must participate within 5 minutes. After enough devices sign, the platform constructs the complete signature and submits the transaction to the blockchain.
If your sandbox wallet uses an HSM keystore, signing is handled automatically by the Hardware Security Module. No device interaction is required.
After the transaction is signed and submitted, you can monitor its progress.
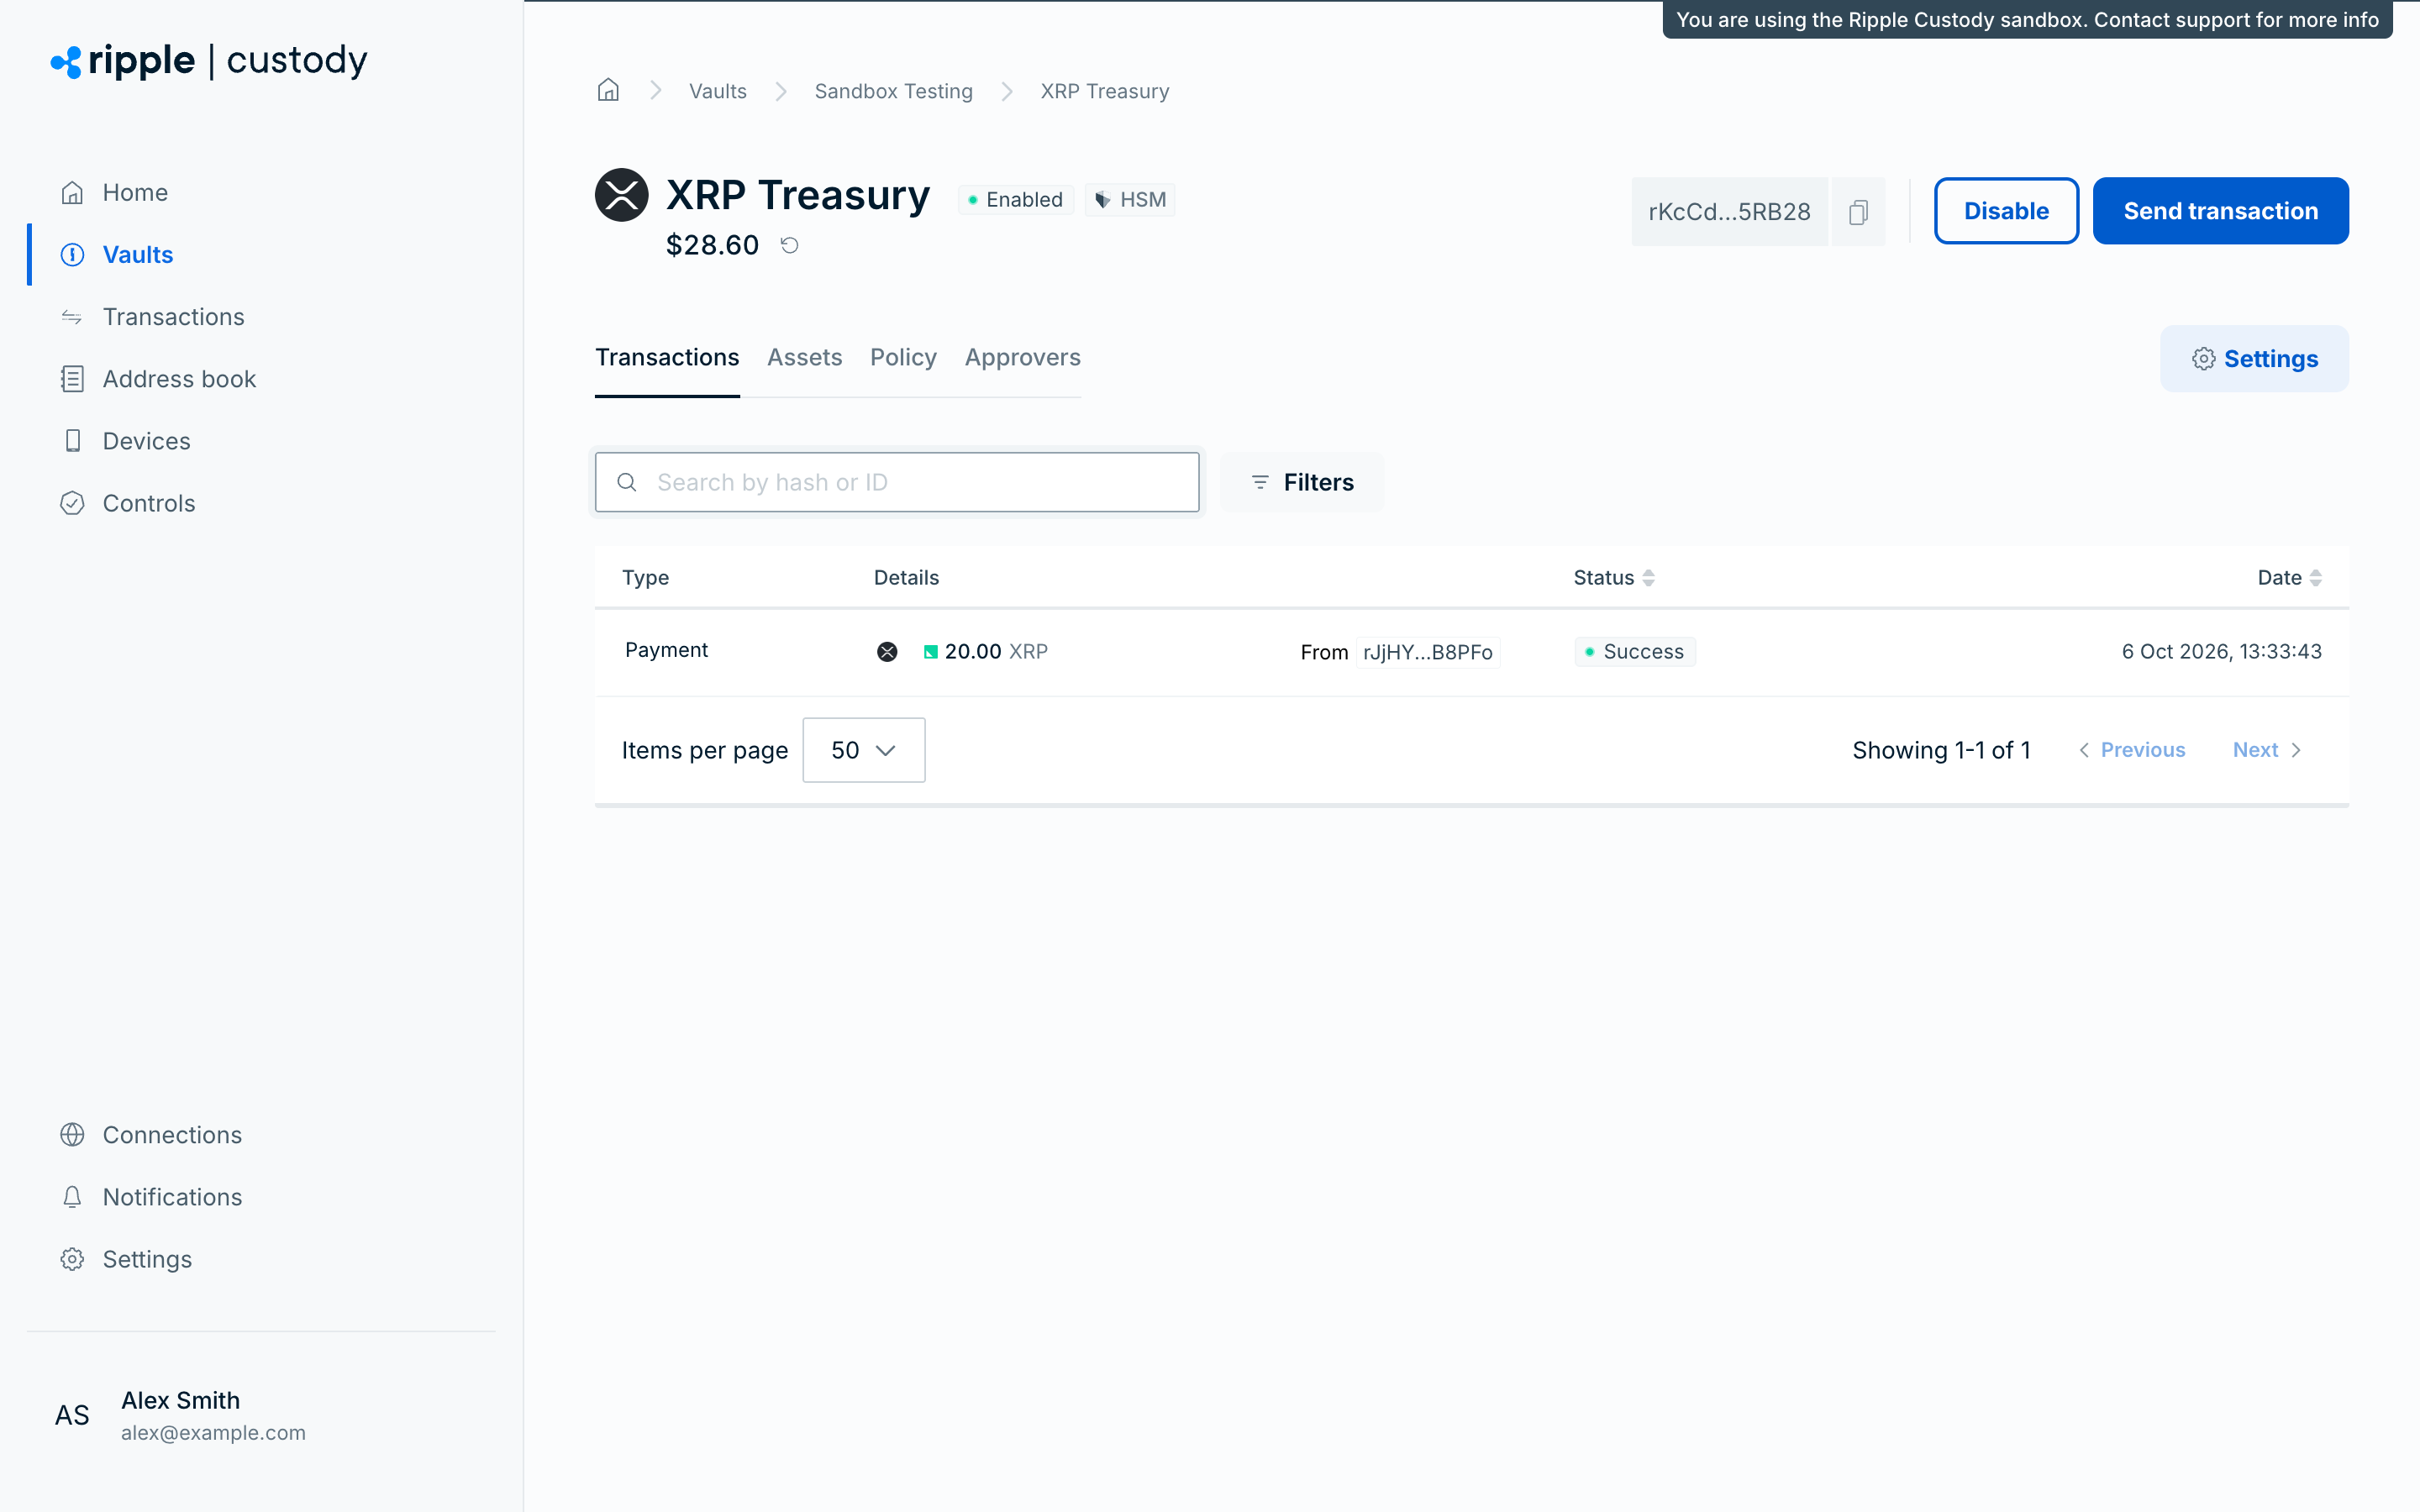
- Open your wallet and go to the Transactions tab.
- Select your transaction to see its status timeline:
| Status | What it means |
|---|---|
| Policy checks pending | Transaction is being evaluated against your active policies |
| Approval checks pending | Waiting for approvers to authorize |
| Signature pending | Waiting for MPC quorum devices to sign |
| Confirmation pending | Signed and broadcast to the blockchain, waiting for confirmation |
| Confirmed | Confirmed on the blockchain — transaction is complete |
| Violation | Rejected by an approver, timed out, or failed a policy check |
| Failed | The blockchain rejected the transaction (for example, insufficient gas) |
The transaction list shows a shorter status badge: Requested, then Pending while the transaction moves through checks and signing, then Signed, Published, Confirming, and finally Success. A rejected transaction shows Violation, and a failed one shows Failed.
See How transactions work and View transactions in the console for the full reference.
| Symptom | Cause | Fix |
|---|---|---|
| "No matching policy" error | No policy exists for the asset, or the destination doesn't match the policy's allowed counterparties/addresses | Create a policy that covers the asset and destination you're trying to use |
| "Address not found" error | The destination address isn't registered in your address book | Add the counterparty and address to the address book |
| Transaction stuck in "Pending" | An approval group is configured and approvers haven't responded yet | Ask your designated approvers to review the transaction in the console or mobile app |
| Transaction rejected automatically | The transaction amount exceeds the policy limit, or the approval timed out | Check the policy limits and try again with a lower amount, or coordinate with approvers to respond within the timeout window |
You've completed the getting started walkthrough. Here are the recommended next steps to get the most from Ripple Custody (Wallet):
- Getting started with the API — Create vaults, wallets, and transactions programmatically with complete
curlexamples. - API credentials best practices — Scope permissions, rotate credentials, and configure IP allowlisting.
- Ripple Custody (Wallet) API reference — Full endpoint documentation.
- Connections — Open connections to external platforms.
- Approval groups — Require human authorization before transactions execute.
- Manage policies — Create more granular policies for different assets, amounts, and destinations.
- User roles and permissions — Assign appropriate access levels to your team.
- Connections — Open connections to external platforms.
- Supported blockchains — Feature availability and chain-specific details.
- Asset sweeping — Automate fund consolidation across wallets.
- Raw signing — Sign arbitrary blockchain transaction types.
- Cross-chain EVM transfers — Send funds across EVM-compatible chains.