Devices hold MPC key shards and participate in transaction signing. Users add and pair devices, and an owner or administrator approves each pairing before the device can join a quorum. This page covers the full device lifecycle: installing the mobile app, adding and pairing a device, approving or rejecting it, tracking its status, and disabling, deleting, or sharing it.
Ripple Custody (Wallet) supports two device types:
| Device type | Description | Best for |
|---|---|---|
| Mobile | A phone running the Ripple Custody (Wallet) Mobile app. Requires manual approval for each signing request. | Human-in-the-loop review, low-volume signing |
| CloudSign | A server-based signing agent. Signs transactions automatically when quorum conditions are met. | High-volume operations, automated workflows |
You can use a single type or combine both in a mixed quorum for flexibility. For a detailed comparison, see Types of devices.
Ripple Custody (Wallet) Mobile is available on iOS and requires iOS 18 or later. There are separate apps for sandbox and production. Use the sandbox app to try out or test the platform; use the production app for live operations. Install the app that matches the console you use.
| Sandbox | Production | |
|---|---|---|
| Console | app.sandbox.palisade.co | app.palisade.co |
| Where to get the app | Apple TestFlight: testflight.apple.com/join/RazUJScm | App Store: apps.apple.com/app/id6467522678 |
The apps appear as Palisade Mobile (sandbox) in TestFlight and Palisade Mobile on the App Store. On your home screen the icons are labeled Palisade [S] (sandbox) and Palisade (production).
The sandbox app connects only to the sandbox console, and the production app connects only to the production console. Don't install the sandbox app to use with production, or the production app to use with sandbox.
- Install the free TestFlight app from the App Store, if you don't already have it.
- On your iPhone, open https://testflight.apple.com/join/RazUJScm.
- TestFlight opens and offers Install. Tap it.
- Open Ripple Custody (Wallet) Mobile (sandbox) and pair the device.
TestFlight delivers updates to the sandbox app automatically. If TestFlight reports that the beta is full or the link is no longer valid, contact the Ripple Custody (Wallet) team.
- On your iPhone, open https://apps.apple.com/app/id6467522678, or search the App Store for the app.
- Tap Get to install the app.
- Open Ripple Custody (Wallet) Mobile and pair the device.
Required role: Owner, Administrator, Proposer, or Approver.
- Go to Devices in the console sidebar and select Add new device.
- Select the device type: Mobile or Cloud (for a CloudSign device).
- Enter a name for the device, up to 50 characters. The name should help identify the device easily. For example, include the owner's name and the device purpose: "Alice - Mobile - Approvals".
- Select Save and continue.
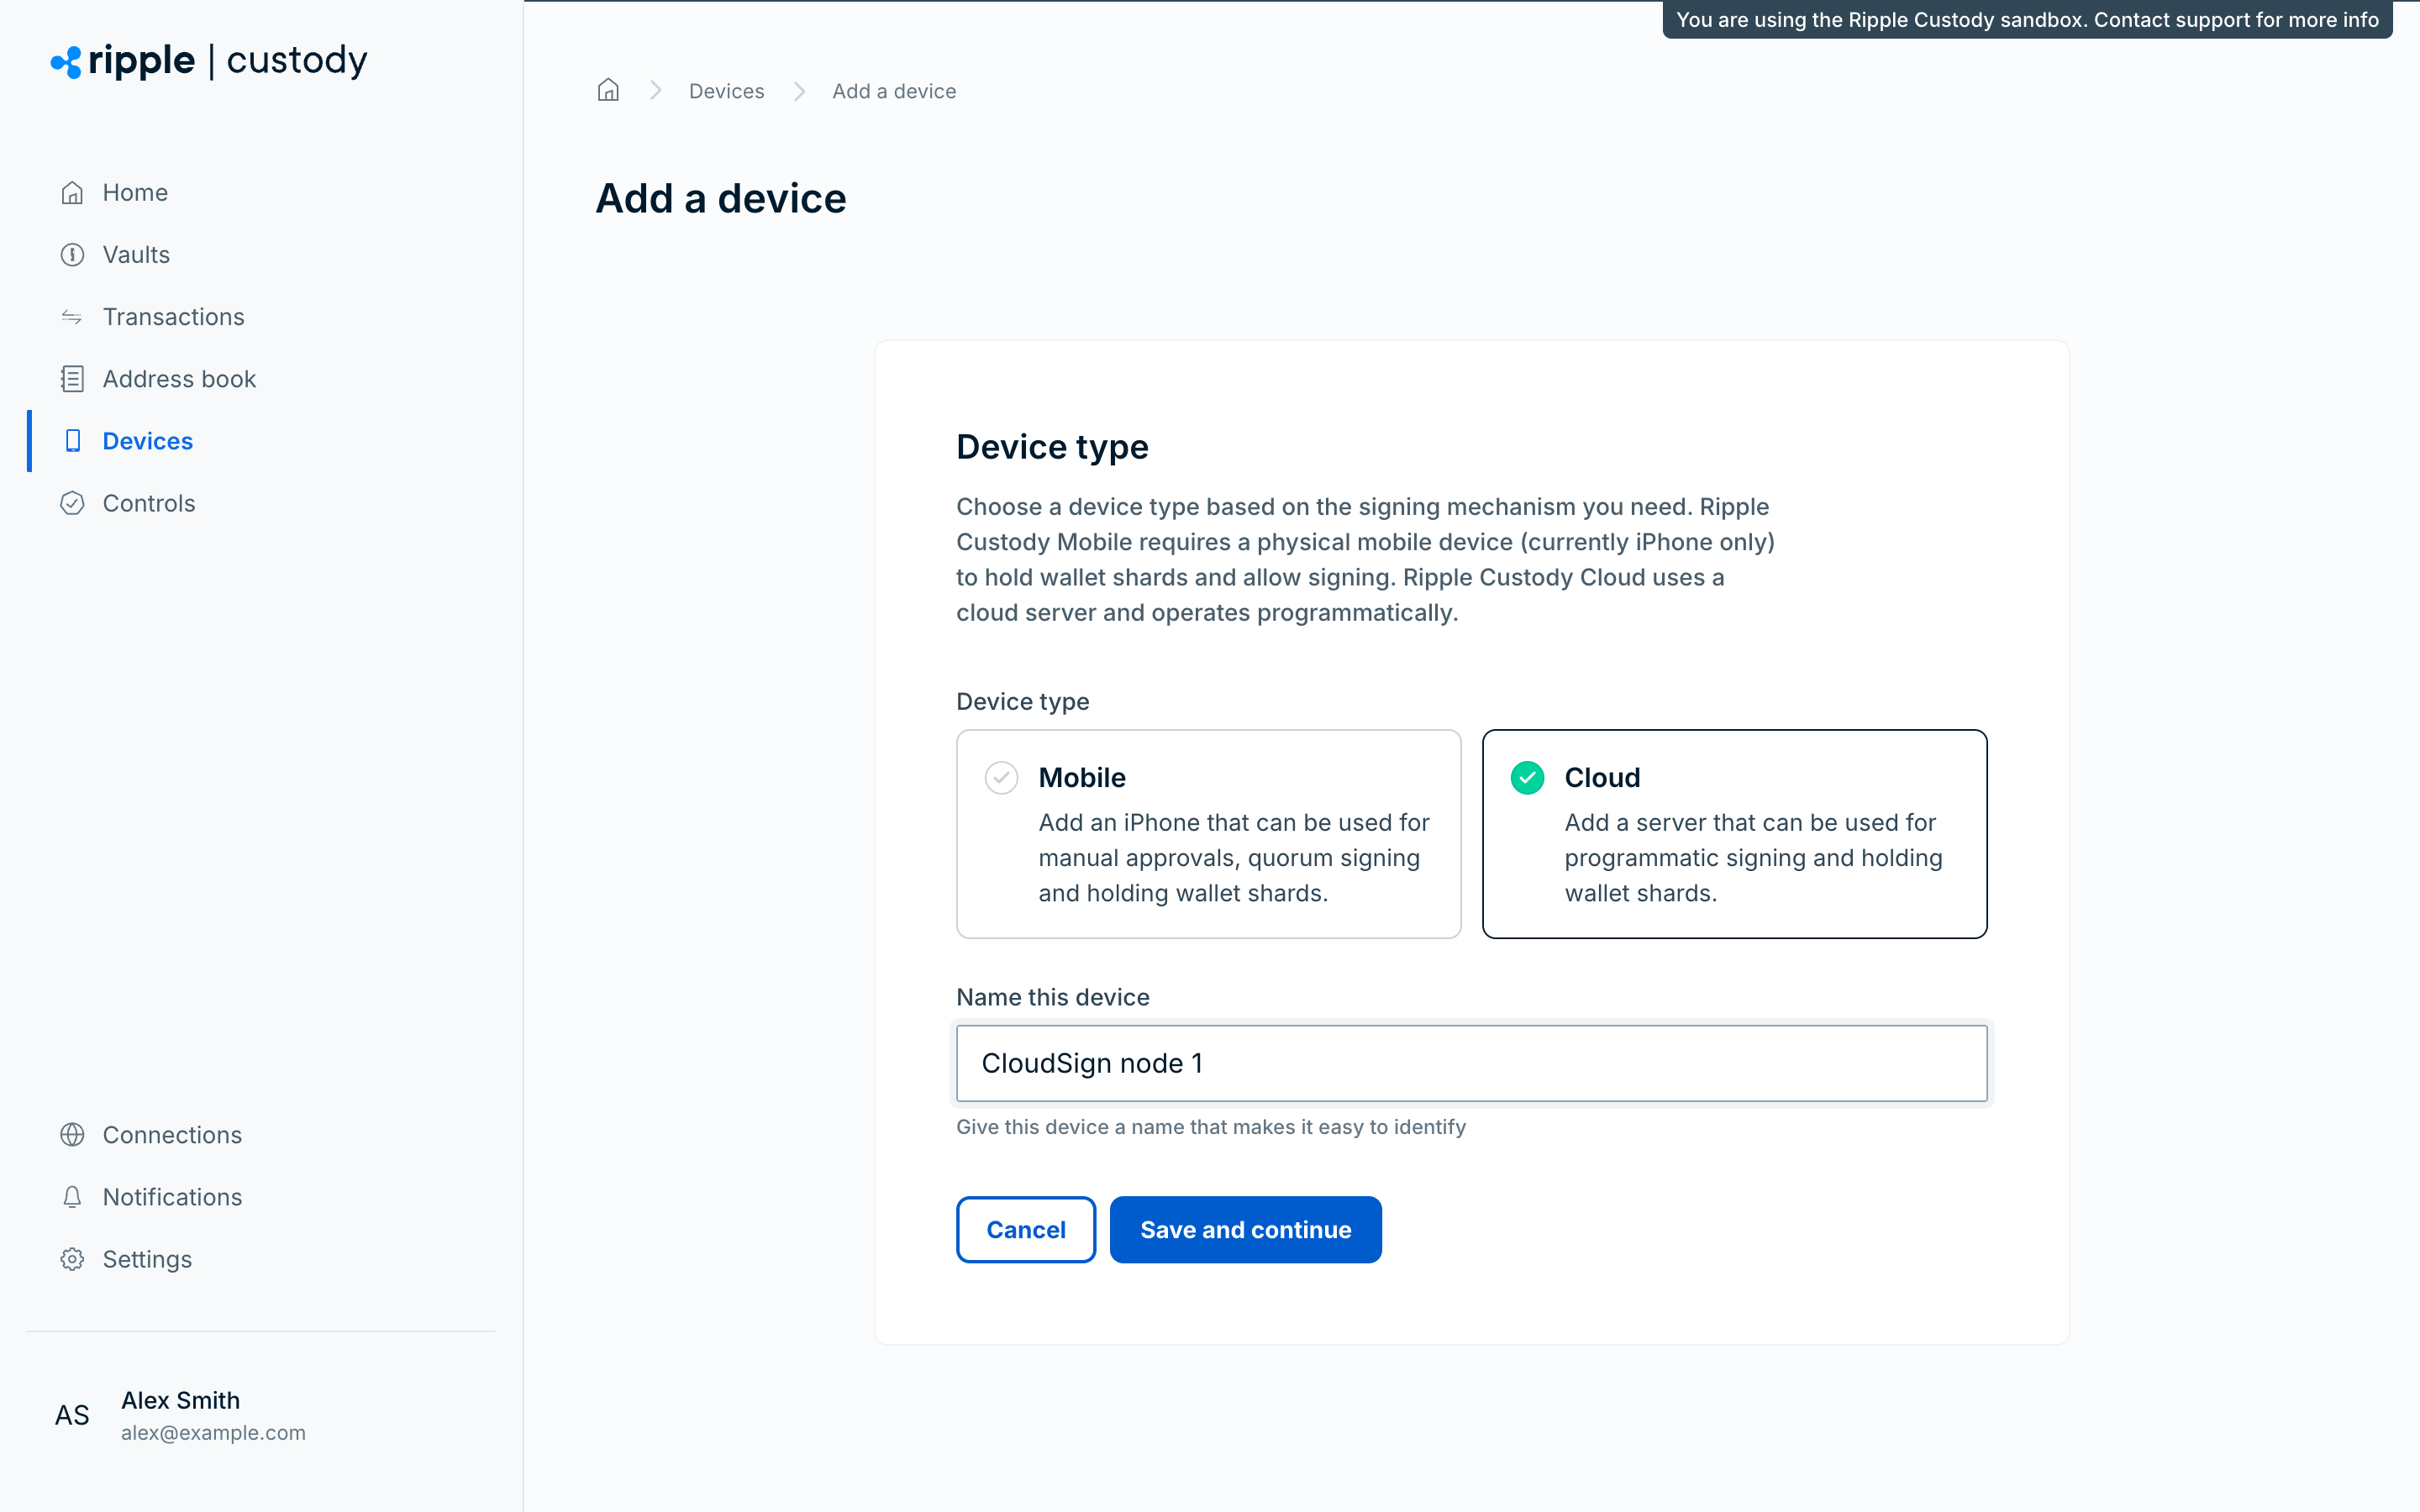
By default, a new device has the status Unpaired, which means it isn't initialized or available for use. The device owner must complete pairing before an owner or administrator can approve it.
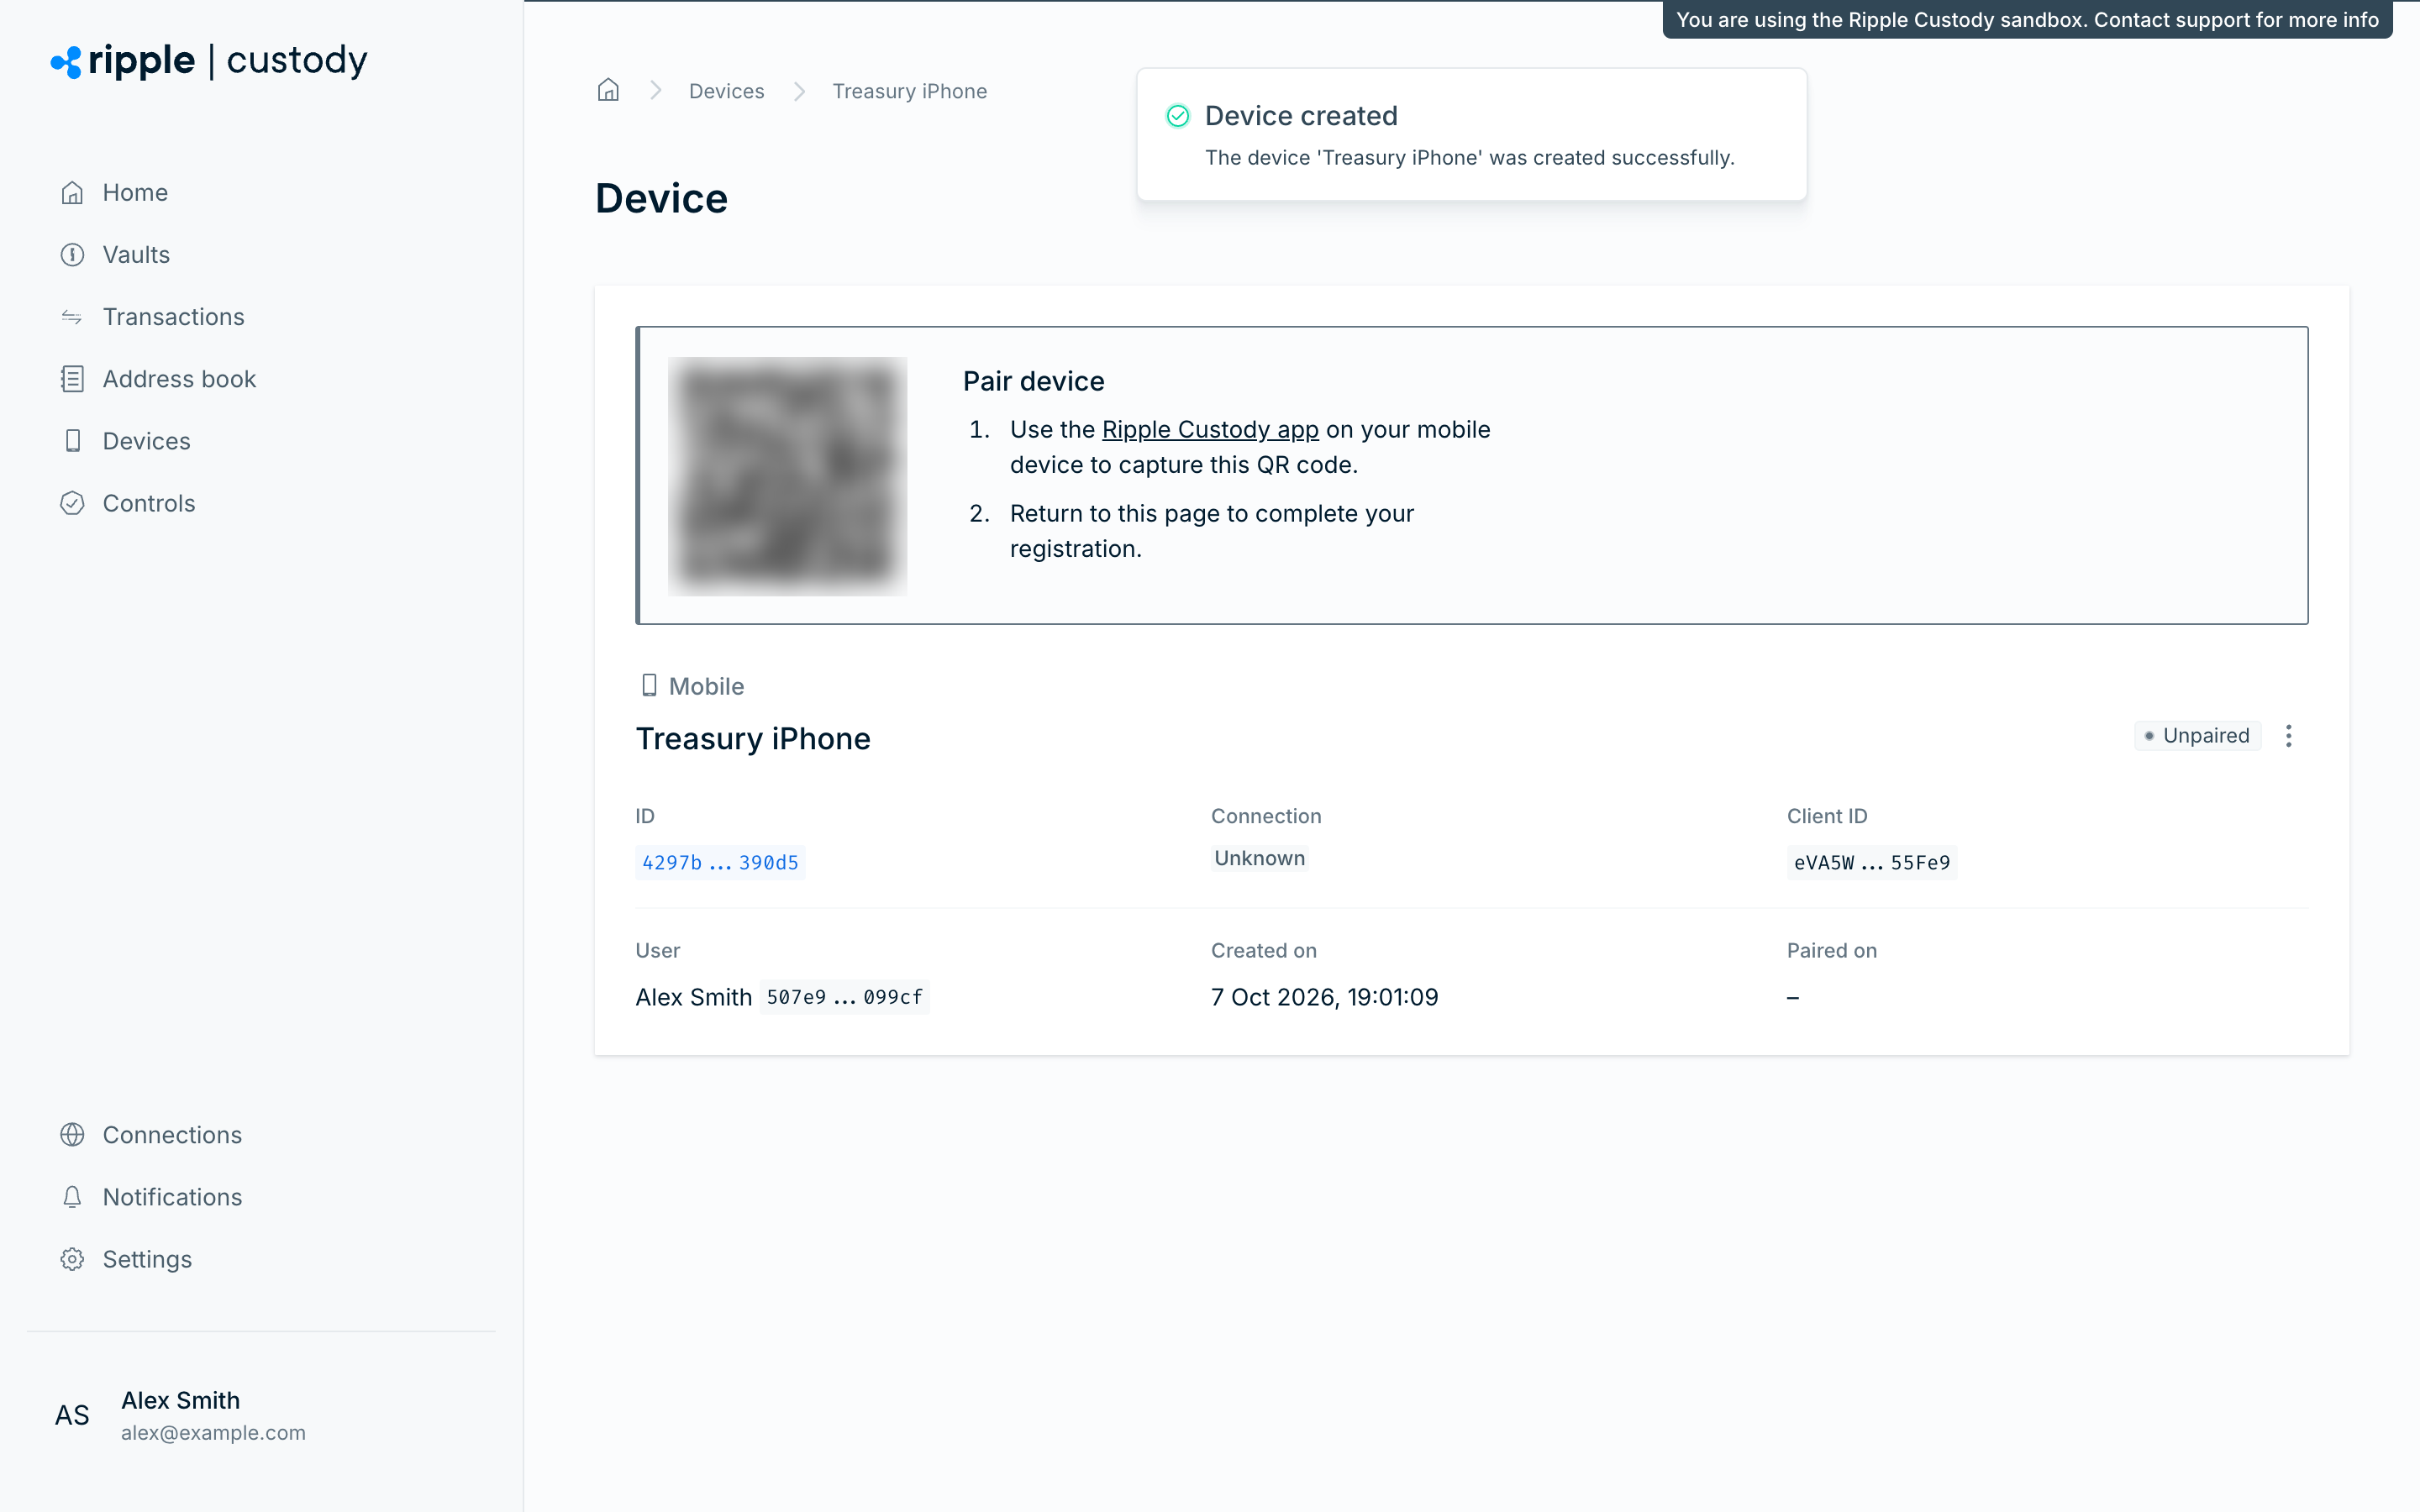
- When you add a mobile device, the console displays a QR code.
- Open the Ripple Custody (Wallet) Mobile app and scan the QR code. If you haven't installed the app yet, see Install the mobile app.
- The device in the console moves from Unpaired to Waiting for approval. This indicates that the device is initialized but not yet ready to use.
- An owner or administrator approves the device.
- The device moves to Paired and is ready to use.
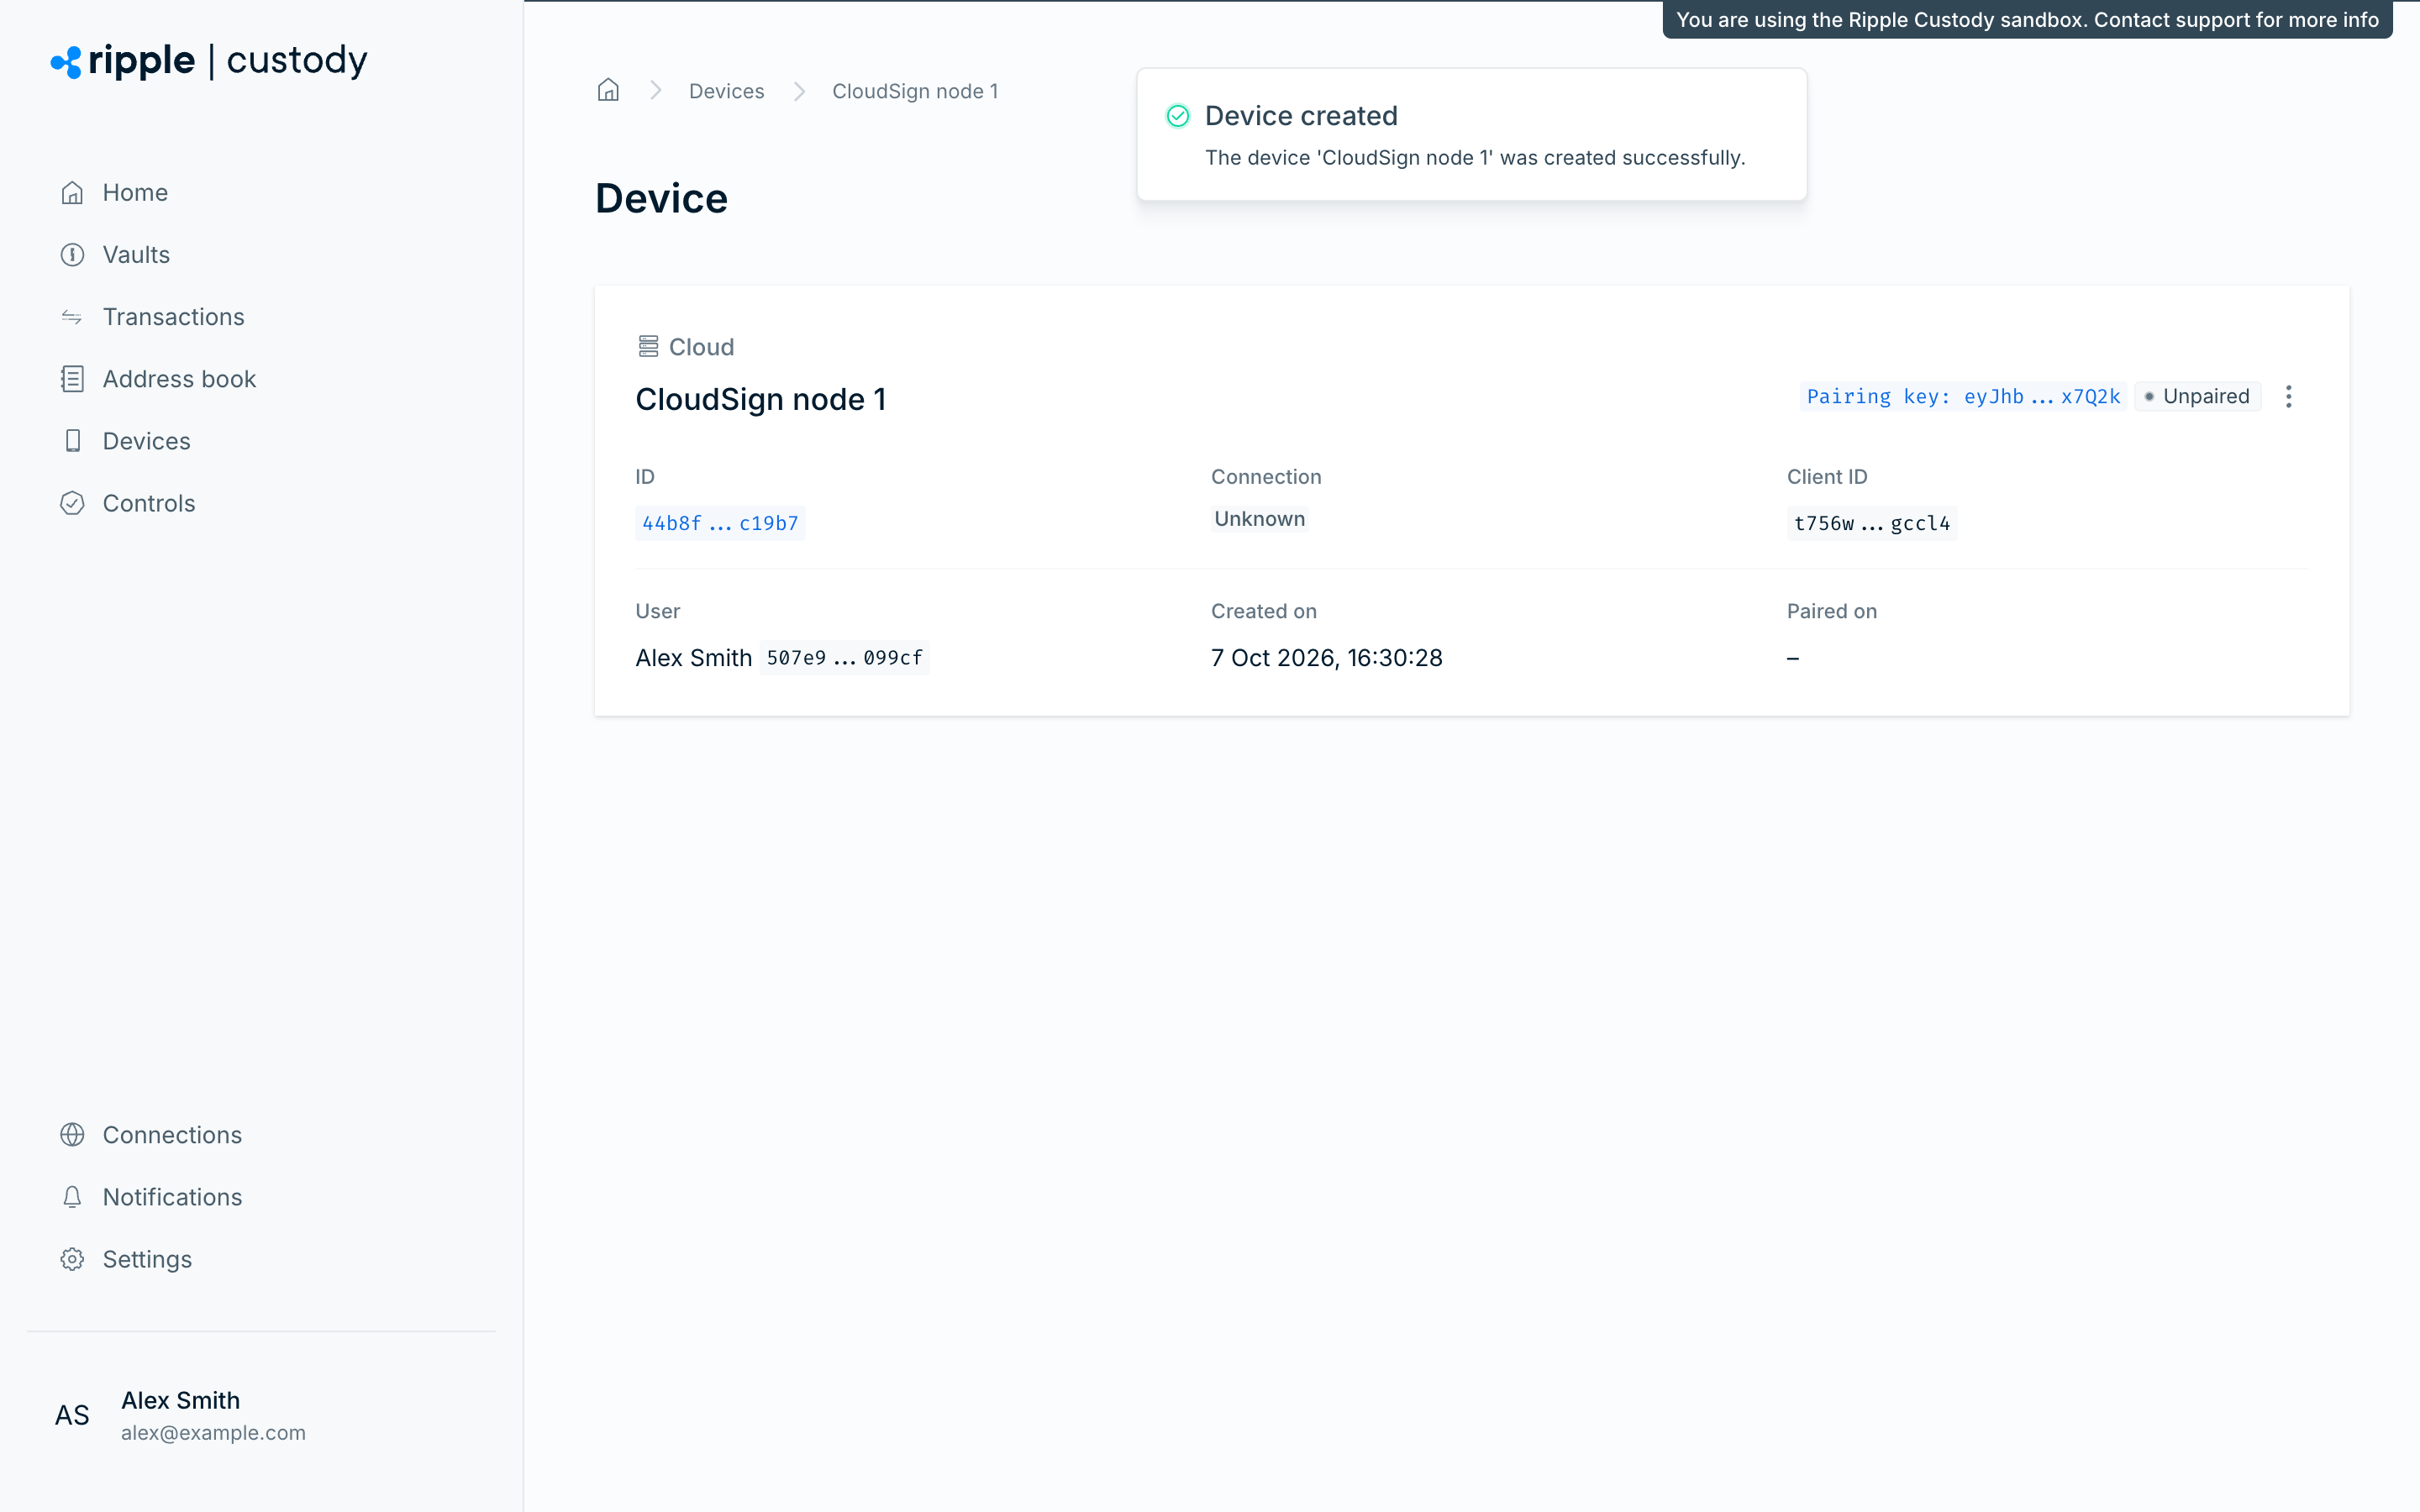
- When you add a CloudSign device, the console opens the device page, which shows the Pairing key next to the Unpaired status badge. Copy the pairing key from there. Similarly to a QR code, the pairing key contains one-time authentication credentials.
- Set up and run the CloudSign node with the pairing key. When the container starts, it registers with the platform.
- The device in the console moves from Unpaired to Waiting for approval. This indicates that the device is initialized but not yet ready to use.
- An owner or administrator approves the device.
- The device moves to Paired and is ready to use.
After a device completes pairing, an owner or administrator must approve it before it can join a quorum.
- Go to Devices.
- Find the device with the status Waiting for approval.
- Select the device to view its details.
- Review the device information (type, owner, registration time).
- Open the Actions menu and select Approve.
Only approve devices you expect. Confirm with the device owner through an out-of-band channel (phone call, in-person) that they initiated the pairing request.
Required role: Owner or Administrator.
Reject a pending device pairing request when you don't expect it or can't verify it. Rejection denies approval: the device shows the status Rejected, and it can't join a quorum or participate in signing operations.
- Go to Devices.
- Select the device with the status Waiting for approval.
- Open the Actions menu and select Reject.
To remove a rejected device from the device list, delete it.
Device state has three independent dimensions:
| Dimension | Values | What it means |
|---|---|---|
| Approval status | Pending, Approved, Rejected | Whether the organization trusts the device to participate in quorum operations. |
| Enabled status | Pending, Enabled, Disabled | Whether the device can currently participate in signing operations. |
| Connection status | Online, Offline, Unknown, Unsupported | Whether the device is currently reporting heartbeats to Ripple Custody (Wallet). Available for CloudSign devices running version 1.13.0 or later; see Cloud Sign 1.13.0. A device that reports a CloudSign version but has never sent a heartbeat, such as a node running an earlier version, shows Unsupported. |
The status badge in the console combines the first two dimensions:
| Status badge | Meaning |
|---|---|
| Unpaired | The device was added but hasn't completed pairing. |
| Waiting for approval | The device completed pairing, and its approval status is Pending. |
| Paired | The device is approved. |
| Rejected | An owner or administrator rejected the pairing request. |
| Disabled | The device is disabled. |
For example, a device with Approved approval status and Disabled enabled status remains trusted but can't currently sign. A device with Rejected approval status isn't trusted and can't sign. An approved and enabled CloudSign device that shows Offline is trusted but disconnected, so it can't respond to signing requests until its connection is restored.
To open a device's settings, select the device name. The Actions menu on the device page offers Edit and, depending on the device's status, Approve, Reject, Enable, Disable, and Delete. For CloudSign devices, it also offers Share.
Go to Devices to see the devices in your organization. Owners, administrators, and auditors see every device. Proposers and approvers see only their own devices. The Viewer role doesn't have access to Devices. The device list has two tabs:
- Internal: Devices owned by users in your organization
- External: Devices shared with your organization from other organizations (see External devices)
You can also view the devices that belong to a single user from their user profile page.
For each device, the list shows:
- Device name and type, with the CloudSign version and connection status for CloudSign devices
- Device ID
- User who owns the device
- Status badge (see Device status)
- Last updated time
To find a device, use Search devices, or select Filters to narrow the list by approval status, enabled status, connection status, device type, device owner, display name, ID, last heartbeat, or date paired, created, or updated.
Required role: Owner, Administrator, Proposer, or Approver. Proposers and approvers can disable only their own devices.
After a device is paired, you can disable it. Disabling a device changes its enabled status to Disabled, which prevents the device from being used for approvals or signing. Its approval status and configuration remain unchanged, so use disable for a reversible pause.
- Go to Devices.
- Select the device you want to disable.
- Open the Actions menu and select Disable.
An owner or administrator can re-enable the device. To re-enable it, open the Actions menu and select Enable.
Disabling a device affects any quorum it belongs to. If the remaining active devices fall below the quorum threshold, that quorum can't sign transactions until you re-enable the device. A restructure can't remove a disabled device, so re-enable the device before you restructure the quorum to replace it.
Required role: Owner, Administrator, Proposer, or Approver. Proposers and approvers can delete only their own devices.
You can delete only a device that was never approved: in the console, Delete appears in the Actions menu only for devices with the status Unpaired or Rejected. You can't delete an approved device, even after you disable it. To take an approved device out of service, disable it.
- Go to Devices.
- Select the device.
- Open the Actions menu and select Delete.
Deletion is immediate and can't be undone.
To stop an approved device from signing, disable it. To replace it in a Cloud quorum, restructure the quorum while the device is still enabled, because Ripple Custody (Wallet) rejects a restructure that removes a disabled device. See Key restructuring.
External devices are devices added by another organization and shared with you. They appear on the External tab of the Devices page.
Example: 'Company A' may be split into three different entities with separate Ripple Custody (Wallet) accounts: Company A Australia, Company A UK and Company A USA. If each entity created a device, Company A Australia and Company A UK could share their devices with Company A USA. Company A USA would then be able to create an MPC quorum with their two external devices and one internal device.
The benefit of sharing devices is that no single entity would have control of all the devices, and therefore, all of the wallet key shards. This minimizes the likelihood of one person accessing all devices in an MPC quorum and using them to authorize transactions.
You can share approved CloudSign devices. Sharing requires an owner or administrator in the sharing organization. To enable devices to be shared, both the recipient and sharing organizations need to complete the following steps:
- Recipient organization: provide your organization name and 36-character ID to the sharing organizations. You can view and copy this information from Settings > Organization > Details in the console.
- Sharing organization: go to the device you want to share, open the Actions menu, and select Share.
- Sharing organization: enter the recipient organization's name and ID.
- The shared device then appears on the recipient organization's External tab.
- Distribute devices across team members: Avoid concentrating multiple key shards on devices controlled by a single person.
- Audit your device inventory regularly: Review which devices are active and whether their owners still need access.
- Remove devices promptly for offboarded users: When a team member leaves, restructure affected Cloud quorums to replace their devices, and then disable the devices. If you must disable a device first, re-enable it before you restructure, because a restructure can't remove a disabled device. Approved devices can't be deleted, so they remain in the list as Disabled.
- Name devices descriptively: Include the owner's name and device purpose in the name (for example, "Alice - Mobile - Approvals").
- Keep CloudSign instances updated: Make sure CloudSign nodes run the latest version for compatibility with quorum operations.
- Monitor CloudSign connection status: An Offline device can't respond to signing requests. If a device shows Offline, check that its container is running and has outbound network access before signing traffic is affected.
- Types of devices: Detailed device type comparison
- Set up and run CloudSign: CloudSign infrastructure setup
- MPC quorums: Create quorums using your devices