Send an individual payment
This section describes the steps involved in sending an individual payment using Ripple Payments Direct.
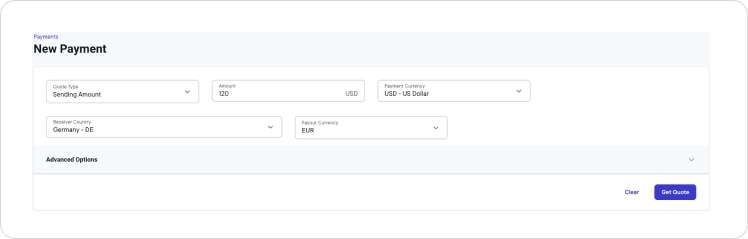
1. Get quote
Fill out all necessary information to fetch a quote for the payment, including the quote type, amount, and receiver country.
- Click the Payments tab.
-
Click
Create Payment
>
Individual
.
-
On the
New Payment
page, select one of the following
Quote Type
options from the drop-down list.
- Sending Amount : Select this option if you want to specify the amount to be sent prior to factoring in the FX and cost.
- Receiving Amount : Select this option if you want to specify the amount to be received after FX and fees have been applied.
-
In the
Amount
field, enter the amount of the currency you want to send or you want the beneficiary to receive.
Note:
If you specified an amount to be sent (instead of received), the Payment Currency field, which allows you to select the sending currency, will be displayed.
USDis currently the only available sending currency supported by Ripple Payments Direct. -
In the
Receiver Country
field, select the country where the beneficiary is located from the drop-down list.
The following countries are currently supported with Ripple Payments Direct :
Receiver Country supported options
Country name ISO Alpha-2
country codeAustria AT Belgium BE Croatia HR Czechia CZ Denmark DK Estonia EE Finland FI France FR Germany DE Greece GR Hungary HU Iceland IS India IN Ireland IE Italy IT Lithuania LT Luxembourg LU Malta MT Monaco MC Netherlands NL Norway NO Philippines PH Poland PL Portugal PT Romania RO Spain ES Sweden SE Switzerland CH United Kingdom of Great Britain and Northern Ireland GB -
United Kingdom of Great Britain and Northern Ireland
only: From the
Payout Currency
field select either
EUR
or
GBP.
All other countries currently support only one payout currency, hence, the payout currency is pre-selected in those cases.Optional:
In the Advanced Options section, you can define advanced quote details. For example, you can specify a receiver RippleNet account or a sender segregated account, apply a currency filter, specify an exchange rate fee, and other payment specifics. For more information, see Advanced options.
- Click Get Quote .
The New Payment page shows you a quote for the payment you initiated. The quote expires after one minute. If the quote expires, you have to get a new quote by creating a new payment using the same field values.
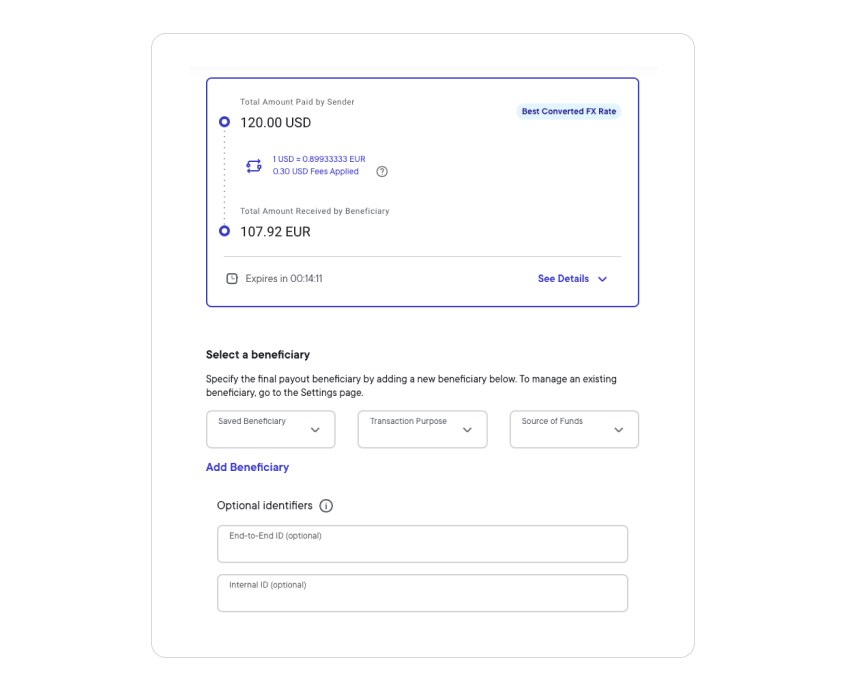
2. Review quote
Review the quote to ensure that the rate and fees are appropriate.
Quote details example:
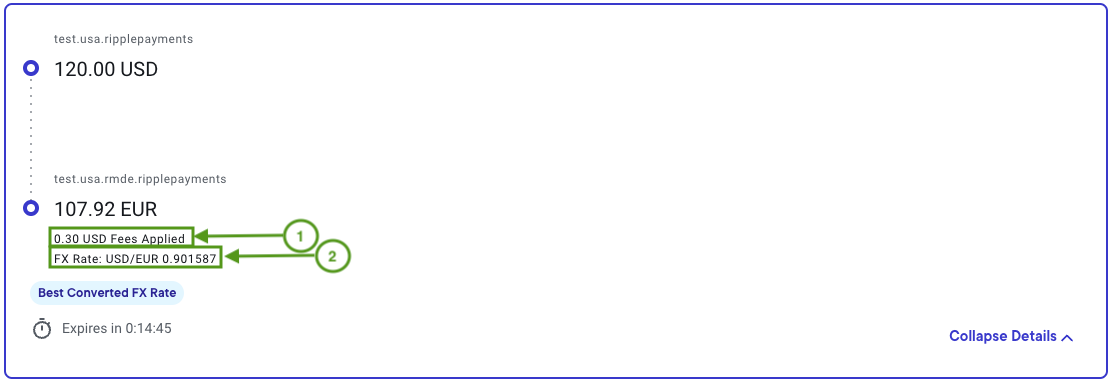
1 - Ripple service fee: The fee Ripple charges for this payment transaction.
2 - Foreign exchange (FX) rate: The rate at which the source currency is exchanged for the destination currency.
3. Accept quote
Select the beneficiary of the payment to accept the quote.
-
From the
Saved Beneficiary
drop-down list, select your beneficiary.
Note:
The beneficiary information will be included in the RippleNet Payment Object (RPO) and shared between Ripple's intermediary node and the payout partner node.
Alternatively, if your intended beneficiary isn't available in the drop-down list, click Add Identity and see Identity management for more information on how to add and manage beneficiaries.
-
Only if you're making the payment on behalf of a different originator:
Select This payment will be made on behalf of a separate originator and then select an originator from the Saved Originator drop-down list.Alternatively, if your intended originator isn't available in the drop-down list, click Add Identity and see Identity management for more information on how to add and manage beneficiaries.
-
From the
Transaction Purpose
drop-down list, select the purpose of the transaction.
Transaction Purpose options
- Allowance
- Architectural, Engineering and Other Technical Services
- Bonus Payment
- Commission
- Construction and Installation Services
- Deposit
- Deposits with or from Offshore Financial Institutions
- Family Maintenance
- Goods and Services by Short-Term Workers
- Goods and Services by Travellers
- Goods for Processing & Manufacturing Services
- Home Health Care
- Interest
- Intra Company Payment
- Investment & Securities
- Invoice Payment
- Maintenance and Repair Services
- Mobile P2P Payment
- Order Cheque Domestic
- Order Cheque Foreign
- Others
- Payment for Machinery, Non-Customized Packaged Software and Transport Equipment
- Payment for Manufactured Goods
- Payment for Miscellaneous Manufactured Articles
- Payroll
- Purchase Sale of Goods
- Purchase Sale of Goods and Services
- Purchase Sale of Services
- Real Estate Abroad
- Rental Lease general
- Salary Payment
- Supplier Payment
- Term Loans Long-Term
- Term Loans Short-Term
-
Trade Services
-
From the
Source of Funds
drop-down list, select where your funds come from.
Source of Funds options
- Alimony
- Cash Proceeds
- Compensation
- Employee Income
- Gift
- Inheritance
- Insurance Premium Liquidation
- Paid Up Capital
- Real Estate Sale
- Redemption
- Retained Earnings
- Retirement Policy
- Sale Acquisition Corporation
- Sale Of Goods
- Savings
- Self Employment Income
- Winnings
- Click Accept Quote .
Note:
The Payments page lists all payments, with the most recent payment on top. After you accept the quote, you can select your payment and in the payment details you'll see the payment hopper on the right. The payment hopper shows each payment state transition and the elapsed time between the payment states. Changes in green show successful states, changes in red show stalled or failed states.
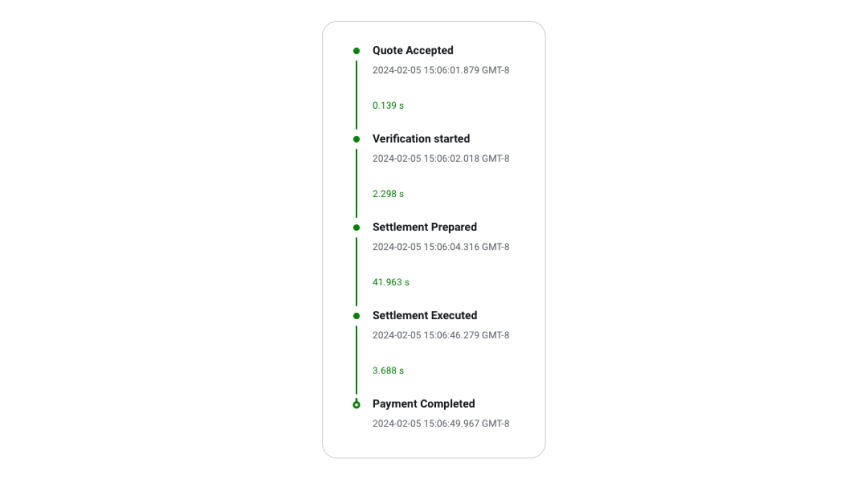
As soon as the payment transaction is settled, the status column will show Completed, which indicates that your payment was successful and that funds have been moved.

4. Optional: Investigate and create report
This section provides instructions for gathering payment details, understanding payment events, and creating reports.
-
To verify the payment details, click your payment's ID and then
Payment Object JSON
.
In the RPO, you'll find information related to your payment, such as user information and fees.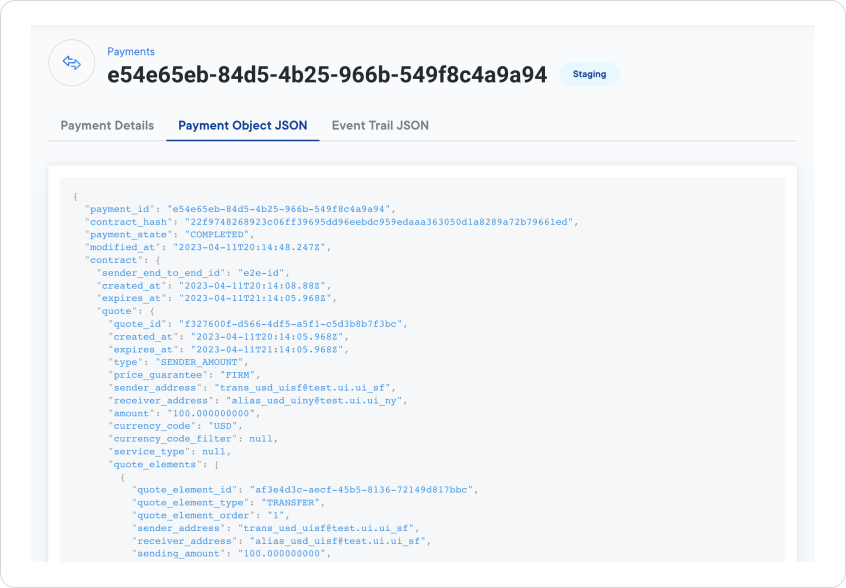
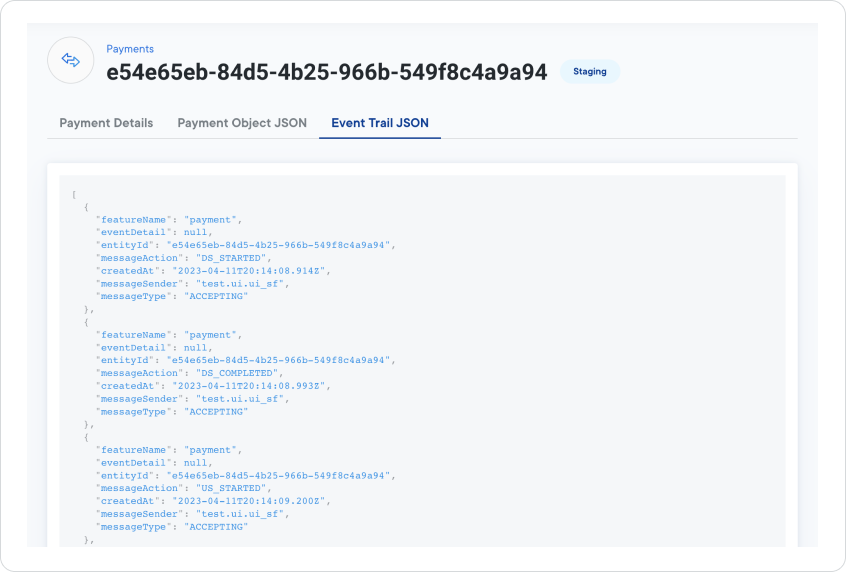
-
To verify the details of the event trail related to the payment, click your payment's ID and then
Event Trail JSON
. The event trail lists the types of events that happen during a payment transaction, including a timestamp and event status.
-
To look at pre-generated reports for
Ripple Payments Direct
transactions:
- Click Monthly Statement .
- Select the Date range (following UTC time) and Format for your report.
-
Click
Download
.
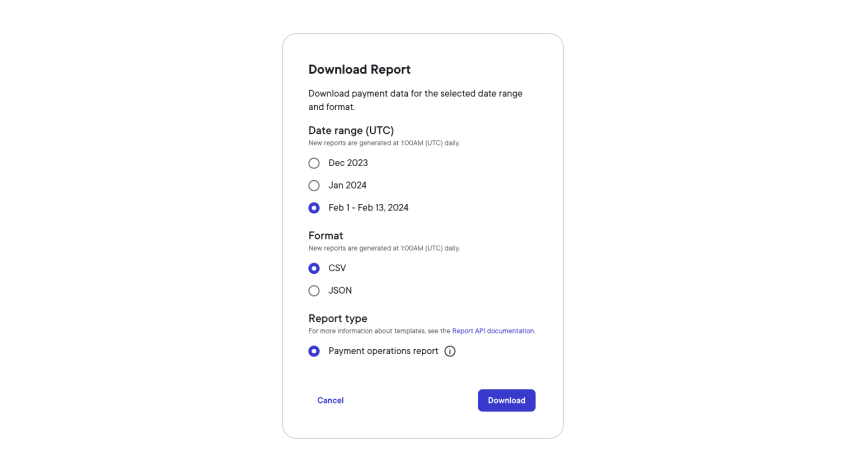
For detailed information on the Payment operations report data fields, see Monthly statement.