
Quarantined transfers need a policy that automates the release of quarantined transfers on child domains.
Alternatively, you can add a policy for manually releasing quarantined transfers. For more information, see Add a policy for a manual release of quarantined transfers.
To add a policy for automatically releasing quarantined transfers in your Elliptic or Chainalysis integration, complete these steps:
In the left navigation, select Integrations, and on the tile for your compliance solution provider, select Configure.
In the Integration window, next to Add policy for automatic release of quarantined transfers, select Start.
The Add a policy for automatic release of quarantined transfers window opens, displaying your previously configured risk scores.Example using Elliptic integration
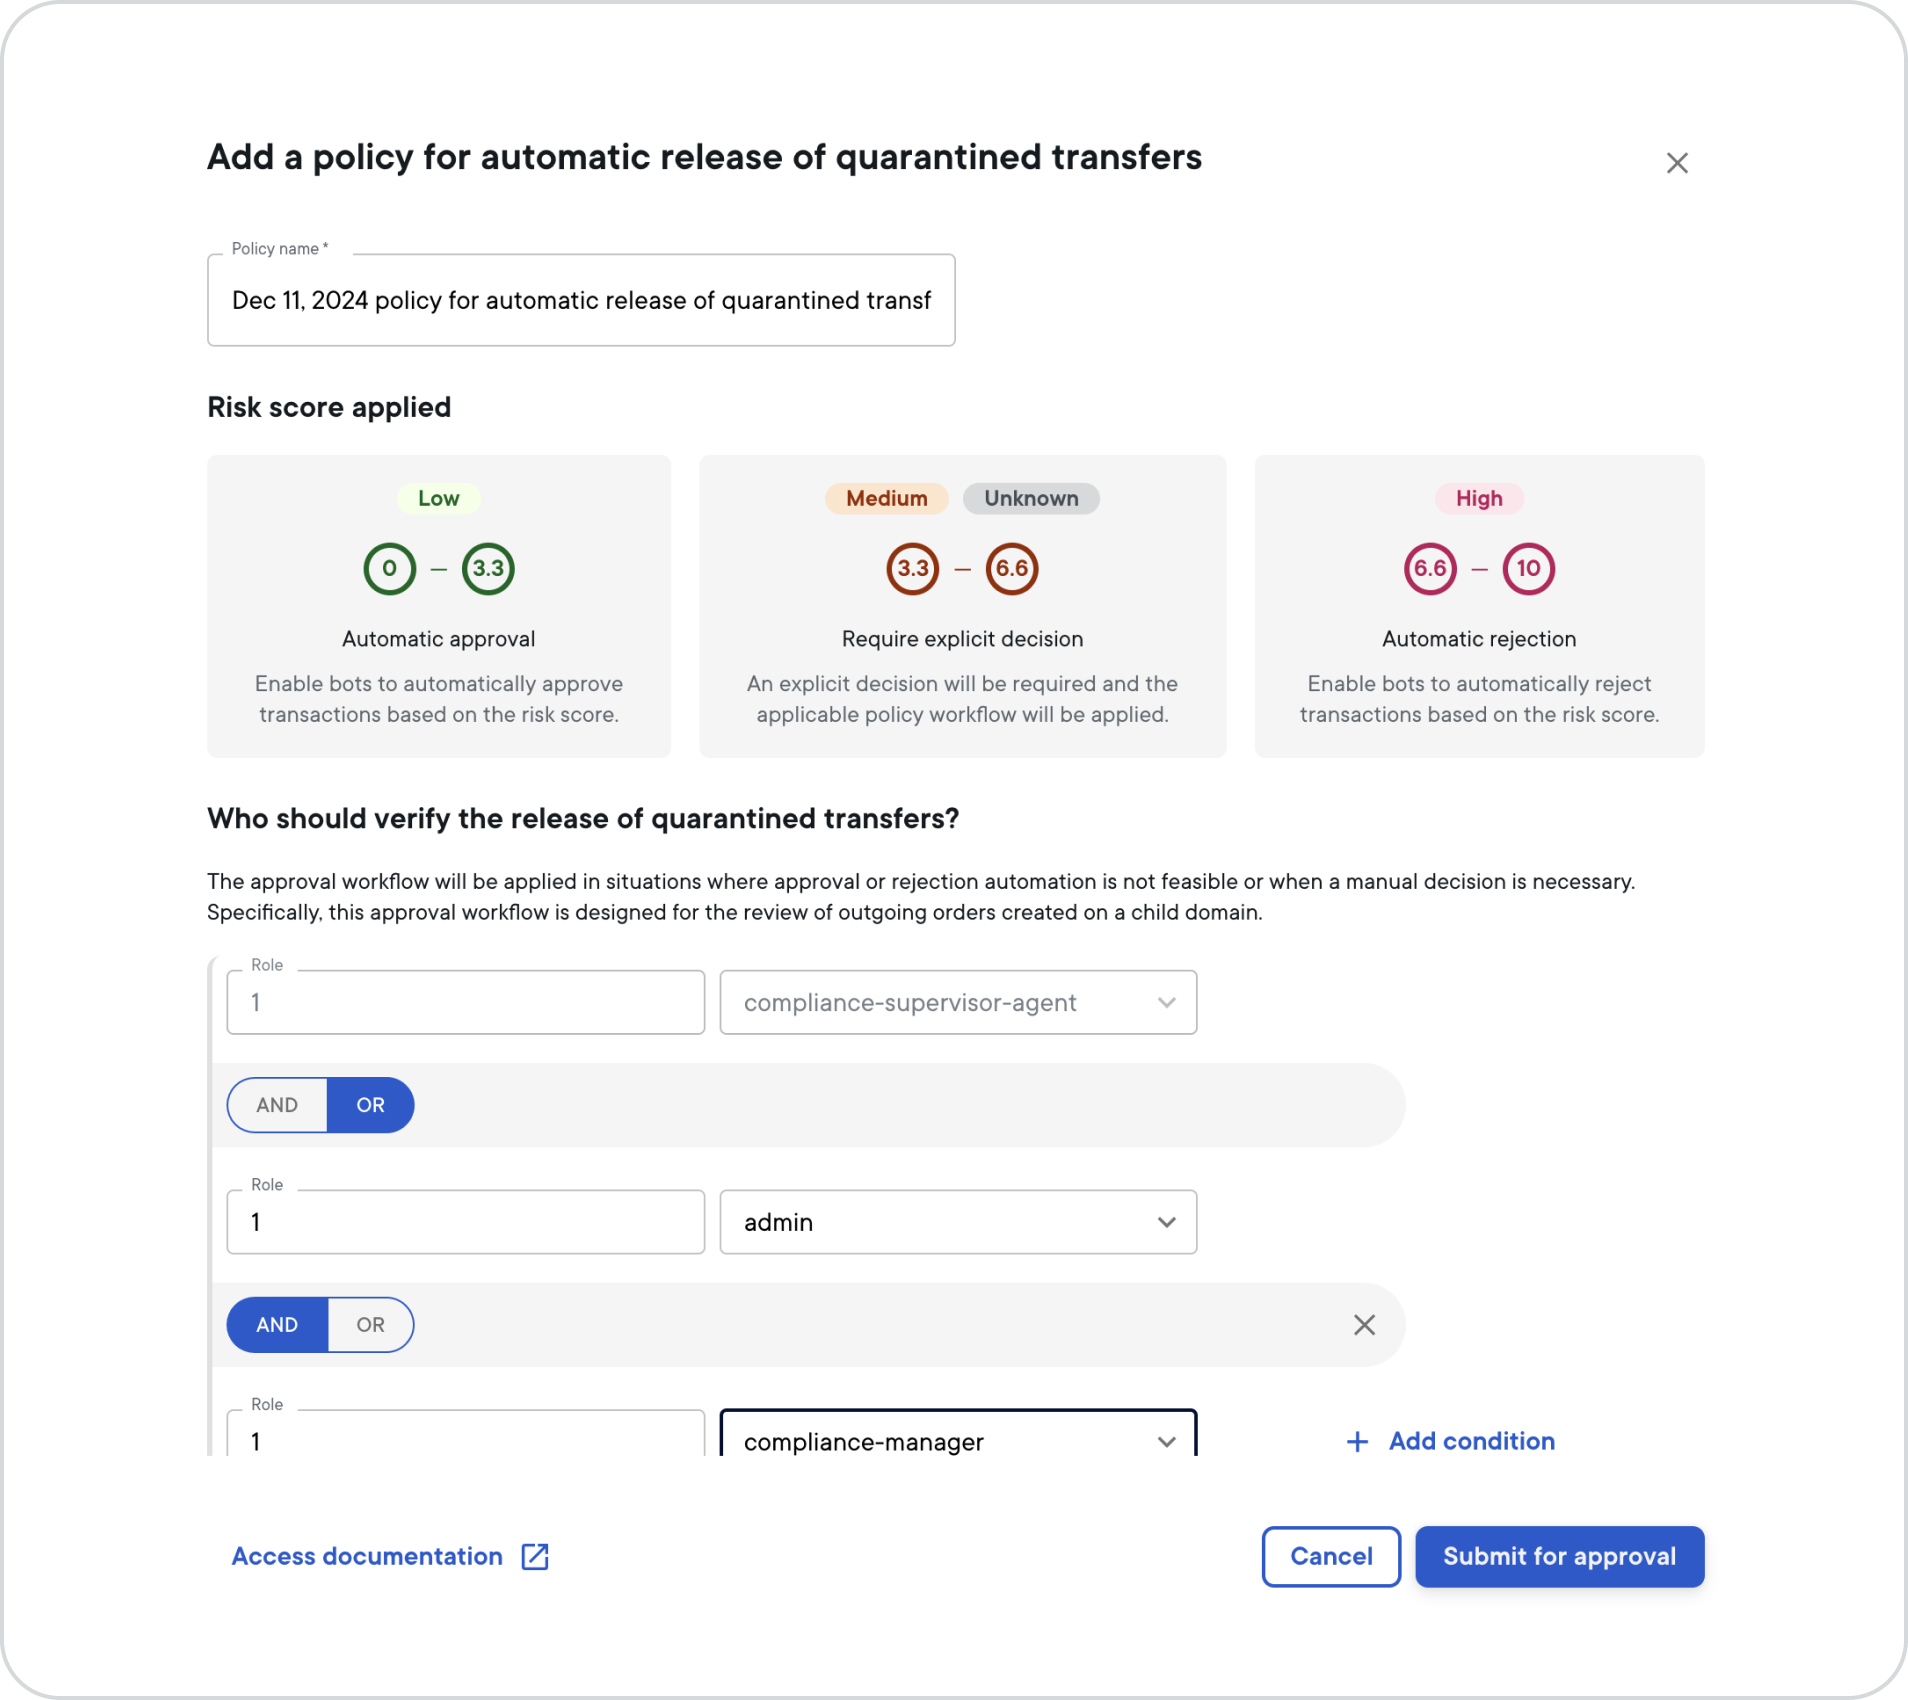
In the Policy name field, change the name to a unique name of your choosing.
In the Role fields, select the amount of users and the role type from the drop-down list, for example 1 and Admin.
If you want two or more different role types to be required for approving quarantine releases, select the AND condition. If you want either the role you already defined or another role to be required for approving quarantine releases, select OR.
Repeat step 4, for example 1 and Compliance manager.
Optional: If you wish to set up additional conditions that must be met for the approval of quarantined releases workflow, select Add condition and repeat step 4.
When you're done adding all conditions, select Submit for approval.
On your security device or the desktop app, sign the operation. For more information, see Sign intents.
The policy governs who approves the release of quarantined transfers. Each release is still a v0_ReleaseQuarantinedTransfers intent that someone must submit. To submit release intents from your own service, use the QuarantineReleaseAgent in the SDK.
The agent lists the quarantined transfers in each domain that it scans. It submits one release intent for the custody account that holds the funds: the recipient account for an incoming transfer, or the sender account for an outgoing transfer. It skips transfers that it has already released, and an error on one transfer doesn't stop the others.
The agent submits release intents as the user that its configuration authenticates as. If the quarantined accounts are in subdomains of the compliance domain, configure that user in the compliance domain. If the user belongs to the root domain, release intents for those subdomains fail with an UnauthorizedException.
The SDK examples assume a configured client. See Integrate via SDK. The following examples run the agent:
The TypeScript agent takes a configuration rather than a client. Omit domainIds to scan the root domain and every domain that the configured user can see.
import {
  QuarantineReleaseAgent,
  loadConfiguration,
} from '@ripple/ripple-custody-client-lib-typescript';

const agent = new QuarantineReleaseAgent({
  config: loadConfiguration(),
  domainIds: [domainId],
  pollIntervalMs: 10_000,
  onRelease: (r) => console.log(`Released ${r.transferId}`),
  onError: (transferId, error) => console.error(transferId, error.message),
});

agent.start();
// On shutdown:
await agent.stop();
To run a single scan instead of polling, call await agent.run(). It returns the transfers released in that pass.
By default, the TypeScript and Python agents record a transfer as released as soon as they submit the release intent. To record it only after the intent executes, set waitExecuted: true (TypeScript) or wait_executed=True (Python).
For a complete program, see example 32 (quarantine release agent). To get the examples, see Examples.