Use this page for day-to-day cold vault operations in the UI. For the conceptual model, see Cold vaults.
Because a cold vault is disconnected from the online deployment, accounts and manifests created for a cold vault remain Pending, and transaction orders remain Prepared, until the cold vault signs them. You export the unsigned operations from Ripple Custody as a .dat file, transfer the file to the cold vault server, make it available to the vault through the cold bridge, and then import the signed .dat file back into Ripple Custody.
If a newly registered cold vault is still Pending, complete the first-time vault handshake before processing accounts, transactions, or manifests.
- A registered cold vault.
- Cold bridge running on the cold vault server.
- Approved transfer media for moving
.datfiles between environments. - Access to the Ripple Custody UI.
| Action | Procedure |
|---|---|
| Complete the first-time handshake | Complete the first-time vault handshake |
| Create an account with a cold vault | Create an account with a cold vault |
| Sign a transaction with a cold vault | Sign a transaction with a cold vault |
| Import signed operations | Import signed operations |
| Receive assets | Receive assets into a cold vault account |
When you register a cold vault, it can appear with a Pending status because it cannot automatically connect to the online deployment. Complete the handshake by importing the initial vault payload from the cold vault server.
On the cold vault server, use the cold bridge to download the vault payload as a
.datfile.Transfer the
.datfile to the online environment using your approved transfer process.In Ripple Custody, go to Administration > Vaults.
Select the cold vault.
Select the Pending operations tab.
Select Import operations, and then select the
.datfile.Verify that the vault status changes to
Completed.
After the vault status is Completed, you can use the vault for account creation, transactions, and manifests.
Creating an account with a cold vault follows the same governed account-creation flow as a hot vault, with an additional cold vault signing step.
- Go to Accounts.
- Select Create an account.
- Enter the account name and description.
- Select the cold vault.
- Select one or more ledgers.
- In Advanced settings, select the account key strategy.
- Enter any required custom properties.
- Set the initial lock status.
- Select Submit for Approval and sign the operation.
- Wait for the required approvals.
- Export pending operations.
- Sign on the cold vault server.
- Import signed operations.
- Verify that the account no longer shows a pending or loading state and that the account address is available.
Signing a transaction from a cold vault account uses the same export, sign, and import workflow. Before signing, verify the transaction details on the cold bridge.
- Create a transfer order or transaction order from the UI.
- Submit the operation for approval and sign it.
- Wait until all required approvals are complete.
- On the account, go to the Orders tab and verify that the order reaches the
Preparedstate. - Export pending operations.
- Sign on the cold vault server.
- Import signed operations.
- On the account, go to the Orders tab and verify that the order changes to
Broadcasting. - Monitor the transaction in the Transactions view.
Before signing a cold vault transaction, verify the destination address, amount, network, and fees. After a signed transaction broadcasts to the blockchain network, Ripple Custody cannot recall it.
Go to Administration > Vaults.
Select the cold vault.
Select the Pending operations tab.
Select Export operations.
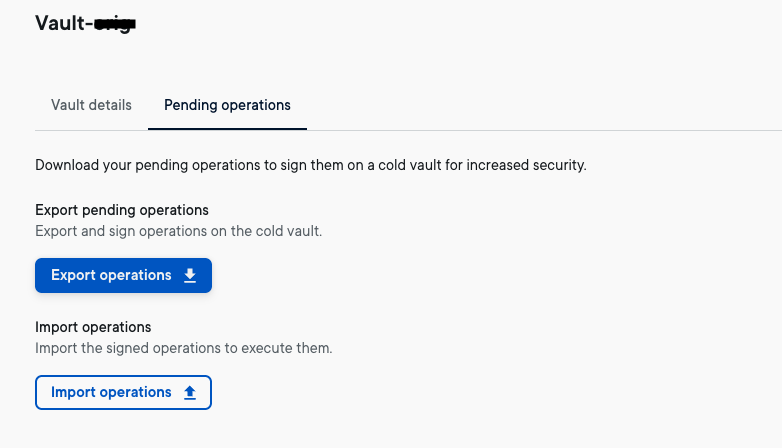
Ripple Custody downloads a .dat file containing the pending operations for the cold vault.
Transfer the .dat file to the cold vault server using your approved process.
On the cold vault server, open the cold bridge UI. The cold bridge shows signing counters for accounts, transactions, manifests, and backups, with the Upload, Download, Decode, and Refresh actions.
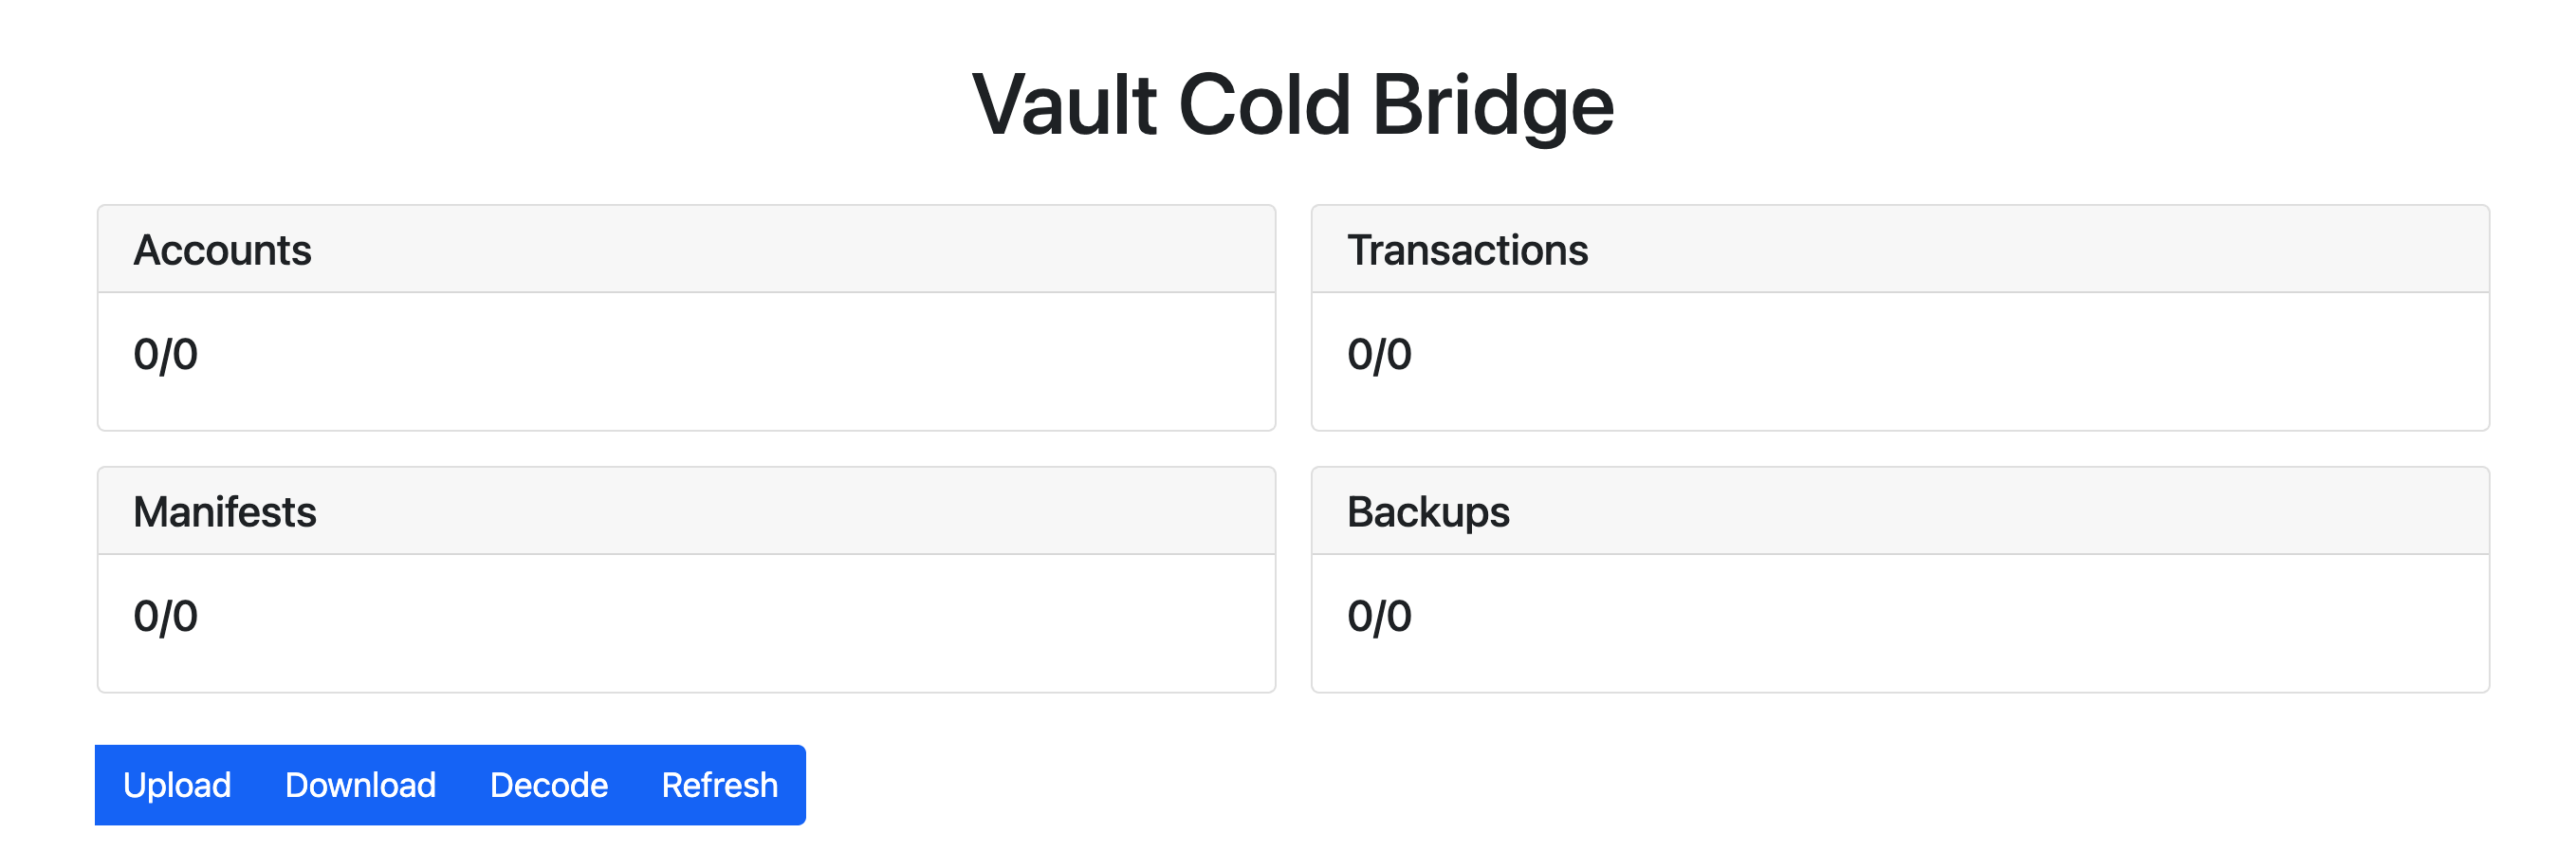
Select Upload and choose the exported
.datfile.Review the operations that the cold bridge displays.
Allow the cold vault to sign the operations through the cold bridge workflow.
Wait for the signing counters to show that there are no remaining operations to sign.
Select Download to save the signed
.datfile from the cold bridge.
Transfer the signed .dat file back to the online environment using your approved process.
- In Ripple Custody, go to Administration > Vaults.
- Select the cold vault.
- Select the Pending operations tab.
- Select Import operations.
- Select the signed
.datfile from the cold bridge. - Confirm that the operation completes successfully.
After import, Ripple Custody continues processing the account, transaction, or manifest.
Receiving assets into a cold vault account does not require cold bridge signing. Incoming funds appear through the standard receive and indexing workflow. If the transfer enters quarantine, follow the standard quarantine release process.