Authentication and authorization of UI operations is managed through the Ripple Custody: Auth & Sign app. The app stores secure information associated with a user and provides it during login, intent submission, approval, rejection, and other secure UI operations.
When you register for the Ripple Custody UI, Ripple Custody generates your keys and JSON Web Token (JWT) and stores them in the authenticator app.
Whenever you log in, the app uses this information to authenticate you.
The app stores your private key on your device, and Ripple Custody never keeps a copy. Because the key exists only on your device, certain actions delete it permanently. Before you reinstall the app or change your device biometrics, read Protect your device key.
Registration for the Ripple Custody UI is a two-step process:
- The new user creates a profile in the UI and authenticator app.
- A user administrator creates the user account from the user's alias and public key.
For the user-administrator step, see Create a user in the UI.
Before you register or log in, download the Ripple Custody: Auth & Sign app from your app store and install it on your mobile device.
The Auth & Sign app is supported on the following platforms:
| Platform | Requirement |
|---|---|
| Desktop | Windows only |
| iOS | v15.1 or later |
| Android | v7.0 (SDK 24) or later |
The mobile app is tested primarily on stock Android OS. While the app may function on custom Android operating systems, such as OxygenOS, GrapheneOS, or LineageOS, full compatibility is not guaranteed.
When you create a profile, Ripple Custody:
- Pairs your mobile device with the UI.
- Generates and stores your private authentication data on your mobile device.
- Generates the public key that the user administrator uses to create your user account.
To create a profile:
On the UI login page:
Click Create a profile.
Click Continue.
A QR code is displayed.
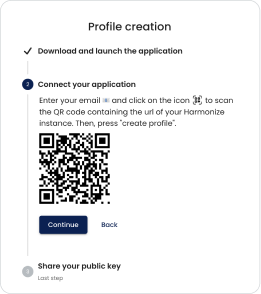
In the app:
Select Get started.
The Pair your device page is displayed.
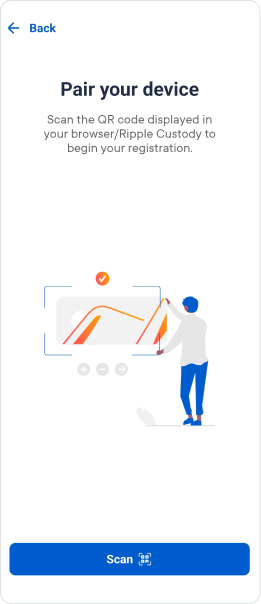
Select Scan.
Scan the QR code.
The Ripple Custody server address is filled in for you.
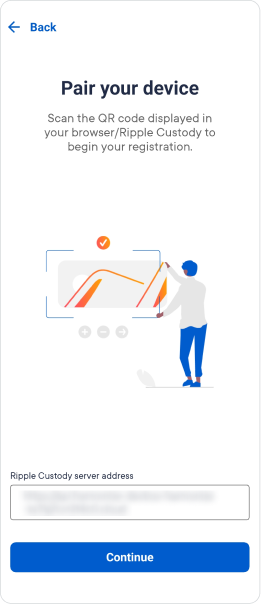
Select Continue.
The Complete your profile page is displayed.
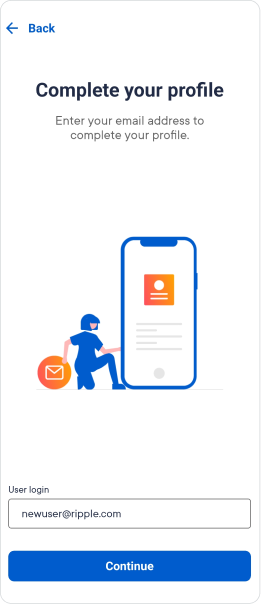
Enter your email address.
Select Continue.
Your public key is displayed in the Share your public key page.
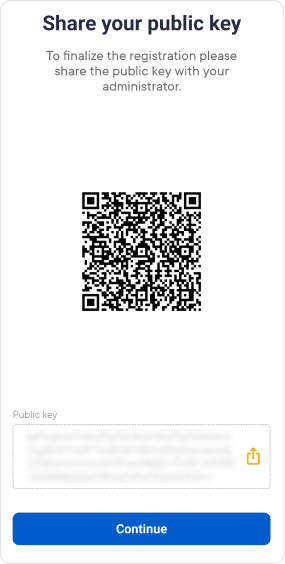
Share the public key with your user administrator by using the on-screen QR code or the share icon next to the Public key field.
Select Continue until you reach the final screen.
Select Finish.
After your user administrator creates your account, you can log in.
During onboarding, the app also registers your device for push notifications, so that signing and login requests reach your phone. If registration fails, or you select Continue without notifications, you can register later from your profile. See Manage push notifications.
The app stores your private key on your device. Ripple Custody never keeps a copy, so you can't recover the key if your device deletes it.
The following actions delete the private key from your device. After any of them, you can't log in or sign operations until you register again:
- Uninstalling or reinstalling the app.
- On a mobile device, changing or re-enrolling the biometrics that unlock your device, such as adding or removing a fingerprint or re-enrolling Face ID.
Before you take any of these actions, contact your user administrator so they can plan to replace your key.
If your device deletes the key, you regain access by registering again. Create a new profile, share the new public key with your user administrator, and the administrator creates a replacement user with your new key. For more information, see Refresh user keys.
Ripple Custody includes the following login types:
- An internal user name and password.
- If available, one or more external single sign-on (SSO) identity providers.
To log in:
In the Ripple Custody UI, select one of the login options available to you:
- To log in with your internal user name and password, select Harmonize.
- To log in with SSO, select an identity provider, such as Azure AD.
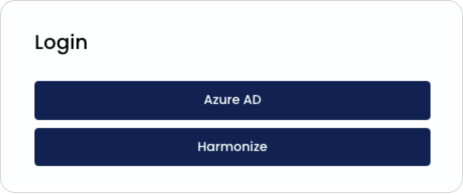
The login options available depend on your configuration. All users can log in with the internal user name and password.
On the login page, enter the details for the login type:
- To log in with SSO, enter the details requested by the identity provider.
- To log in with your standard user name and password:
Enter your email address.
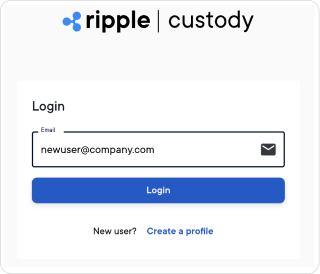
Click Login.
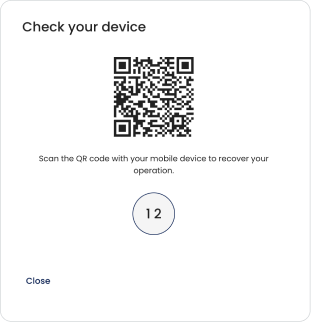
A QR code is displayed.
In the app:
Select Scan and scan the QR code.
The app displays a set of two-digit numbers.
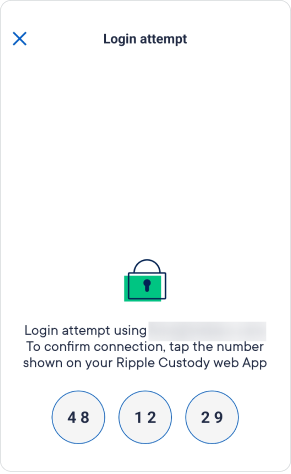
Select the number that matches the two-digit code displayed in the UI.
If prompted, authenticate in your app.
Ripple Custody issues the login code from the server. If the login page shows an error instead of a QR code and a code, the server refused the request, the service was unavailable, or you exceeded the login rate limit. When you see Too many login attempts. Please try again later., wait a few minutes before you try again. The rate limit protects you from a flood of push notifications to your phone.
Ripple Custody approves your login and redirects you to your dashboard.
After login, select a domain in the drop-down at the top left to access the entities and operations available to you in that domain.
Any change requested in the Ripple Custody UI requires authorization with a digital signature. You sign when you submit an intent for approval, approve an intent, or reject an intent.
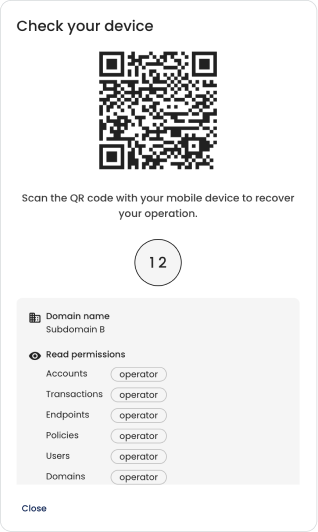
When you submit, approve, or reject an operation, the UI briefly shows Preparing your signing request and then opens the Check your device window with a QR code and a two-digit verification code. Ripple Custody issues the code from the server for this request only. The app shows the same code after you scan the QR code, and matching the two confirms that your phone is signing the operation that your browser requested.
To sign an operation:
With the app, scan the QR code displayed in the UI.
In the Signature requested window:
Check that the two-digit code at the top of the app matches the code in the UI. If the codes differ, select Cancel and contact your user administrator.
Review the information displayed in the app in the Intent details and Raw details sections.
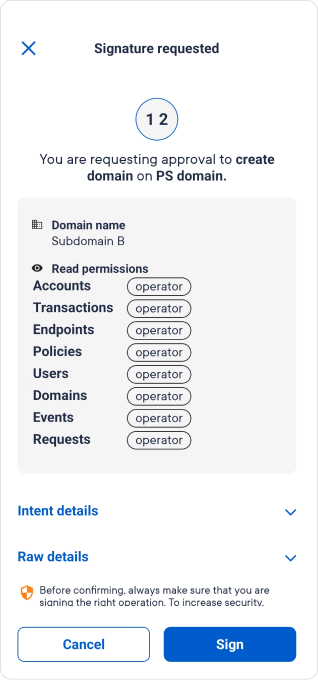
Select Sign.
If the UI can't obtain a valid code from the server, it shows an error and stops the signing request. Close the window and submit the operation again. If the app can't obtain a valid code, it shows Verification code unavailable with Retry and Cancel this request, and doesn't offer Sign or Reject in that state. Never approve a request whose code you can't verify.
Cancelling a signing request in the UI also cancels a request that is still preparing.
The Ripple Custody UI shows a success message if the signature was successful and an error message if the signature was unsuccessful. If the signature was successful, you can check the progress of the intent in Manage intents and approvals.
The app receives signing and login requests as push notifications. To receive them, the app registers your device with Ripple Custody. From app version 5.12.0, the app ties this registration to your signing key, so only your device can register or unregister itself for your user.
The first time you open the app after updating to version 5.12.0, the app re-registers your device. If your key is hardware-backed, the app asks you to authenticate once with your device biometrics. The app requests no new permissions.
You can register your device during onboarding or later from your profile:
- In the app, open your profile.
- Select one of the following:
- Register, to register a device that isn't registered yet.
- Retry registration, if a previous attempt failed.
- When you edit your profile, Save and register or Save without registering.
If registration fails, the app tells you why. For example, registration fails until your user administrator activates your user in Ripple Custody. Complete the activation, then retry.
When you delete a profile or point it at a different Ripple Custody server, the app unregisters your device with a signature from your key, and removes the profile only after the server confirms. If the app can't reach the server, or the server refuses the request, the app keeps the profile and tells you why. Try again when the server is reachable, or contact your user administrator.
Deleting a profile deletes your private key from the device. Read Protect your device key first.