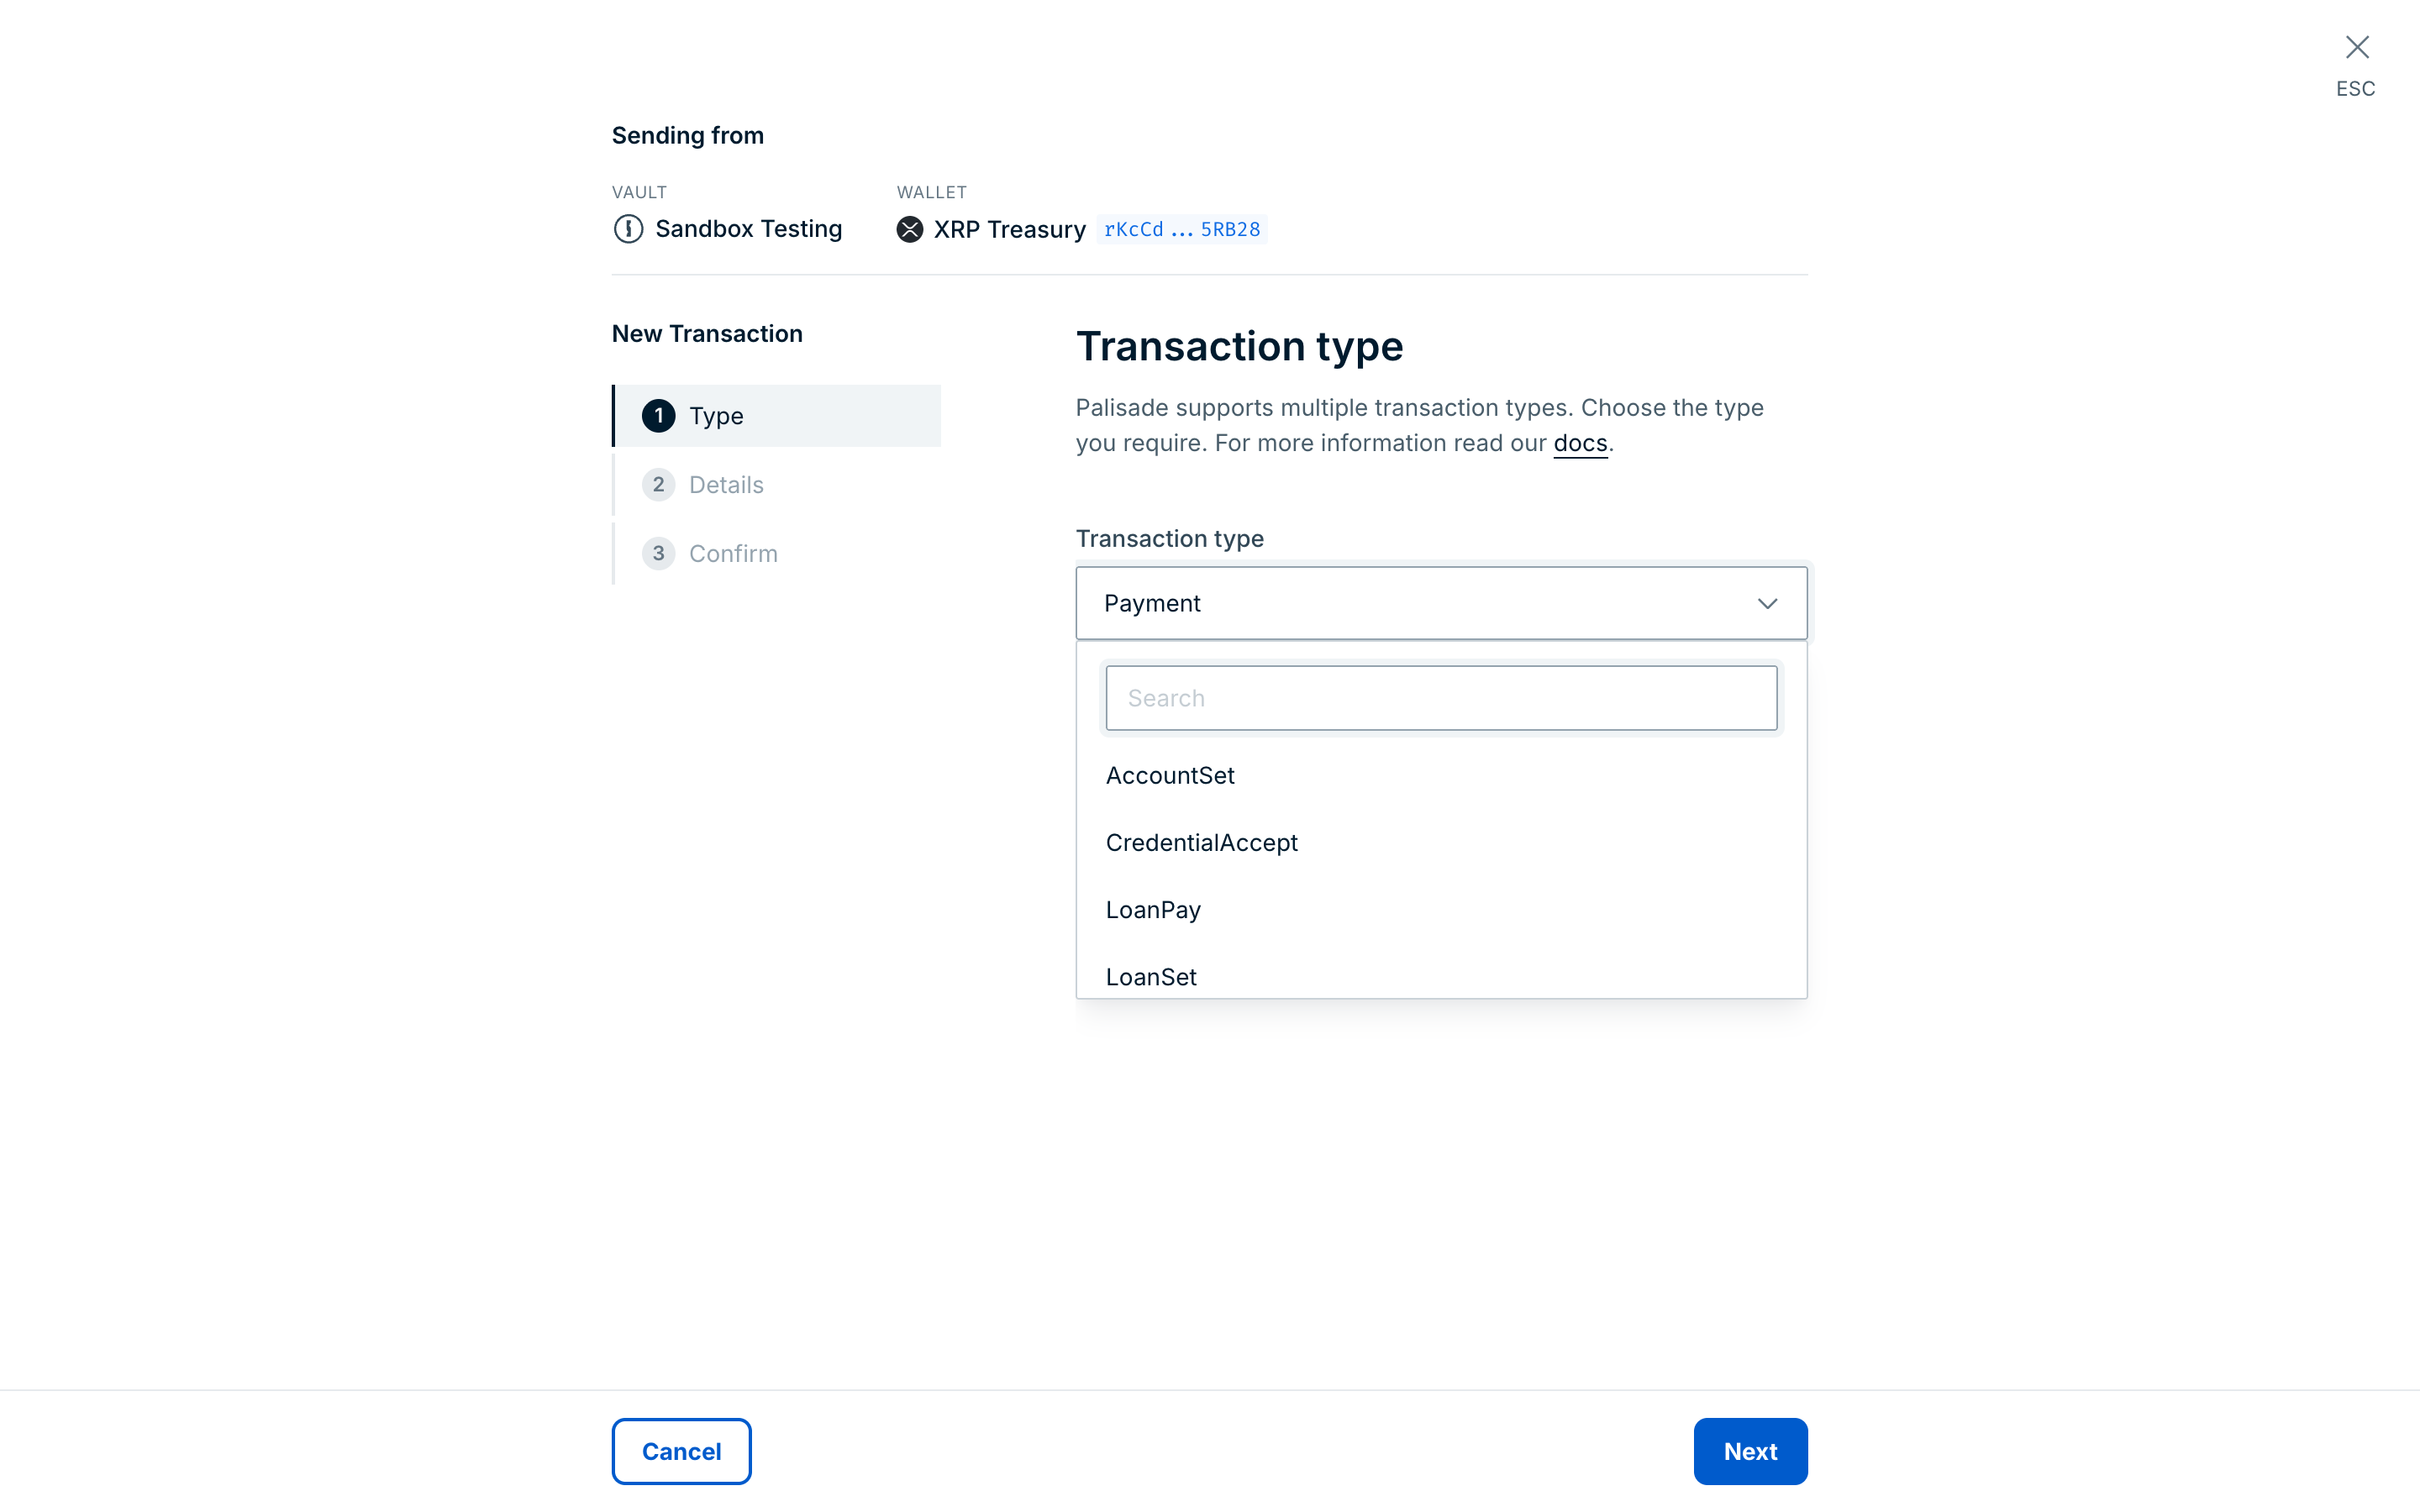
In addition to Payment, which works on all blockchains, the console offers transaction types that apply to XRP Ledger wallets only:
- OfferCreate
- OfferCancel
- TrustLine
- AccountSet
- SignerListSet
- CredentialAccept
- VaultDeposit
- VaultWithdraw
- LoanSet
- LoanPay
Required role: Owner, Administrator, or Proposer.
To start any of these transactions, navigate into your XRP Ledger wallet and click Send transaction. Choose the Transaction type and click Next. To send a payment instead, see Send assets in the console. To submit XRP Ledger transactions programmatically, see Submit XRP Ledger transactions via the API.
If CredentialAccept, VaultDeposit, VaultWithdraw, LoanSet, and LoanPay don't appear in the list, contact your Ripple representative to use them. The console submits these five types as raw signing transactions, so the wallet must have raw signing enabled, or the transaction fails its policy check. See Raw signing in wallet settings.
| Action | Console role | Console procedure | API procedure |
|---|---|---|---|
| Create a DEX offer | Owner, Administrator, Proposer | OfferCreate | Create a DEX offer (offer-create) |
| Cancel a DEX offer | Owner, Administrator, Proposer | OfferCancel | Cancel a DEX offer (offer-cancel) |
| Set a trust line | Owner, Administrator, Proposer | TrustLine | Set a trust line (trust-set) |
| Configure the account | Owner, Administrator, Proposer | AccountSet | Configure the account (account-set) |
| Set a signer list | Owner, Administrator, Proposer | SignerListSet | Set a signer list (signer-list-set) |
| Accept a credential | Owner, Administrator, Proposer | CredentialAccept | No dedicated endpoint; use raw signing |
| Deposit into a ledger vault | Owner, Administrator, Proposer | VaultDeposit | No dedicated endpoint; use raw signing |
| Withdraw from a ledger vault | Owner, Administrator, Proposer | VaultWithdraw | No dedicated endpoint; use raw signing |
| Request a loan | Owner, Administrator, Proposer | LoanSet | No dedicated endpoint; use raw signing |
| Repay a loan | Owner, Administrator, Proposer | LoanPay | No dedicated endpoint; use raw signing |
| Claw back issued tokens | - | - | Claw back issued tokens (clawback) |
| Create an AMM | - | - | Create an AMM (amm-create) |
| Deposit into an AMM | - | - | Deposit into an AMM (amm-deposit) |
| Withdraw from an AMM | - | - | Withdraw from an AMM (amm-withdraw) |
| Track the result | All roles | View a transaction | Track the result |
Permissions: In the console, owners, administrators, and proposers can create transactions, and owners, administrators, proposers, and approvers can approve them. See User roles and permissions. The API procedures need an API credential of type TRANSACTIONS. See Prerequisites.
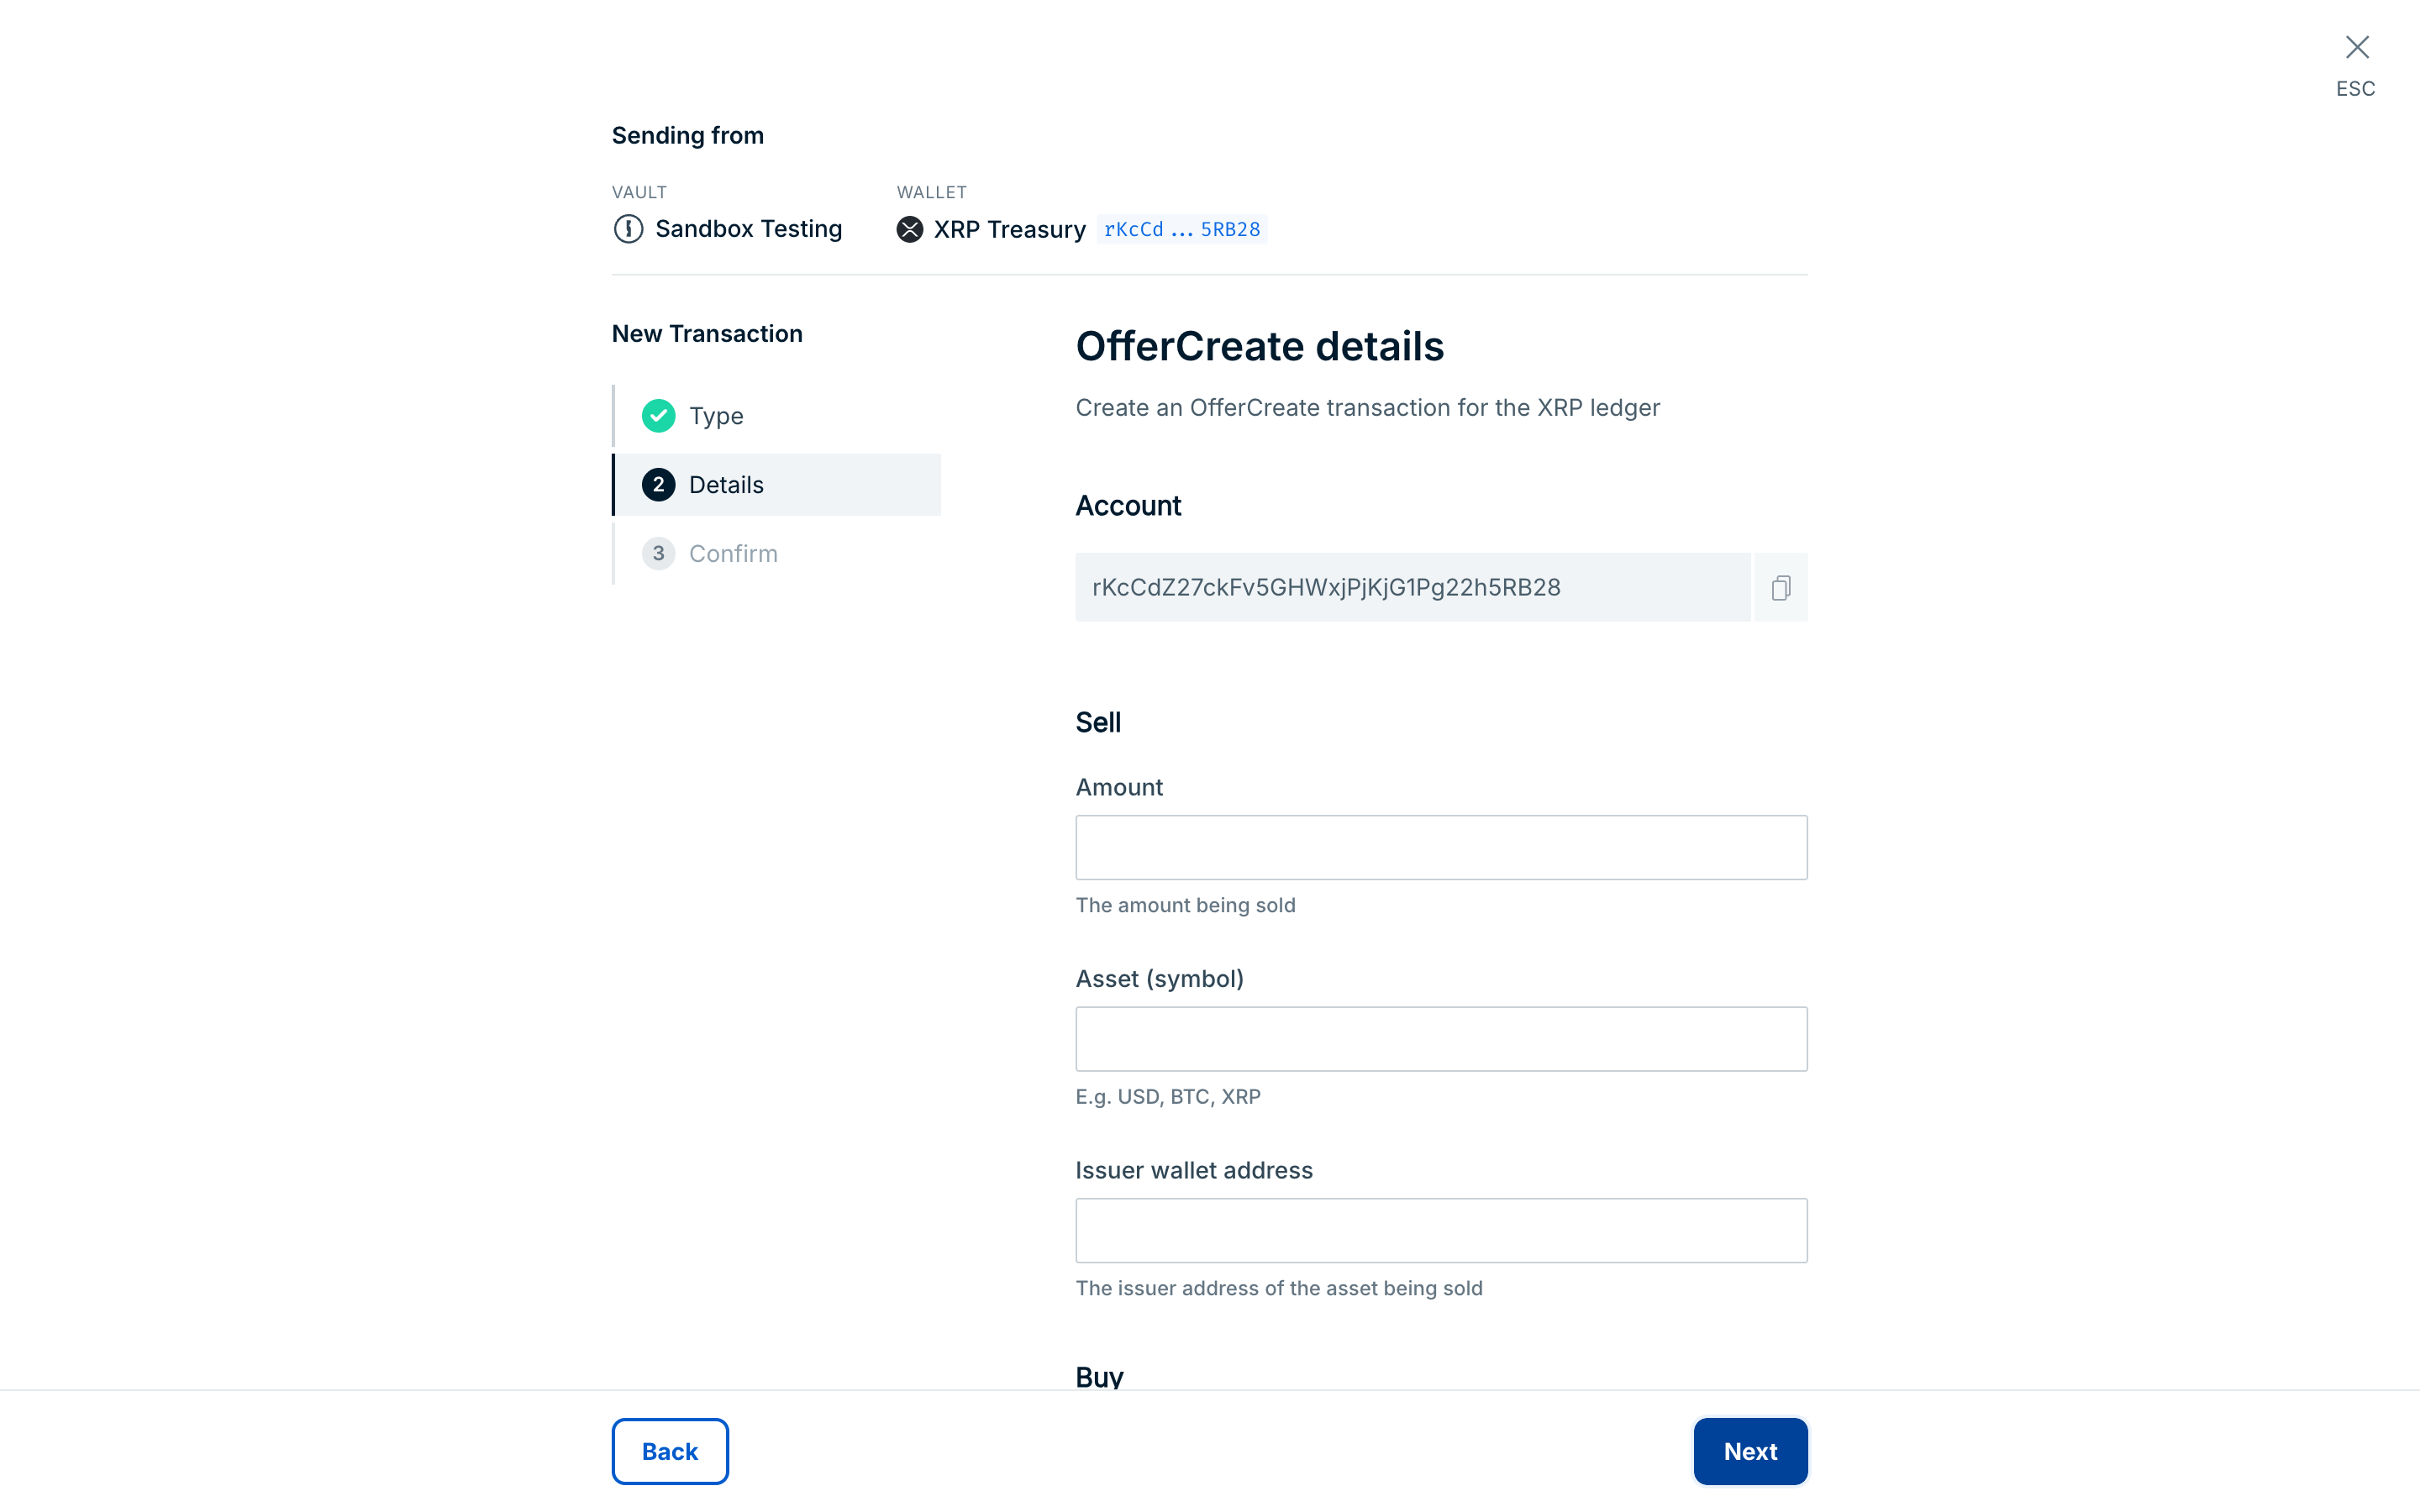
This transaction type places an offer or instruction on the XRP Ledger blockchain to exchange digital currencies at a certain price. It is similar to a traditional limit order.
If you select this transaction type, you will need to:
- Under Sell, enter sale details
- Amount of the asset being sold
- Asset (symbol) of the asset being sold
- Issuer wallet address of the asset being sold
- Under Buy, enter purchase details
- Amount of the asset being purchased
- Asset (symbol) of the asset being purchased
- Issuer wallet address of the asset being purchased
- Optional: under Flags, select one or more flags to dictate how the offer will behave
- Fill or Kill: The offer is canceled if it cannot be fully filled at the time of execution
- Immediate or Cancel: The offer trades as much as it can by consuming existing offers, or executes "successfully" even if no offers match
- Passive: The Offer will not consume Offers that exactly match it. Instead, it becomes an Offer object and waits in the ledger until other Offers or cross-currency payments fully consume it
- Sell: Exchanges the entire sale amount, even if it means obtaining more than the purchase amount in exchange
- Optional: under Advanced, complete advanced settings
- Sequence: a unique, increasing number associated with your account that ensures each offer from that account is executed only once and in the correct order. These are automatically generated, however users may wish to provide their own
- OfferSequence: a unique number used to cancel a previous sequence
- Expiration: the time the offer expires, as a Unix timestamp in seconds (seconds since 00:00 UTC on January 1, 1970). It must be in the future. Ripple Custody (Wallet) converts it to the XRP Ledger's own epoch for you. The console hint describes this field as a duration, but it takes a timestamp. After the offer expires, it cannot be filled by other users
- Click Next, review the details, and click Confirm transaction
Click here for more information on restrictions/error cases that apply when completing an OfferCreate transaction.
Example: an error message will be displayed if the user selects both the ImmediateOrCancel and FillOrKill flags.
This transaction type will remove an offer from the XRP Ledger.
If you select this transaction type, you will need to:
- Enter the Offer sequence: the sequence number of the previous OfferCreate transaction you wish to cancel
- Optional: under Advanced, complete advanced settings
- Sequence: the sequence number of the account sending the transaction
- Last ledger sequence: the highest ledger index this transaction can appear in
- Click Next, review the details, and click Confirm transaction
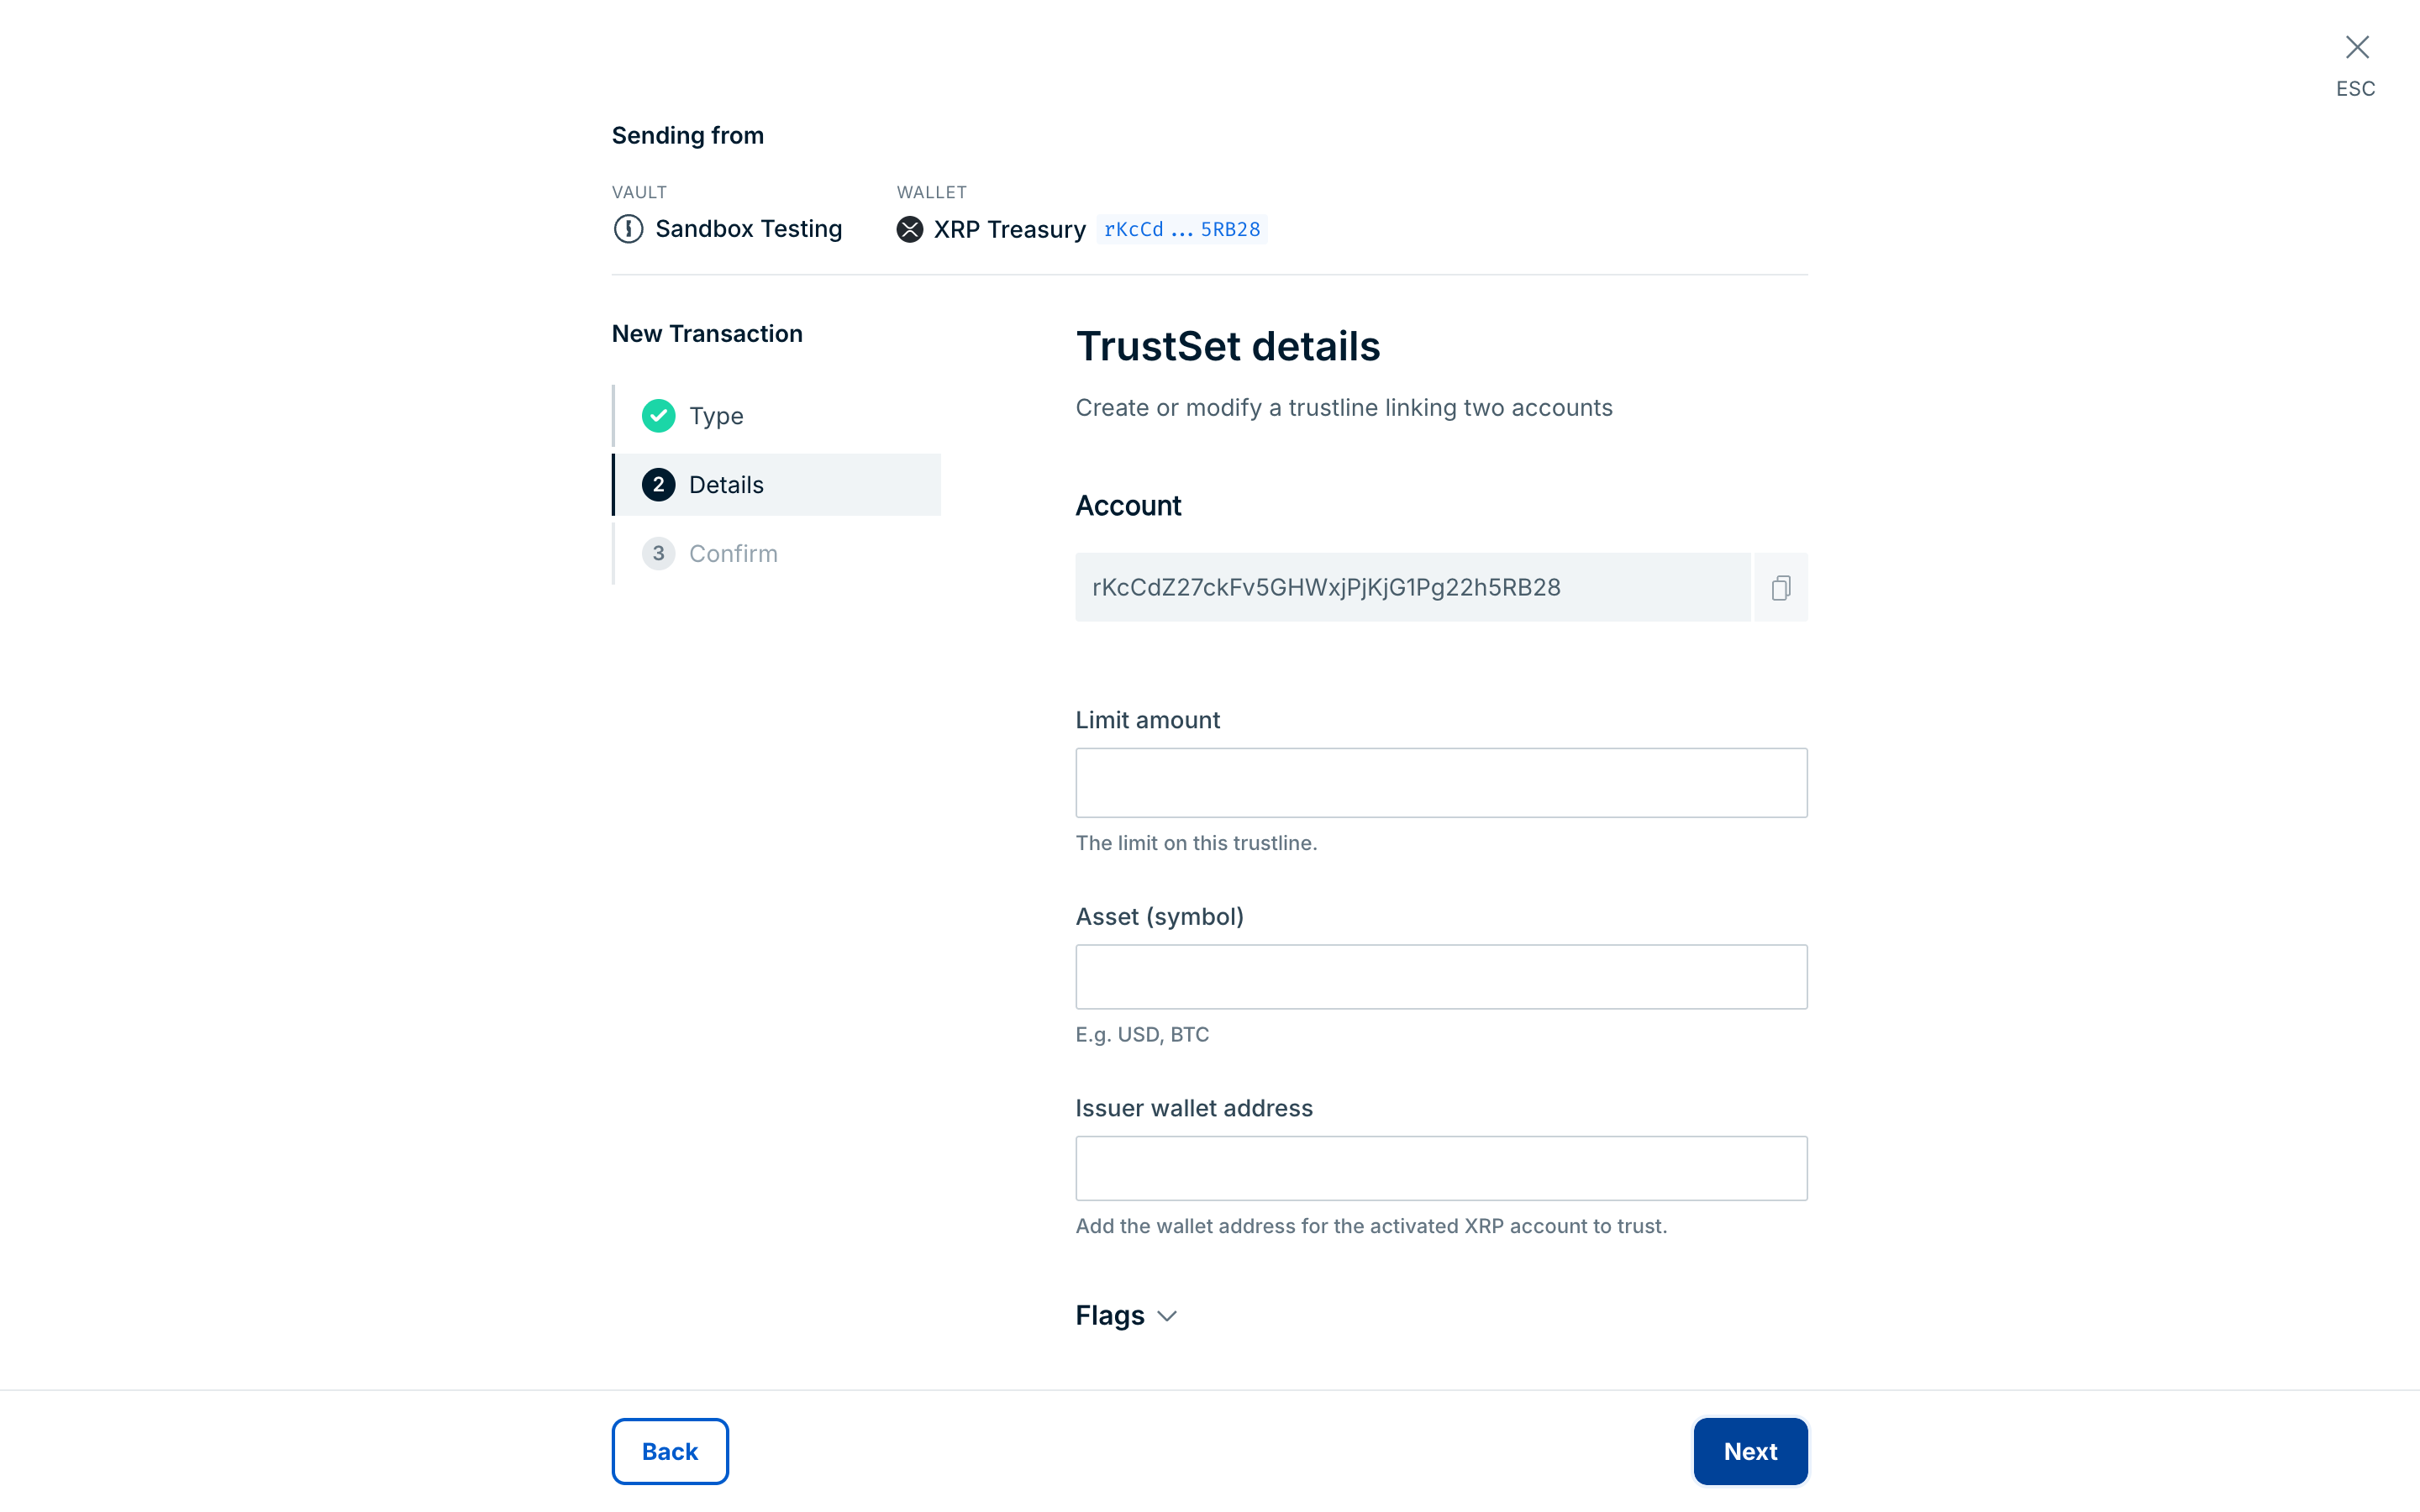
This transaction type will create or modify a trust line, or relationship of trust, between two accounts.
For example, if A wants to trade a custom token issued by B, A needs to first create a trust line with B’s account, specifying how much of B’s token A is willing to hold. This allows A to receive and send B’s tokens securely.
If you select this transaction type, you will need to:
Enter the Limit amount: the maximum amount of an asset that may be held on the trust line
Enter the Asset (symbol) of the asset that will be held on the trust line
Enter the Issuer wallet address: the wallet address that your activated XRP account will trust
Optional: under Flags, select one or more flags to dictate how the trust line will behave
- Authorize the other party to hold currency issued by this account
- Set No Ripple flag: blocks the automatic routing of payments through that specific trust line to other accounts
- Unset No Ripple flag
- Freeze the trustline
- Unfreeze the trustline
- Set Deep Freeze flag
- Unset Deep Freeze flag
More informationClick here for more information on the TrustLine flags available.
Click Next, review the details, and click Confirm transaction
AccountSet changes the settings of your wallet's account on the XRP Ledger, such as account flags, the domain, or the transfer fee for tokens the account issues.
- Under Account, confirm the wallet address. Every field on this form is optional; fill in only the settings you want to change.
- To turn an account flag on, enter its name in Set flag. To turn one off, enter its name in Clear flag. Each field takes one flag name, typed exactly as listed:
ACCOUNT_TXN_ID,ALLOW_TRUSTLINE_CLAWBACK,AUTHZ_NFTOKEN_MINTER,DEFAULT_RIPPLE,DEPOSIT_AUTH,DISABLE_MASTER,DISALLOW_INCOMING_CHECK,DISALLOW_INCOMING_PAY_CHAN,DISALLOW_INCOMING_TRUSTLINE,DISALLOW_XRP,GLOBAL_FREEZE,NO_FREEZE,REQUIRE_AUTH, orREQUIRE_DEST. These are flag names, not the XRP Ledger's numeric flag values. - Optional: fill in any of the other account fields:
- Domain: the domain that owns this account, as hex-encoded ASCII, less than 256 characters.
- Email hash: the hex-encoded 128-bit hash of the email address for this account.
- Message key: a 33-byte public key for sending encrypted messages to this account. The first byte must be
0x02,0x03, or0xED. - NFT minter: the address of another account that can mint NFTokens for this account.
- Transfer rate: the fee to charge when users transfer tokens this account issues, in billionths of a unit:
0, or a value from1000000000to2000000000. - Tick size: the tick size for offers involving a currency this account issues:
0, or3to15. - Wallet locator: an arbitrary 256-bit hash value to associate with this account.
- Wallet size: an unused field you can set on the account.
- Optional: enter a Sequence and a Last ledger sequence. Both must be numbers, and Last ledger sequence must be greater than Sequence.
- Click Next, review the details, and click Confirm transaction.
The console doesn't check the account field values before you submit. The XRP Ledger rejects values outside the ranges above. For the effect of each flag and field, see AccountSet on xrpl.org.
SignerListSet sets the list of accounts that can multi-sign transactions for your wallet's account on the XRP Ledger, and the combined weight their signatures need.
Under Signer Entries, enter each signer:
- Account: the signer's wallet address. The account doesn't need to exist.
- Signer weight: the weight of this signer's signature.
Click Add signer entry to add another signer, or Remove to delete one. You can add up to five signers in the console.
Enter the Signer quorum: the minimum sum of signer weights that authorizes a transaction. It must be at least
1, and the weights of all signers must add up to at least this value.Optional: under Advanced, enter a Sequence and a Last ledger sequence.
Click Next, review the details, and click Confirm transaction.
- The XRP Ledger allows up to 32 signers. The console accepts up to five. To set a longer list, use the signer-list-set endpoint.
- The XRP Ledger removes a signer list when the quorum is
0. The console requires a quorum of at least1, so you can't remove a signer list in the console. Use the API instead.
CredentialAccept accepts a credential that another account issued to your wallet's account on the XRP Ledger, so the credential takes effect. See Credential, vault, and loan types.
- Enter the Issuer: the XRP Ledger address of the account that issued the credential. Required.
- Enter the Credential type: the hex-encoded credential type identifier, up to 128 bytes. It must match the type the issuer used. Required.
- Optional: under Advanced, enter a Sequence and a Last ledger sequence. Last ledger sequence must be greater than Sequence.
- Click Next, review the details, and click Confirm transaction.
VaultDeposit deposits assets into a single-asset vault on the XRP Ledger in exchange for shares in that vault. See Credential, vault, and loan types.
- Enter the Vault ID: the 256-bit hash that identifies the vault on the XRP Ledger. This is a ledger object, not a Ripple Custody (Wallet) vault. Required.
- Enter the Amount to deposit, in drops of XRP (1 XRP = 1,000,000 drops). It must be a whole number greater than
0. Required. - Optional: under Advanced, enter a Sequence and a Last ledger sequence. Last ledger sequence must be greater than Sequence.
- Click Next, review the details, and click Confirm transaction.
The console sends Amount to the XRP Ledger as a drops value, so you can deposit only into a vault that holds XRP. The form's hint describes the amount as the vault's asset, but it has no field for an issued token or its issuer. To deposit an issued token, use raw signing.
VaultWithdraw redeems your shares in a single-asset vault on the XRP Ledger for the vault's assets. See Credential, vault, and loan types.
- Enter the Vault ID: the 256-bit hash that identifies the vault on the XRP Ledger. Required.
- Enter the Amount to withdraw, in drops of XRP (1 XRP = 1,000,000 drops). It must be a whole number greater than
0. Like VaultDeposit, the console supports XRP vaults only. Required. - Optional: enter a Destination: the account to receive the withdrawn assets. If you leave it empty, the assets go to your wallet.
- Optional: under Advanced, enter a Sequence and a Last ledger sequence. Last ledger sequence must be greater than Sequence.
- Click Next, review the details, and click Confirm transaction.
LoanSet creates a loan on the XRP Ledger from a loan broker. See Credential, vault, and loan types.
- Enter the Loan broker ID: the 256-bit hash that identifies the loan broker. Required.
- Enter the Principal requested: the principal amount of the loan. Required.
- Optional: enter the Interest rate. The console passes this value to the XRP Ledger unchanged, so enter it in the ledger's units: tenths of a basis point, from
0to100000(0–100%). For example, enter5000for 5%. - Optional: under Advanced, enter a Sequence and a Last ledger sequence. Last ledger sequence must be greater than Sequence.
- Click Next, review the details, and click Confirm transaction.
The console form sets only these fields. It can't add the counterparty's signature or loan terms such as the payment total, payment interval, or fees. To set those, use raw signing. See LoanSet on xrpl.org.
LoanPay makes a payment against an existing loan on the XRP Ledger. See Credential, vault, and loan types.
- Enter the Loan ID: the 256-bit hash that identifies the loan to repay. Required.
- Enter the Amount to repay, in drops of XRP (1 XRP = 1,000,000 drops). It must be a whole number greater than
0. The console supports loans in XRP only. Required. - Optional: under Advanced, enter a Sequence and a Last ledger sequence. Last ledger sequence must be greater than Sequence.
- Click Next, review the details, and click Confirm transaction.
- XRP Ledger transactions — What you can do on the XRP Ledger in the console and through the API
- View transactions in the console — Track the transaction after you confirm it