The address book stores information about external counterparties and their blockchain addresses. Ripple Custody (Wallet) requires you to register every external destination in the address book before you can send funds to it. Keep the address book accurate, governed, and compliant.
Each address belongs to a counterparty, so you must create a counterparty before adding any addresses.
| Action | Console role | Console procedure | API procedure |
|---|---|---|---|
| Create a counterparty | Owner, Administrator | Create a counterparty | Create a counterparty |
| List and get counterparties | All except Viewer | List and get counterparties | List and get counterparties |
| Update a counterparty | - | - | Update a counterparty |
| Add an address | Owner, Administrator | Add an address | Add an address to a counterparty |
| List addresses | All except Viewer | List addresses | List addresses |
| Delete an address | Owner, Administrator | Delete a counterparty or address | Get or delete an address |
| Delete a counterparty | Owner, Administrator | Delete a counterparty or address | Delete a counterparty |
| Require approval for new addresses | Owner, Administrator | Require approval for new entries | - |
Permissions: In the console, owners and administrators can create, update, and delete counterparties and addresses. Owners, administrators, proposers, and approvers can approve addresses. See User roles and permissions. The API procedures need an API credential of type CONTROLS. See Prerequisites.
Required role: Owner or Administrator.
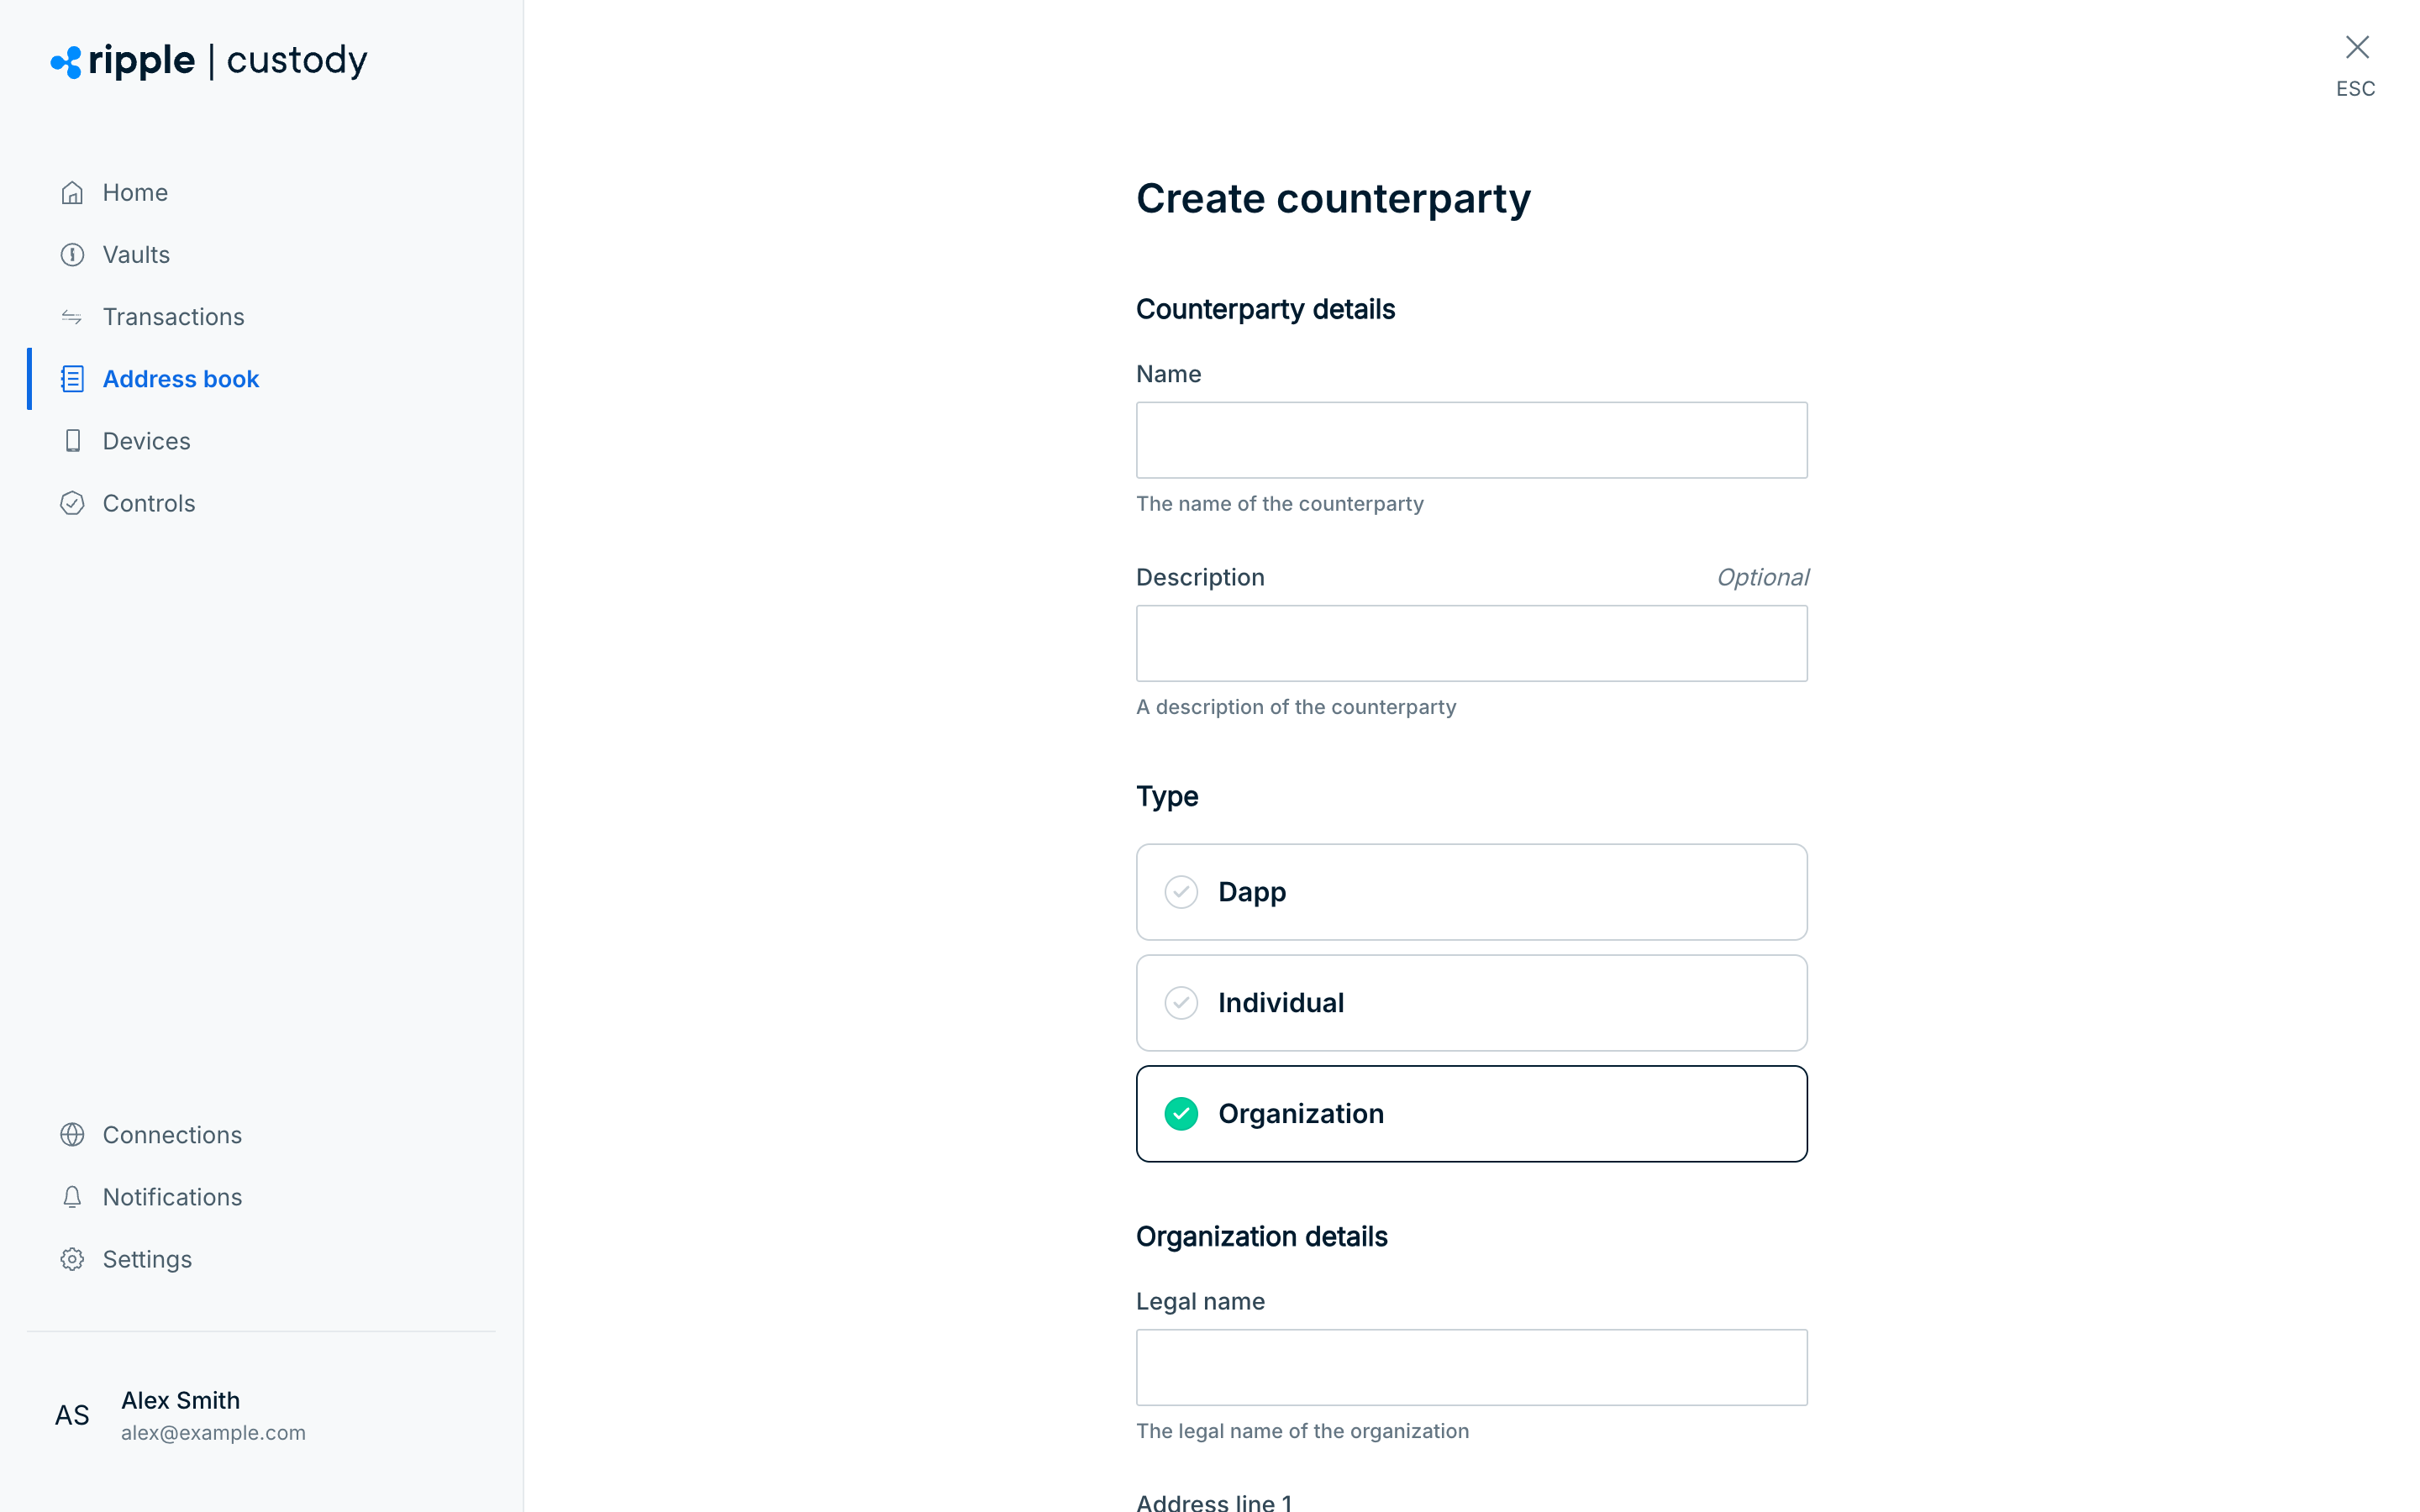
- Go to Address book > Counterparties.
- Select Add counterparty.
- Enter the counterparty name and optional description.
- Select the Type. Organization is selected by default:
- Individual: A person. Enter their first name, last name, and address details.
- Organization: A company or institution. Enter the legal name (at least 5 characters) and address details.
- Dapp: A decentralized application (smart contract).
- Select Next. Ripple Custody (Wallet) creates the counterparty.
Ripple Custody (Wallet) runs compliance checks on counterparty and address details, so new entries may not be available for immediate use. The platform validates entries before activating them.
Required role: Owner, Administrator, Proposer, Approver, or Auditor.
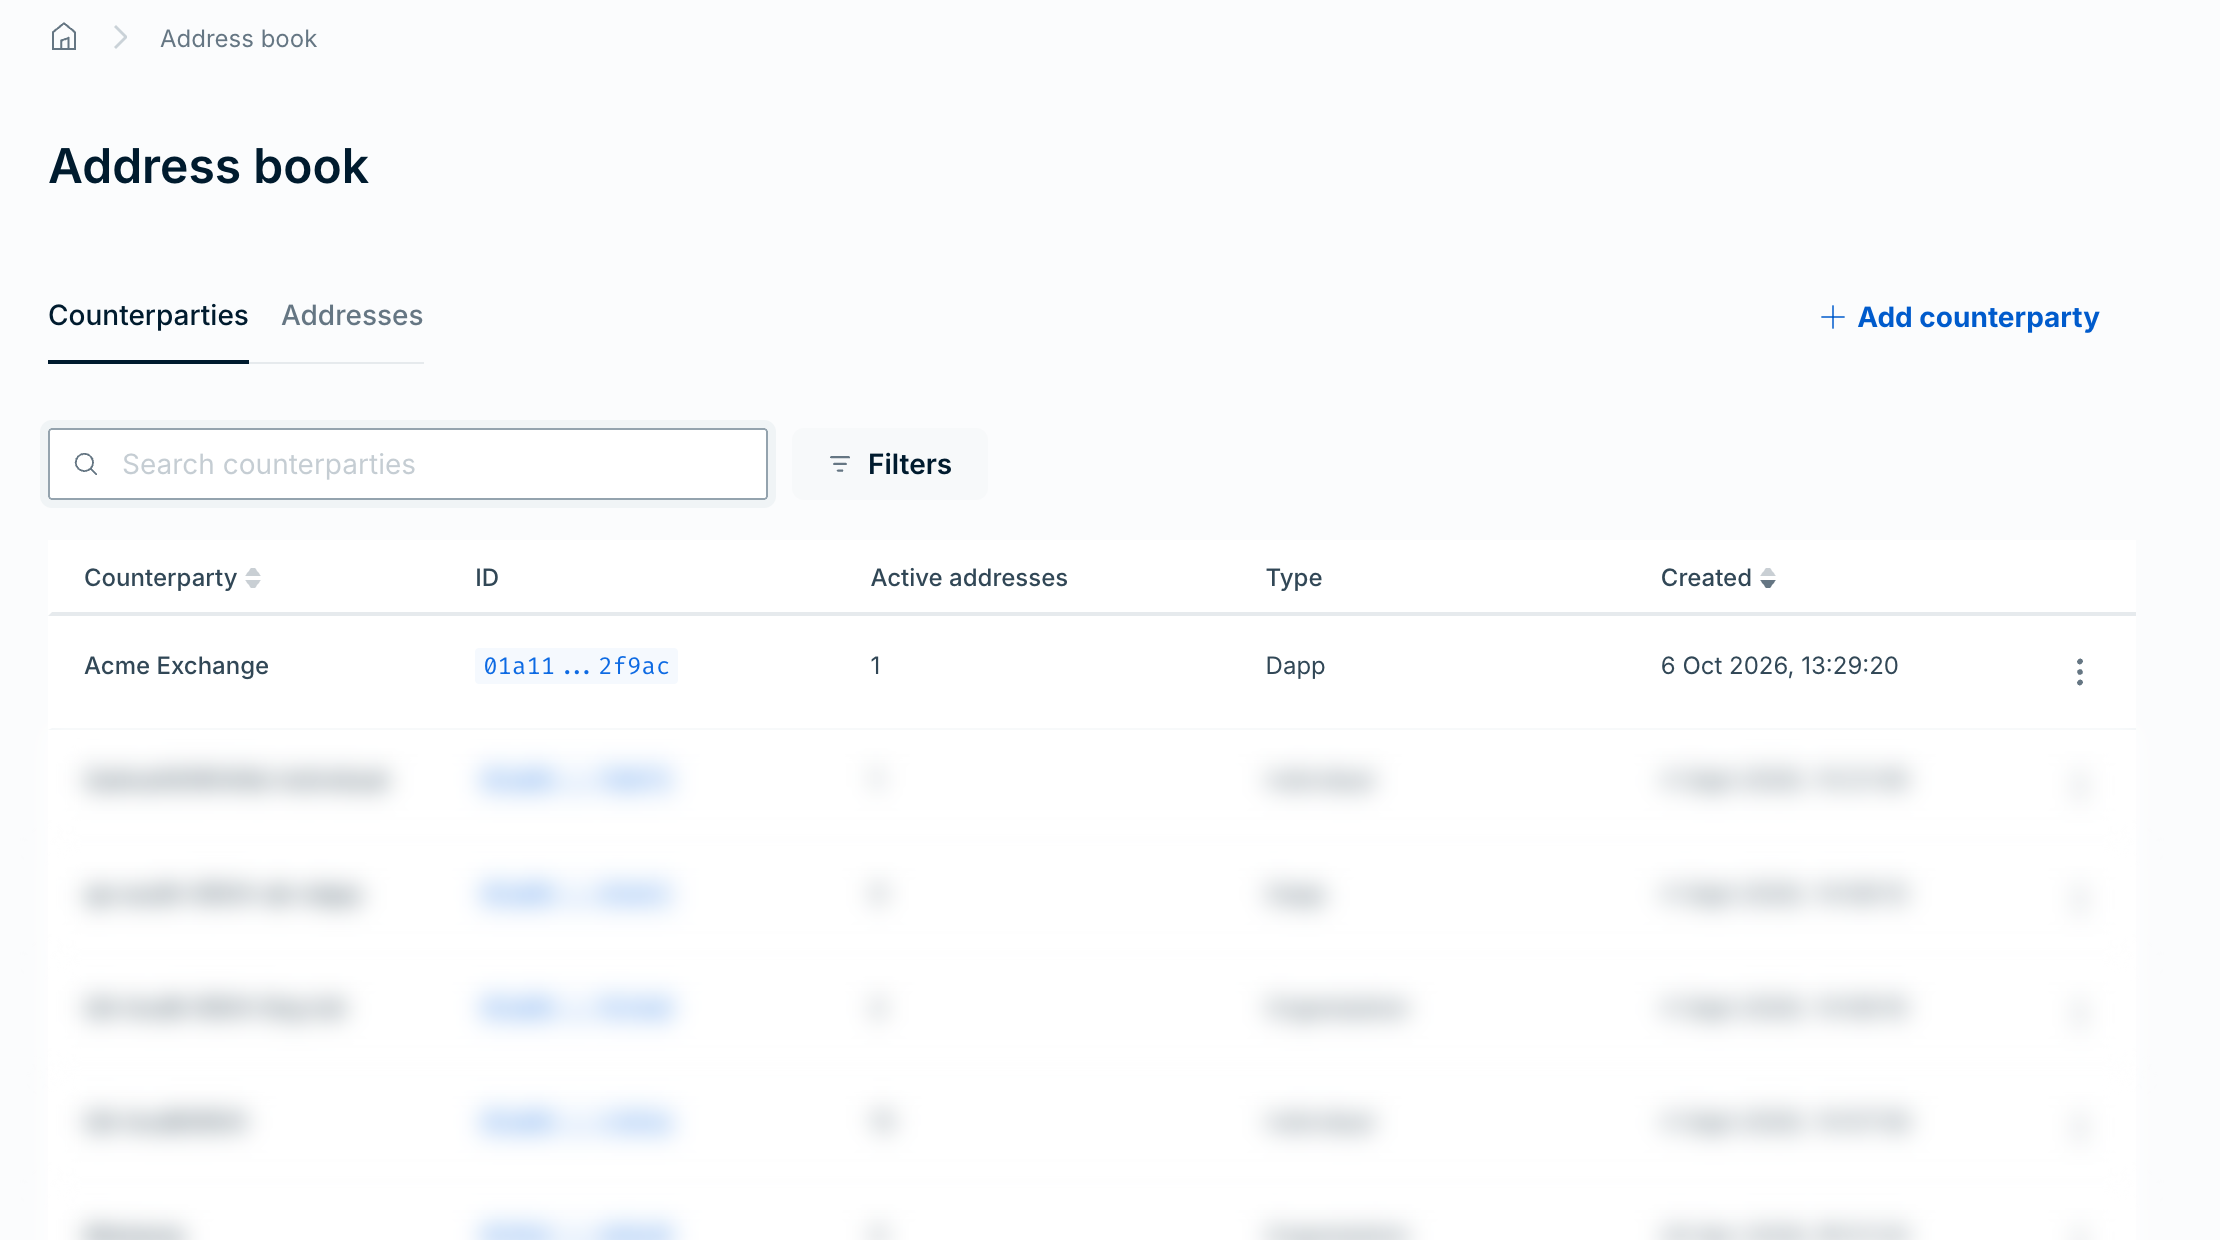
- Go to Address book > Counterparties. The table lists each counterparty with its Counterparty name, ID, number of Active addresses, Type, and Created date.
- To find a counterparty, enter text in Search counterparties. To clear the search, select Clear search.
- To filter by type, select Filters, select Type, and then select Dapp, Individual, or Organization. The active filter appears as a chip above the table. To remove it, select Clear all.
- To sort the table, select the Counterparty or Created column heading.
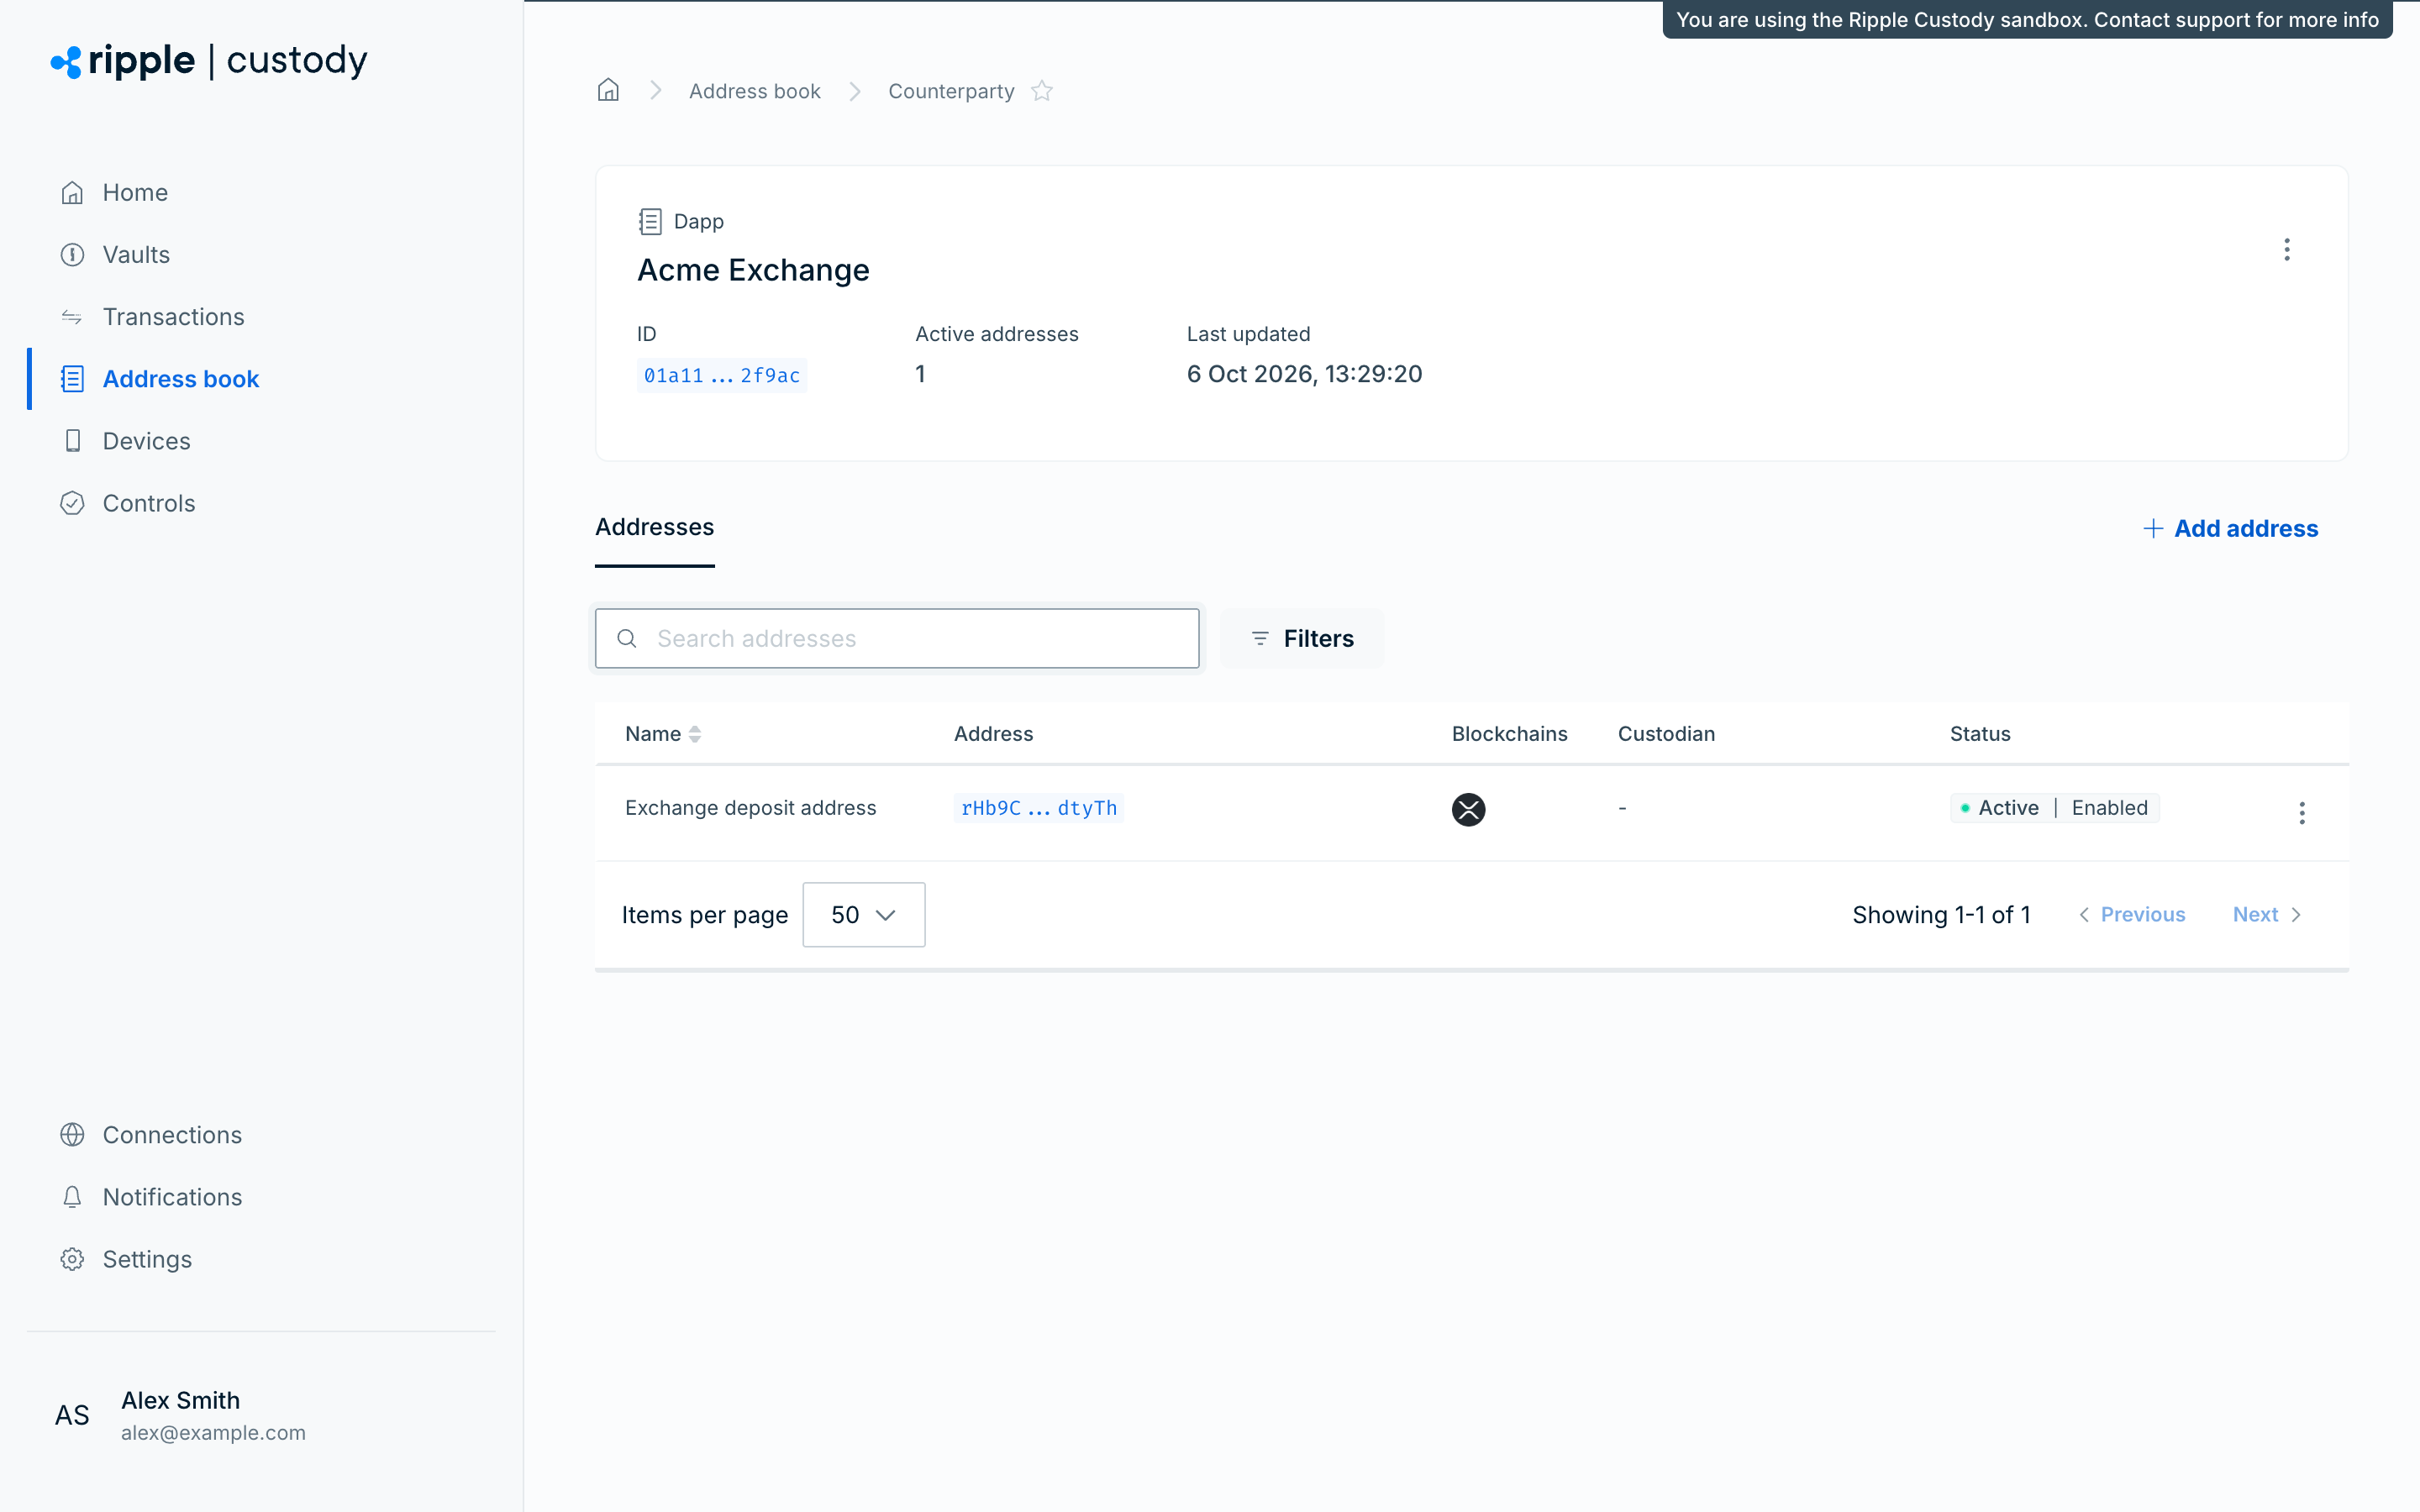
- To get a counterparty's details, select its row. The counterparty page shows its type, ID, Active addresses, and Last updated date. It also shows the Legal name and Registered office of an organization, or the Name and Postal address of an individual.
The counterparty page's Addresses tab lists the counterparty's addresses, with the same search and filters as the Addresses tab of the address book, except the Counterparty filter. From the counterparty page, you can also select Add address to add an address to this counterparty, or delete the counterparty.
Required role: Owner or Administrator.
- Go to Address book > Addresses.
- Select Add address.
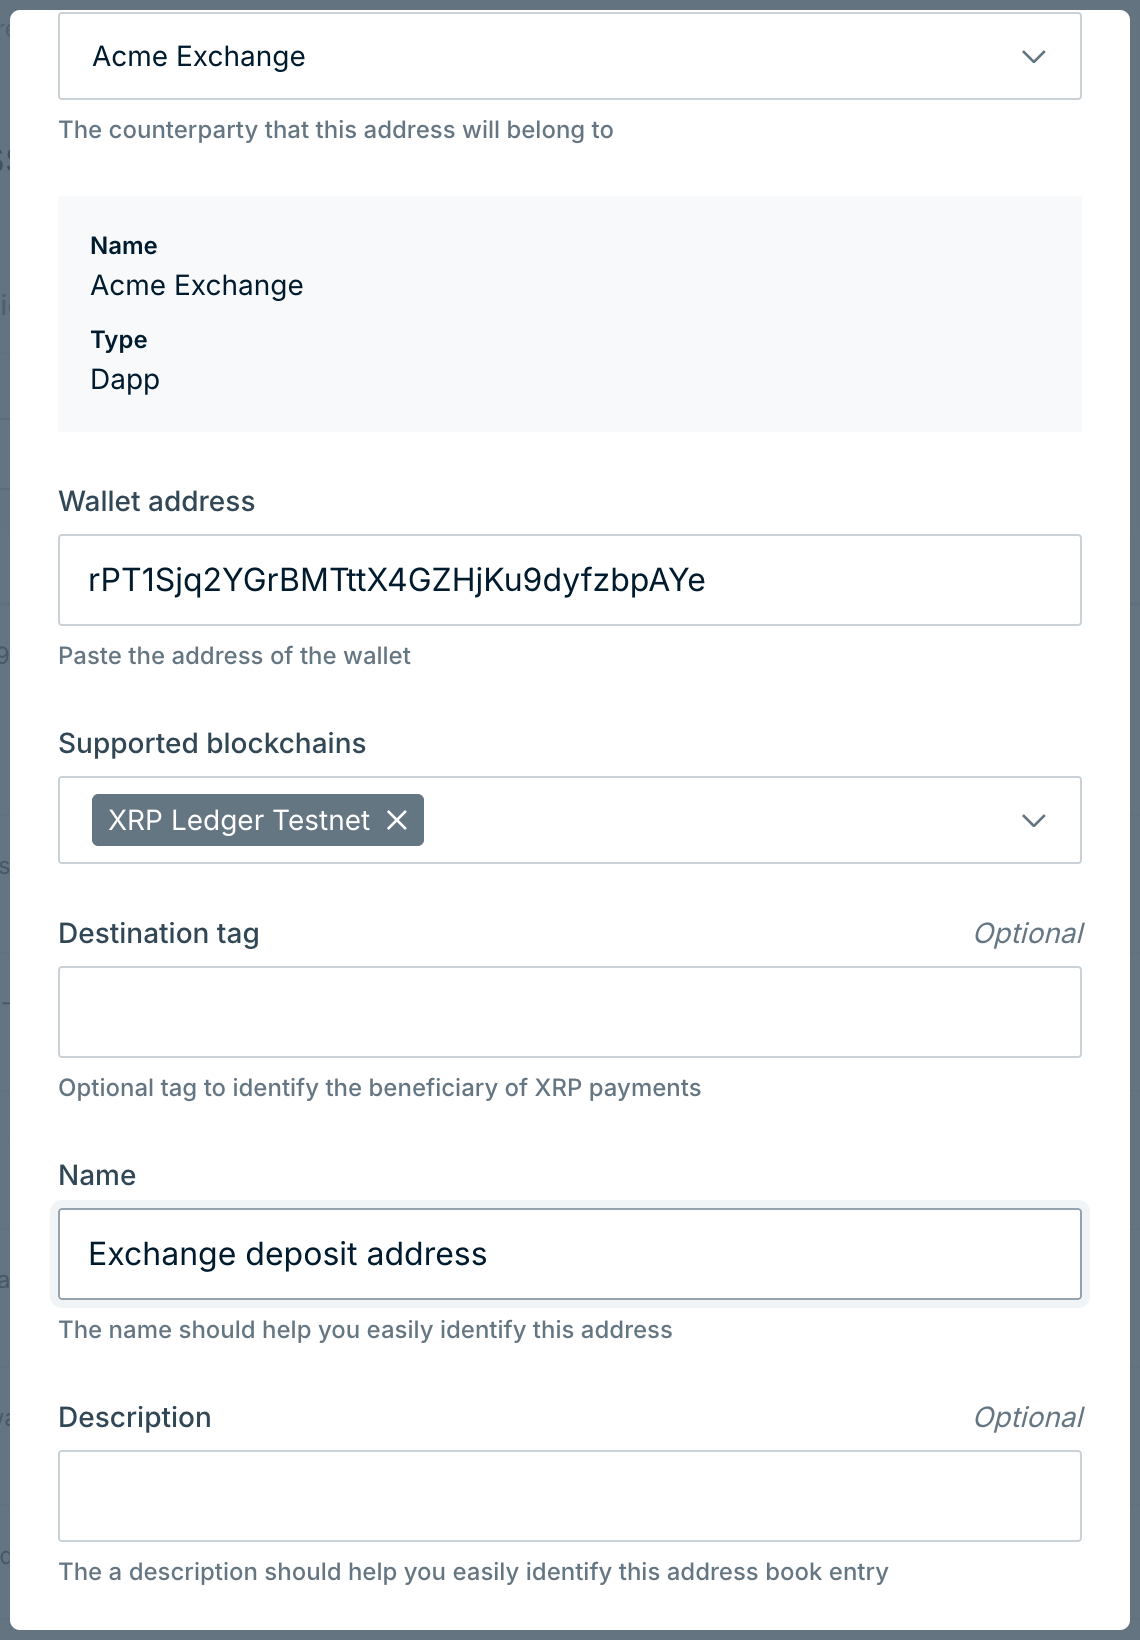
- Select the counterparty the address belongs to.
- Enter the destination address in Wallet address.
- Under Supported blockchains, select one or more blockchains supported by the address.
- If you selected XRP Ledger, you can optionally enter a Destination tag to identify a specific counterparty at this r-address. See XRP Ledger destination tags.
- Enter a name for the address (description is optional).
- If the destination is custodial (controlled by a custodian such as Coinbase), select Add custodian details. Under Select custodian, enter the custodian's name, select Search, and then select the custodian.
- Select the submission checkbox to confirm that the custodial information you're submitting about ownership of the destination wallet is correct.
- Select Add address.
If your organization has an Addresses approval group, the address shows Inactive | Approval pending until approvers approve it, and then Active | Enabled.
Required role: Owner, Administrator, Proposer, Approver, or Auditor.
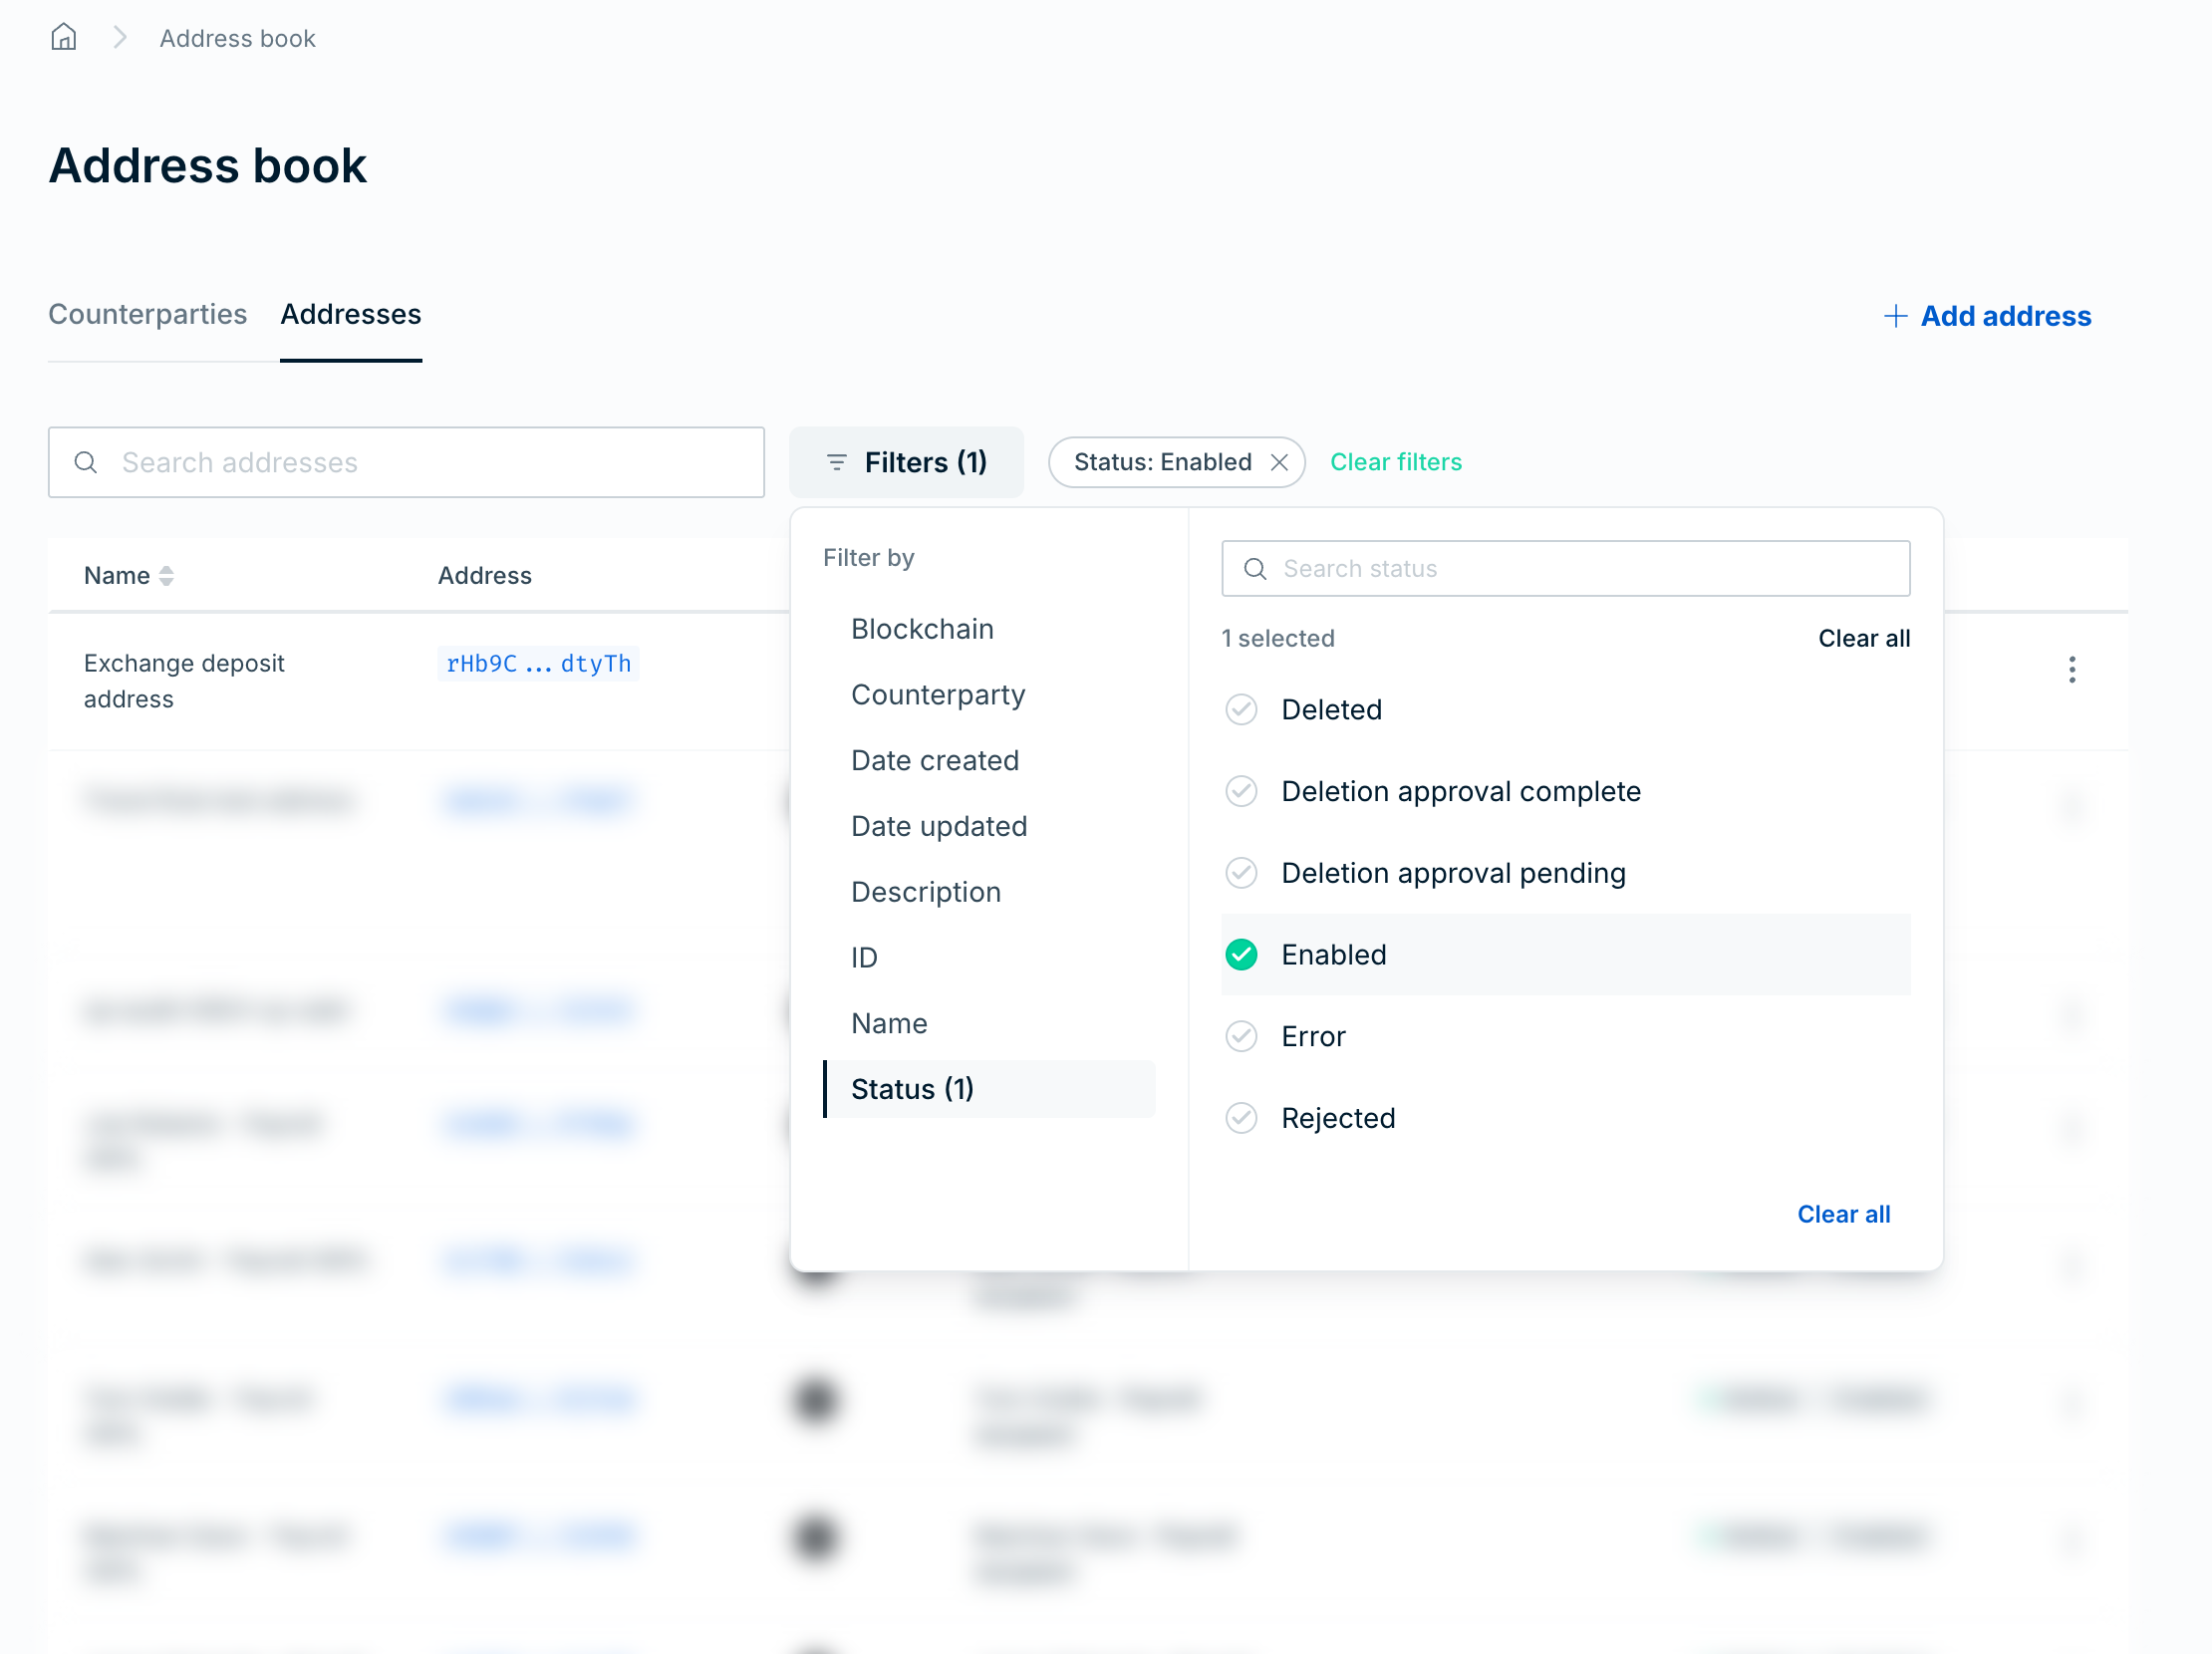
Go to Address book > Addresses. The table lists each address with its Name, Address, Blockchains, Counterparty, 3rd party custodian, and Status.
To find an address, enter text in Search addresses. To clear the search, select Clear search.
To filter the table, select Filters, select a category under Filter by, and then set the filter:
- Blockchain: Select one or more blockchains.
- Counterparty: Enter a counterparty ID.
- Date created and Date updated: Select Today, Last 48 hours, Last 7 days, Last 30 days, or This month, or select Custom and enter a From and To date.
- Description, ID, and Name: Enter a value.
- Status: Select a status, for example Enabled, Creation approval pending, or Deletion approval pending.
For the counterparty, description, ID, and name filters, select Include to show matching addresses or Exclude to hide them. Each active filter appears as a chip above the table, and Filters shows the number of active filters. To remove the filters in a category, select Clear all. To remove all filters, select Clear filters.
To sort the table by name, select the Name column heading.
Destination tags are optional 32-bit unsigned integers (0 to 4,294,967,295) that identify a specific counterparty at an XRP Ledger r-address. Exchanges commonly use a single r-address for many customers and rely on the destination tag to route funds to the correct account.
When adding an XRP Ledger address, you can enter a destination tag alongside the r-address. Ripple Custody (Wallet) treats the r-address and destination tag together as a unique address, so you can add multiple entries that share the same r-address but differ by tag.
You can leave the destination tag empty for r-addresses that don't require a tag. A tagless entry is distinct from any entry with a tag — matching is exact.
- Address lookup — Searches match on the full r-address and destination tag combination. Two address book entries with the same r-address but different tags resolve independently.
- Transaction history — New transactions display the counterparty whose r-address and destination tag exactly match the transaction's destination. Ripple Custody (Wallet) doesn't backfill historical transactions.
- Policies — Policies that reference an address book entry apply to the specific r-address and destination tag combination on that entry.
Required role: Owner or Administrator.
- Find the counterparty or address in its respective table.
- Open the Actions menu and select Delete address or Delete counterparty.
- In the dialog, select Delete address or Delete counterparty again to confirm.
With an Addresses approval group, an address deletion takes effect after approvers approve it, and the address shows Active | Approval pending until then. Counterparty deletions take effect immediately.
You must delete all of a counterparty's addresses before you can delete the counterparty. Review any transaction policies that reference the deleted entries. Removing an address may unintentionally narrow what a policy permits.
Address book entries are global: a counterparty and its addresses are available to all wallets in your organization. But the address book alone doesn't grant permission to send. Two conditions must be true:
- You registered the address in the address book under a counterparty.
- A transaction policy on the sending wallet permits that address (or its counterparty) as a destination.
This separation means one user can register counterparties in the address book, while a different user controls which wallets can actually send to them through policies.
Transfers between wallets within your own organization don't require address book entries. The address book is only for external destinations.
Uncontrolled address book modifications are a significant risk: a malicious or compromised user could register a fraudulent address and then send funds to it. Mitigate this with layered controls.
Set up an approval group for address book entries so that new addresses require review before they become active, and address deletions require review before they take effect. Counterparties don't go through approval.
- Go to the Controls section of the console and select the Approval groups tab.
- Create an approval group with the type Addresses.
- Select approvers and set a threshold.
See Create an approval group for the full setup.
Only users with the Owner or Administrator role can create address book entries. Assign the Proposer, Approver, Viewer, or Auditor role to users who must not modify the address book. See Roles and permissions.
Ripple Custody (Wallet) logs all address book modifications (creates, updates, deletes). Use audit logging to track who changed what and when, and to detect unauthorized modifications.
The address book helps you meet regulatory requirements for counterparty due diligence:
- EU Transfer of Funds regulation — requires custodians and wallet providers to collect and verify counterparty information (travel rule data) for inbound and outbound transactions. The address book provides a structured way to record this information. When adding an address, mark custodial destinations and identify the custodian.
- Counterparty due diligence — record legal names, physical addresses, and custodian information to support your organization's know-your-customer (KYC) and anti-money laundering (AML) processes.
- Sanctions screening — Ripple Custody (Wallet) runs compliance checks on counterparty and address details, so new entries may not be available for immediate use.
To exchange Travel Rule data with counterparty VASPs, see Travel Rule.
- Verify addresses through an independent channel — before registering a new external address, confirm it with the counterparty through a separate communication channel (phone, in-person). Don't rely solely on email.
- Review the address book regularly — remove stale counterparties and addresses that are no longer needed. Each active entry is a potential transaction destination.
- Coordinate with policies — when you delete an address, review any transaction policies that reference it. Deleting an address may unintentionally narrow what a policy permits.
- Document counterparty relationships — use the description field to record the business context for each counterparty (who they are, why they are in the address book, who requested the addition).
- Use counterparty types accurately — classify each entry correctly (Individual, Organization, or Dapp) to support compliance reporting and filtering.
To manage the address book programmatically, see Manage the address book via the API.
- Address book overview — Conceptual overview
- Manage policies via the console — Reference addresses in policies
- Configure approval flows — Require approval for new addresses
- Configure audit logging — Track address book changes