Send a single payment
This tutorial describes the steps involved in sending a single payment using Ripple Payments Direct.
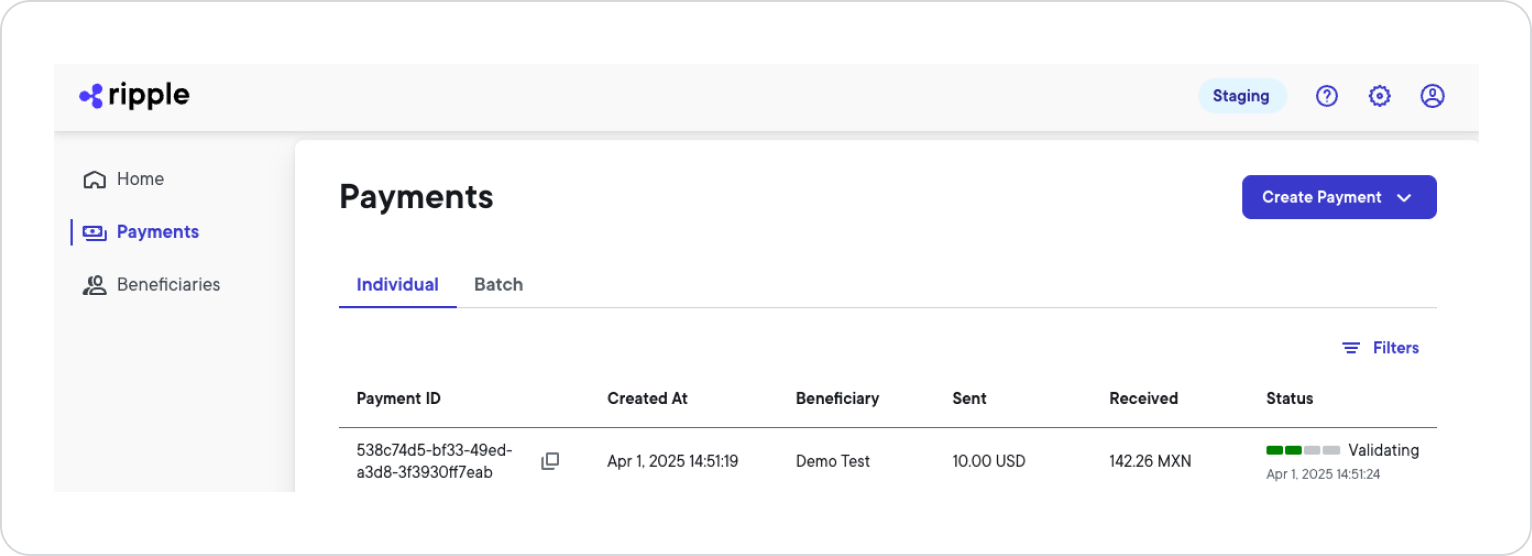
- Select the Payments tab.
- Select Create Payment > Individual .
-
Only if you're approved to send a payment on behalf of someone else:
-
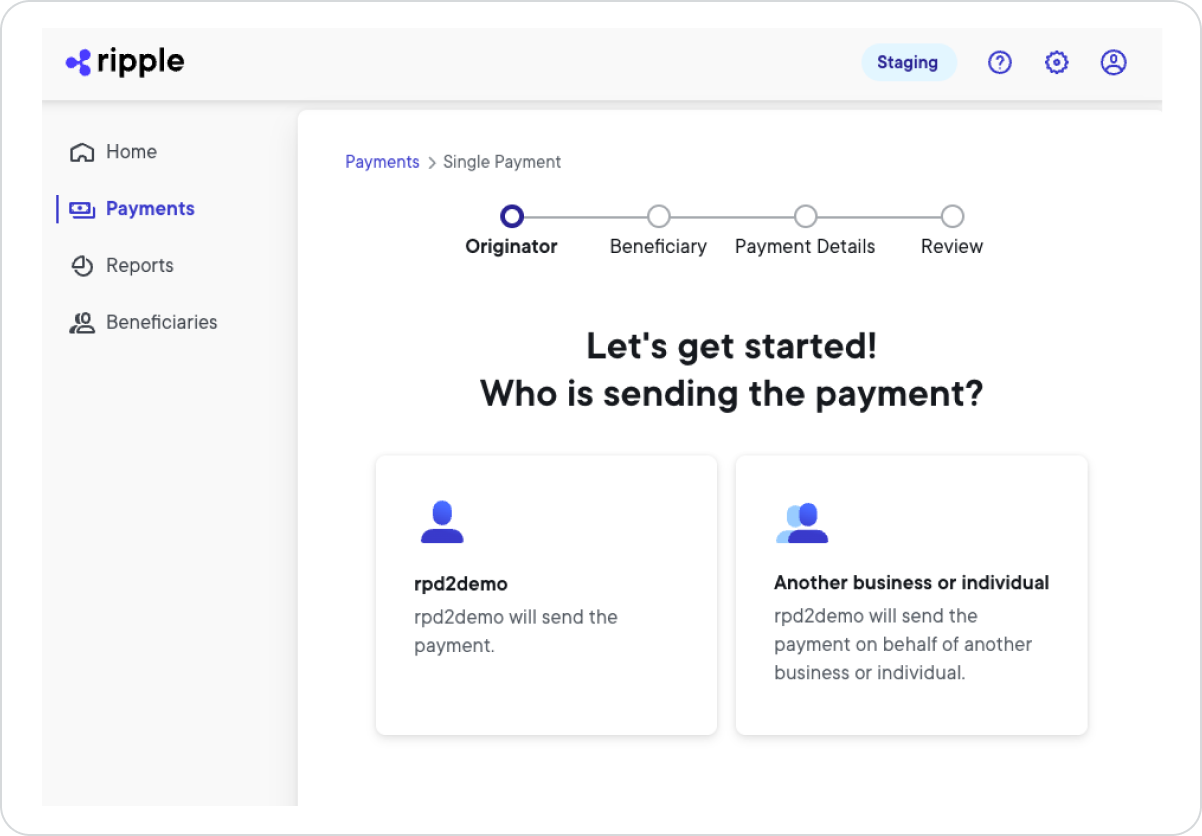
In the
Originator
section, select one of the following originator options:
- < Name > : Select this option if you're the one originating the payment.
- Another business or individual : Select this option if you're originating the payment on someone's behalf.
-
If you selected 'Another business or individual'
:
Select the originator identity that you want to use to send the payment. Then select Next .
-
In the
Originator
section, select one of the following originator options:
-
In the
Beneficiary
section, select the beneficiary identity that you want to use. Then select
Next
.
Tip
Search for your beneficiary by entering their nickname, identity type, or date created in the search field.
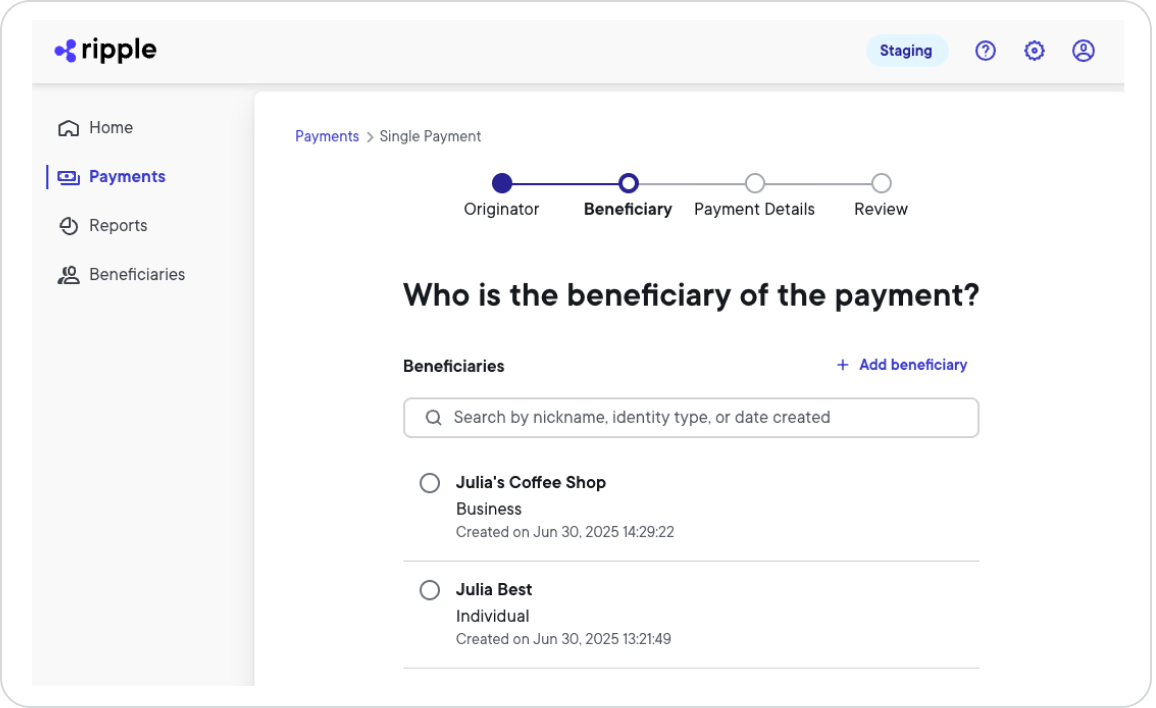
Alternatively, if you don't see the beneficiary you want to use, select + Add beneficiary to create a new beneficiary.
For more information on how to create a beneficiary identity, see Beneficiaries. -
In the
Payment details
section, enter all required payment details.
- Funds from -- Specifies where the funds for the payment come from.
-
Sending amount
-- Specifies the amount and currency you want to send.
Note:
You can select from either fiat currency or cryptocurrency (Stablecoin).
- Receiving amount -- Specifies the amount and currency you want the beneficiary to receive.
- Transaction purpose -- Specifies the purpose of the transaction.
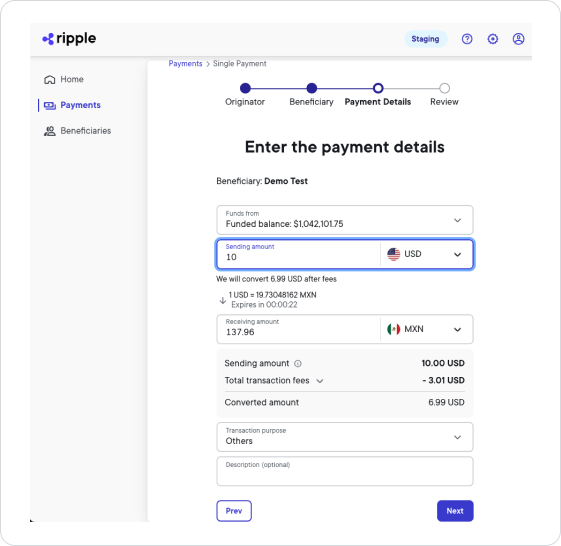
Once you've entered either the sending or receiving amount, you'll see a quote for the payment. The quote expires after 15 minutes. If the quote expires, you have to get a new quote by updating the payment details using the same field values.
- Select Next .
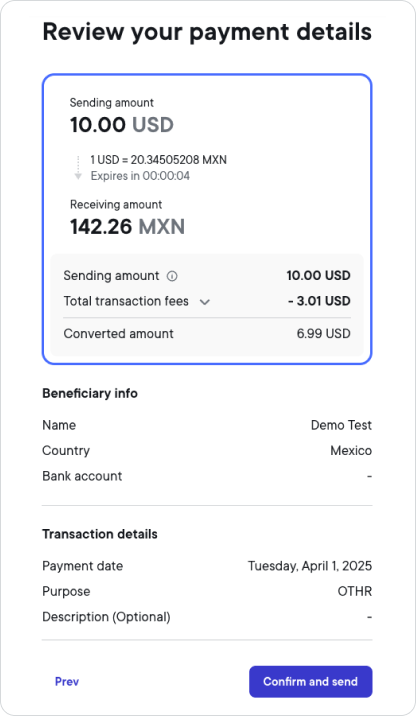
-
In the
Review
section, review the quote and all payment details. If everything looks good, select
Confirm and send
.
Note:
If the payment authorization feature is enabled for your account, select Submit for approval, which notifies authorized approvers about your intent to send a payment. Once the payment is approved, it will be sent. For more information on the payment authorization feature, see Approval log.
If you need to make changes, select Prev and update the payment details.
Note
The Payments page lists all (approved) payments, with the most recent payment on top. After you confirm and send the payment, you can select your payment to see the payment details in the payment hopper. The payment hopper shows each payment state transition and the elapsed time between the payment states. Changes in green show successful states, while changes in red show stalled or failed states.
As soon as the payment is transferred, the status column will show Completed, which indicates that your payment was successful and that funds have been moved.